10 Easy No-Bake Desserts for Lazy Days
10 Easy No-Bake Desserts for Lazy Days
When the day has drained your energy and the thought of turning on the oven feels like a chore, no-bake desserts come to the rescue. These 15 easy recipes are perfect for satisfying your sweet tooth without any hassle. From simple treats to delightful indulgences, these desserts require minimal effort and maximum enjoyment!
Creamy No-Bake Cheesecake With Fresh Berries
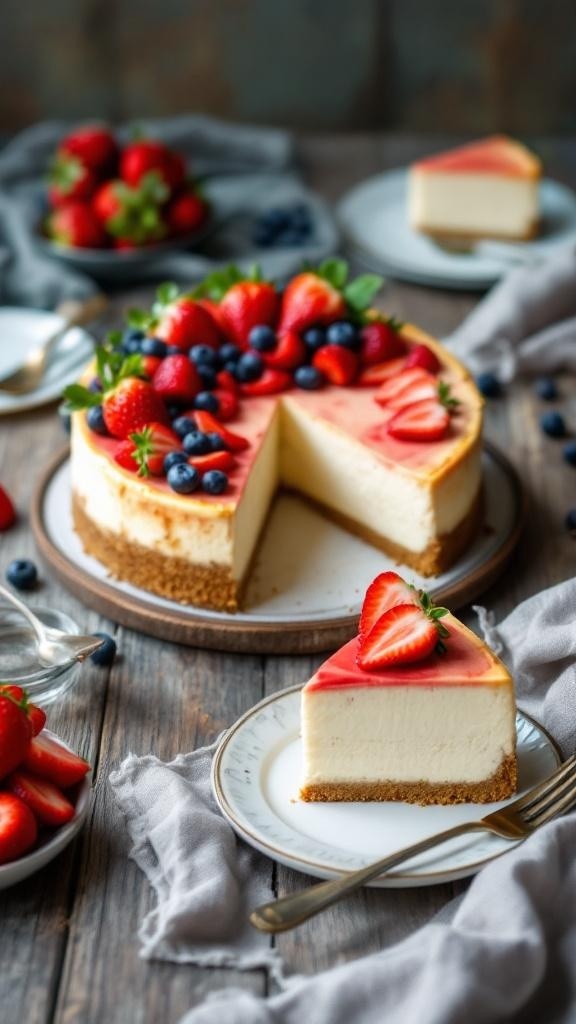
This creamy no-bake cheesecake is a delightful treat that’s perfect for those days when you just can’t muster the energy to bake. The image showcases a beautifully crafted cheesecake topped with vibrant fresh berries, including strawberries and blueberries, which add a pop of color and freshness. The smooth, creamy texture of the cheesecake pairs perfectly with the crunchy graham cracker crust, making it a satisfying dessert that everyone will love.
Making this cheesecake is super simple. You’ll mix cream cheese, sugar, and whipped cream to create a rich filling. Pour it over a buttery graham cracker crust and let it chill until set. Top it off with your favorite berries for a refreshing finish. It’s a no-fuss dessert that looks impressive and tastes amazing!
Ingredients
- 1 ½ cups graham cracker crumbs
- ½ cup unsalted butter, melted
- 2 cups cream cheese, softened
- 1 cup powdered sugar
- 1 teaspoon vanilla extract
- 1 cup heavy whipping cream
- Fresh strawberries, sliced
- Fresh blueberries
Instructions
- Prepare the Crust: In a bowl, combine graham cracker crumbs and melted butter. Mix until well combined. Press the mixture into the bottom of a 9-inch springform pan to form the crust.
- Make the Filling: In a large bowl, beat the softened cream cheese until smooth. Gradually add powdered sugar and vanilla extract, mixing until well combined.
- Whip the Cream: In another bowl, whip the heavy cream until stiff peaks form. Gently fold the whipped cream into the cream cheese mixture until fully incorporated.
- Assemble: Pour the cream cheese filling over the crust in the springform pan. Smooth the top with a spatula.
- Chill: Cover the cheesecake with plastic wrap and refrigerate for at least 4 hours or until set.
- Serve: Once set, remove the cheesecake from the springform pan. Top with fresh strawberries and blueberries before slicing and serving.
Refreshing Key Lime Pie Cups For A Zesty Treat
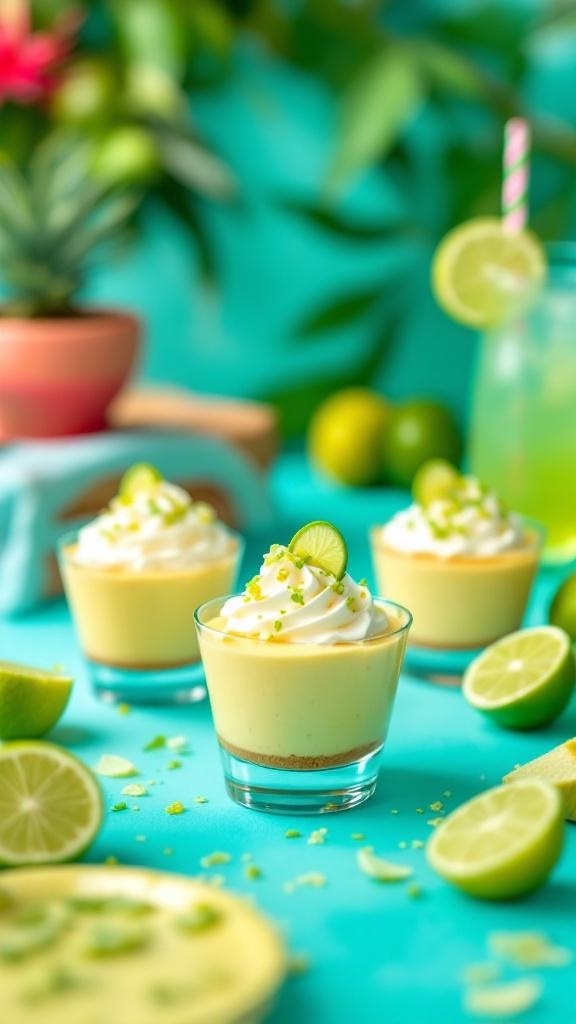
These Key Lime Pie Cups are a delightful way to enjoy a classic dessert without the fuss of baking. Perfect for warm days, they offer a refreshing burst of citrus flavor that’s sure to brighten your mood. The creamy filling paired with a crumbly crust makes each bite a treat. Plus, they’re super easy to whip up!
To create these cups, you’ll need a few simple ingredients. The combination of tangy lime juice and sweetened condensed milk creates a smooth filling that pairs perfectly with the graham cracker crust. Topped with whipped cream and a sprinkle of lime zest, these cups are not just tasty; they’re also visually appealing!
These desserts are perfect for gatherings or just a sweet treat at home. They require no baking, making them ideal for those days when you want something sweet but don’t feel like turning on the oven. Serve them chilled for the best experience!
Simple Strawberry Shortcake Parfaits To Delight Your Taste Buds

Strawberry shortcake parfaits are a delightful treat that brings a burst of flavor with every spoonful. These parfaits are layered with fresh strawberries, fluffy whipped cream, and soft cake pieces, making them a perfect dessert for any occasion. They look beautiful in clear glasses, showcasing the vibrant red strawberries against the creamy white layers.
Making these parfaits is super easy and requires no baking, which is a win when you’re feeling tired. Just grab some fresh strawberries, whipped cream, and your favorite cake or cookies. Layer them up, and you have a stunning dessert ready in no time!
These parfaits are not just tasty; they also offer a refreshing taste that’s perfect for warm days. Serve them at a picnic or as a sweet ending to a family dinner. Everyone will love digging into these colorful cups of joy!
Ingredients
- 2 cups fresh strawberries, hulled and sliced
- 1 cup whipped cream
- 1 cup pound cake or angel food cake, cut into pieces
- 2 tablespoons sugar (optional, for sweetening strawberries)
- Mint leaves for garnish (optional)
Instructions
- If you want sweeter strawberries, toss the sliced strawberries with sugar and let them sit for about 10 minutes.
- In clear glasses or bowls, start layering the ingredients. Begin with a layer of cake pieces at the bottom.
- Add a layer of sliced strawberries on top of the cake.
- Next, add a generous layer of whipped cream over the strawberries.
- Repeat the layers until the glasses are filled, finishing with whipped cream on top.
- Garnish with extra strawberries and mint leaves if desired.
- Serve immediately or chill for a bit before serving. Enjoy your delicious strawberry shortcake parfaits!
GET 21 QUICK & EASY LOW-CALORIE MEAL PLANS
Nutty Energy Bites For An Easy, Healthy Snack
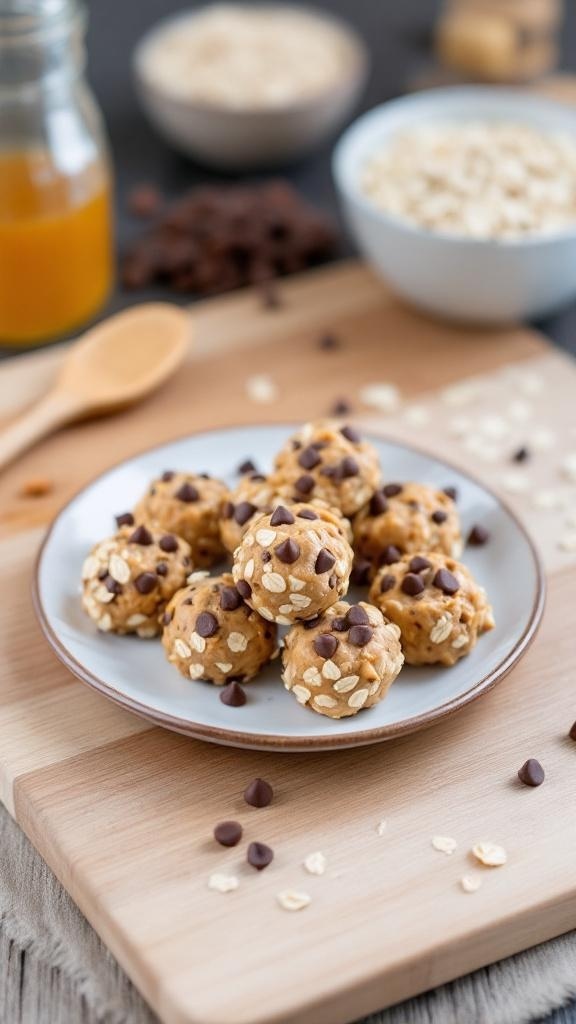
Nutty energy bites are the perfect solution for those days when you just can't muster the energy to whip up something elaborate. These little snacks are packed with flavor and nutrition, making them a great choice for a quick pick-me-up. They’re easy to make and require no baking, which is a huge bonus when you're feeling tired.
In the image, you can see a delightful plate of energy bites, sprinkled with oats and chocolate chips. The combination of ingredients gives them a fun texture and a hint of sweetness. You can easily customize them by adding your favorite nuts or seeds, making them versatile for any taste preference.
These bites are not just tasty; they’re also a great source of energy. Perfect for a mid-afternoon snack or a post-workout treat, they’ll keep you fueled without weighing you down. Plus, they’re easy to store in the fridge for whenever you need a quick snack.
Ingredients
- 1 cup rolled oats
- 1/2 cup peanut butter (or any nut butter)
- 1/3 cup honey or maple syrup
- 1/2 cup chocolate chips
- 1/4 cup ground flaxseed
- 1/2 teaspoon vanilla extract
Instructions
- Mix Ingredients: In a large bowl, combine the rolled oats, peanut butter, honey, chocolate chips, ground flaxseed, and vanilla extract. Stir until everything is well combined.
- Form Bites: Using your hands, roll the mixture into small balls, about 1 inch in diameter.
- Chill: Place the energy bites on a baking sheet lined with parchment paper. Refrigerate for at least 30 minutes to help them firm up.
- Store: Once chilled, transfer the bites to an airtight container. They can be stored in the fridge for up to a week.
Classic Rice Krispie Treats With A Chewy Twist

Rice Krispie treats are a classic dessert that many of us grew up loving. They are simple, quick, and require no baking, making them perfect for those days when you just can’t muster the energy to cook. This version adds a chewy twist, making them even more delightful!
The image showcases a stack of golden, chewy Rice Krispie treats drizzled with rich chocolate. The colorful sprinkles and mini marshmallows scattered around add a fun touch, making these treats not just tasty but also visually appealing. They are perfect for parties, movie nights, or just a sweet snack at home.
To make these treats, you’ll need just a few ingredients, and the steps are super easy. Let’s get started!
Ingredients
- 6 cups Rice Krispies cereal
- 4 cups mini marshmallows
- 3 tablespoons unsalted butter
- 1/2 teaspoon vanilla extract
- 1/2 cup chocolate chips (for drizzling)
- 1/4 cup colorful sprinkles (optional)
Instructions
- Prepare the Pan: Grease a 9x13 inch baking dish with butter or cooking spray.
- Melt Butter and Marshmallows: In a large saucepan over low heat, melt the butter. Once melted, add the mini marshmallows and stir until completely melted and smooth. Remove from heat and stir in the vanilla extract.
- Add Cereal: Quickly add the Rice Krispies cereal to the melted mixture. Stir until all the cereal is coated evenly.
- Press into Pan: Pour the mixture into the prepared baking dish. Use a spatula or your hands (greased with butter) to press it down evenly.
- Drizzle Chocolate: Melt the chocolate chips in a microwave-safe bowl in 30-second intervals, stirring in between until smooth. Drizzle the melted chocolate over the top of the treats.
- Add Sprinkles: If using, sprinkle the colorful sprinkles on top of the chocolate drizzle while it’s still warm.
- Cool and Cut: Let the treats cool completely before cutting them into squares.
Enjoy your chewy Rice Krispie treats with a twist! They are sure to bring a smile to your face and satisfy your sweet tooth.
Tasty No-Bake Peanut Butter Bars For A Quick Fix
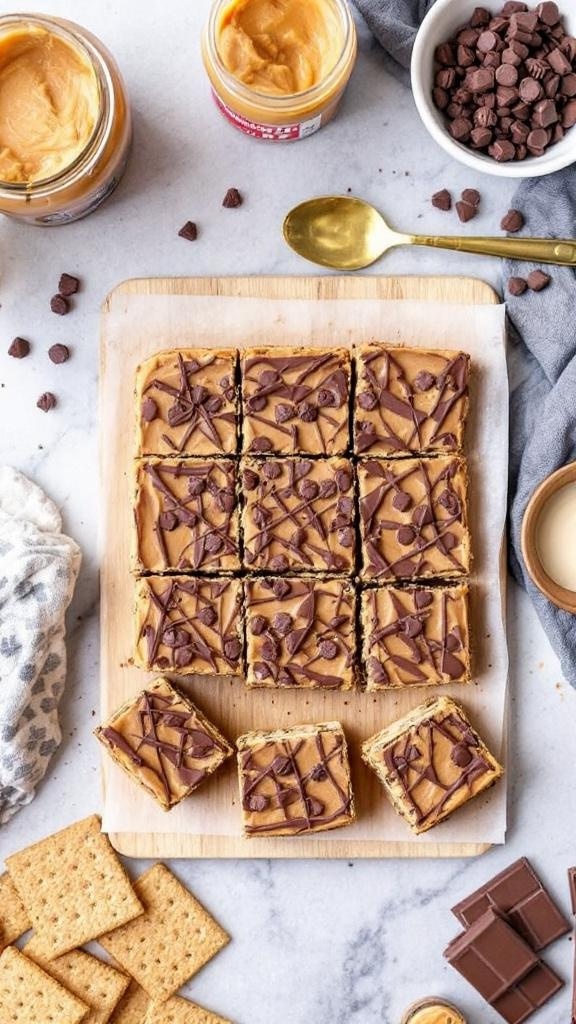
No-bake peanut butter bars are a lifesaver when you're feeling too tired to cook. These treats are quick to whip up and require minimal effort. Just look at that creamy peanut butter layer topped with chocolate chips! The combination of flavors is simply irresistible.
These bars are perfect for satisfying your sweet tooth without spending hours in the kitchen. Plus, they’re made with simple ingredients you probably already have at home. Whether you're enjoying them as a snack or dessert, they are sure to hit the spot.
Let’s get to the fun part! Here’s how to make these delicious no-bake peanut butter bars.
Ingredients
- 1 cup graham cracker crumbs
- 1/2 cup unsweetened cocoa powder
- 1 cup creamy peanut butter
- 1/2 cup honey or maple syrup
- 1/2 cup powdered sugar
- 1/2 cup chocolate chips
Instructions
- Mix the Base: In a large bowl, combine graham cracker crumbs and cocoa powder. Add peanut butter and honey (or maple syrup) to the mixture and stir until well combined.
- Add Sweetness: Gradually mix in powdered sugar until the mixture is smooth and sticky.
- Press into Pan: Line an 8x8 inch baking dish with parchment paper. Press the mixture evenly into the bottom of the dish.
- Top with Chocolate: Melt the chocolate chips in the microwave or on a stovetop. Pour the melted chocolate over the peanut butter layer and spread it evenly.
- Chill: Refrigerate for about 1 hour or until set. Once firm, cut into squares and enjoy!
Delicious Chocolate-Covered Strawberry Treats For A Romantic Touch

Chocolate-covered strawberries are a classic treat that never fails to impress. They’re simple to make and perfect for any romantic occasion. The image shows a beautiful arrangement of these treats, nestled among soft pink roses and flickering candles, creating a cozy and inviting atmosphere.
These strawberries are dipped in rich chocolate, making them both sweet and slightly indulgent. The combination of juicy fruit and smooth chocolate is irresistible. Plus, they’re easy to prepare, which is great when you’re feeling too tired to cook.
To make these delightful treats, you’ll need fresh strawberries, chocolate (dark, milk, or white), and a few optional toppings like crushed nuts or sprinkles. The process is quick and straightforward, allowing you to whip them up in no time.
Serve them on a pretty plate, and they’ll add a lovely touch to any romantic evening. Whether it’s a date night or a special celebration, chocolate-covered strawberries are sure to make the moment sweeter.
Fruit-Filled No-Bake Banana Pudding For Comforting Sweetness
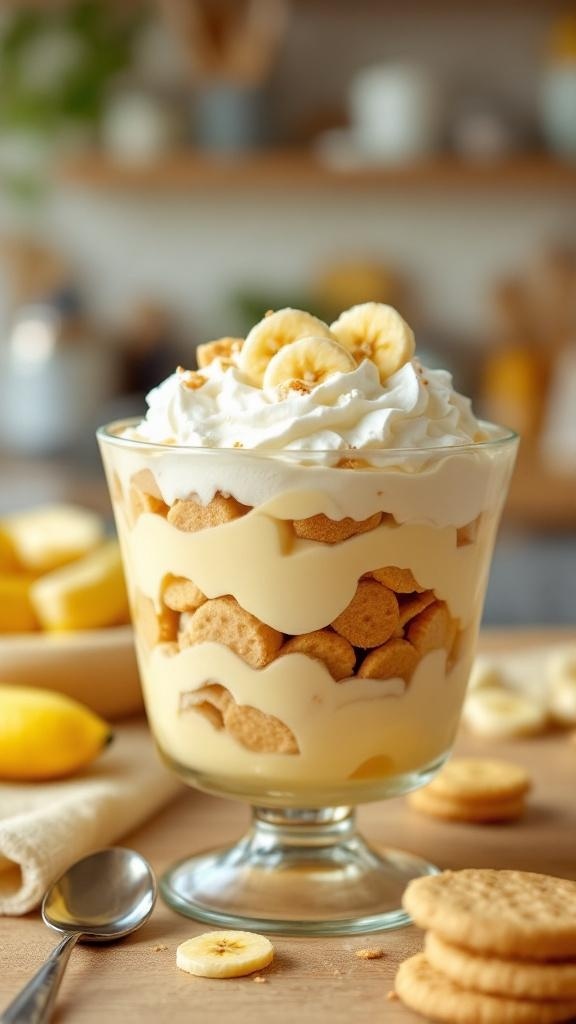
When you're feeling tired but still want something sweet, this no-bake banana pudding is a perfect choice. It’s creamy, fruity, and oh-so-comforting. The layers of vanilla pudding, sliced bananas, and crunchy cookies create a delightful texture that hits the spot. Plus, it’s super easy to whip up!
The image shows a beautiful glass dish filled with layers of banana pudding, topped with whipped cream and banana slices. The golden cookies peeking through add a nice crunch. This dessert not only looks inviting but also promises a burst of flavor with every spoonful.
Gather your ingredients and get ready to enjoy a treat that requires no baking at all. It’s perfect for warm days or when you just want to relax without spending hours in the kitchen.
Ingredients
- 2 cups cold milk
- 1 package (3.4 oz) instant vanilla pudding mix
- 1 cup whipped topping
- 3 ripe bananas, sliced
- 1 box (11 oz) vanilla wafers
- Extra whipped topping for garnish
Instructions
- In a large bowl, whisk together the cold milk and instant pudding mix for about 2 minutes until it thickens.
- Fold in the whipped topping gently until well combined.
- In a trifle dish or individual cups, layer the vanilla wafers, sliced bananas, and pudding mixture. Repeat the layers until all ingredients are used, finishing with pudding on top.
- Chill in the refrigerator for at least 2 hours to allow the flavors to meld.
- Before serving, top with extra whipped topping and banana slices for a fresh touch.
GET 8-WEEKS OF WORKOUTS TO LOSE INCHES
Fruity No-Bake Coconut Lime Bars For Tropical Flavor

These fruity no-bake coconut lime bars are a refreshing treat that brings a taste of the tropics right to your kitchen. With their bright green limes and creamy coconut topping, they look as good as they taste. The vibrant colors and textures make them a fun addition to any dessert table.
Making these bars is super simple. You don’t need to turn on the oven, which is perfect for those hot days when you just want something sweet without the fuss. The combination of coconut and lime creates a zesty flavor that’s both tangy and sweet. Plus, they’re easy to slice and serve, making them ideal for parties or a casual snack.
Let’s get to the recipe so you can whip up these delicious bars!
Ingredients
- 1 cup graham cracker crumbs
- 1/4 cup granulated sugar
- 1/2 cup unsalted butter, melted
- 1 can (14 oz) sweetened condensed milk
- 1/2 cup fresh lime juice
- 1 tablespoon lime zest
- 1 cup shredded coconut, sweetened
- 1 cup whipped topping
- Extra lime slices and coconut for garnish
Instructions
- Prepare the Crust: In a bowl, mix graham cracker crumbs, sugar, and melted butter until combined. Press the mixture firmly into the bottom of a greased 8x8 inch pan.
- Make the Filling: In another bowl, whisk together sweetened condensed milk, lime juice, and lime zest until smooth. Fold in the shredded coconut.
- Combine: Pour the lime mixture over the crust and spread evenly. Refrigerate for at least 4 hours or until set.
- Top: Once set, spread whipped topping over the bars. Garnish with extra lime slices and coconut.
- Serve: Cut into squares and enjoy your tropical treat!
Caramel Apple Salad For A Fun And Easy Dessert
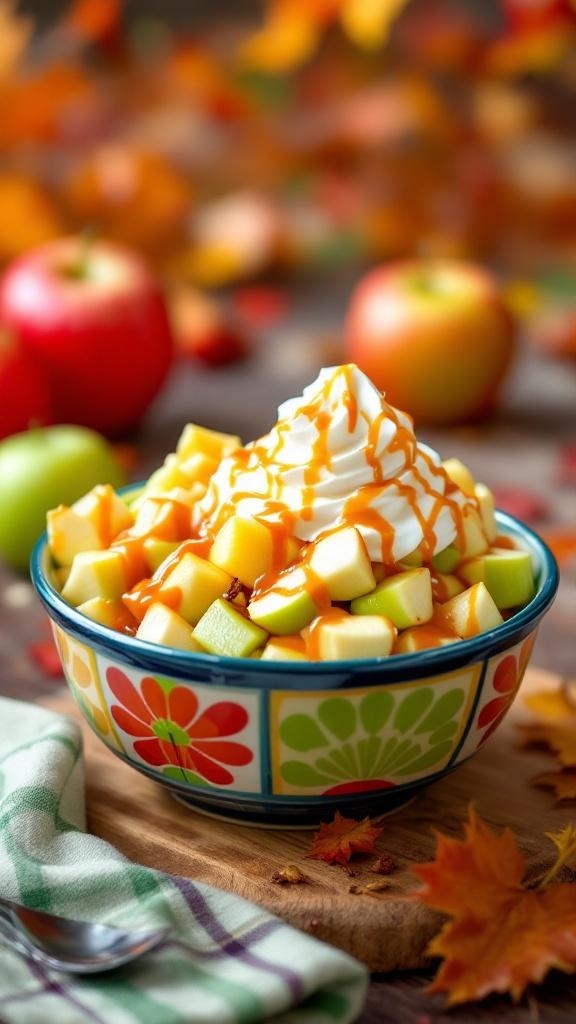
Caramel Apple Salad is a delightful treat that combines the sweetness of apples with creamy goodness. This dessert is perfect for those days when you want something quick and satisfying without turning on the oven. The vibrant colors of the apples, topped with whipped cream and drizzled with caramel, make it visually appealing too!
This salad is not just easy to make; it’s also a crowd-pleaser. You can whip it up in no time, making it ideal for potlucks or family gatherings. Plus, it’s a fun way to enjoy fresh fruit!
Gather your ingredients and get ready to impress your friends and family with this simple yet delicious dessert. They’ll be asking for seconds!
Ingredients
- 4 cups diced apples (mix of red and green)
- 1 cup mini marshmallows
- 1 cup whipped topping
- 1/2 cup caramel sauce
- 1/2 cup chopped nuts (optional)
- 1/4 cup brown sugar
Instructions
- Prepare the Apples: Wash and dice the apples into bite-sized pieces. If you prefer, you can leave the skin on for added texture.
- Mix Ingredients: In a large bowl, combine the diced apples, mini marshmallows, and chopped nuts if using. Gently fold in the whipped topping until everything is well coated.
- Add Sweetness: Drizzle the caramel sauce over the mixture and sprinkle with brown sugar. Stir gently to combine.
- Chill: Cover the bowl and refrigerate for at least 30 minutes to let the flavors meld together.
- Serve: Scoop the salad into bowls and drizzle with extra caramel sauce before serving. Enjoy!
Struggling to Stay on Track with Your Eating?
You’re not alone. One of the biggest obstacles I see people
face is not knowing what to eat. Between busy schedules, endless diet
advice online, and trying to cook healthy meals that actually taste good—it’s
easy to feel stuck or overwhelmed.
That’s why I created my 21 Quick & Easy Custom
Low-Calorie Meal Plans Program. These plans are built specifically for
you—your goals, your lifestyle, and your food preferences. You won’t find
any cookie-cutter diets here. Just real, satisfying meals that help you stay
full, energized, and on track without the stress.
✅ No more guessing.
✅
No more skipping meals or eating “diet food” you hate.
✅
Just a clear, doable plan that fits your life.
👉 Ready to eat better,
feel better, and finally make progress? [Click here to get your custom meal plans today.]
Not Seeing the Inches Drop No Matter What You Do?
If you’re working out but still not seeing the results in
the mirror, I hear you. So many people come to me after months of doing cardio
or random workouts—and still struggling to lose inches or tone up. The truth
is, your body needs more than just movement. It needs a proven strategy.
My 8-Week Workout Program to Lose Inches is designed
to do just that—burn fat, tighten up, and give you visible results.
These workouts are fun, effective, and designed for real people with real
lives. Whether you’re getting back into fitness or ready to take it to the next
level, this program gives you a clear path to success.
✅ Just 8 weeks to build strength,
confidence, and a fitter shape.
✅
No endless cardio.
✅
No gym required (unless you want it).
👉 If you're ready to
drop inches and feel amazing in your own skin, [click here to start the 8-Week Workout Program].


Comments
Post a Comment