17 Budget-Friendly Halloween Treats You Can Make for $10 or Less
17 Budget-Friendly Halloween Treats You Can Make for $10 or Less
Halloween fun doesn’t have to break the bank! If you’re looking for tasty treats that won’t leave your wallet feeling spooky, you’re in the right place. Here are some easy, budget-friendly ideas that can be whipped up for $10 or less, perfect for all your ghoulish gatherings and trick-or-treat delights.
Spooky Spider Cookies That Won'T Break The Bank
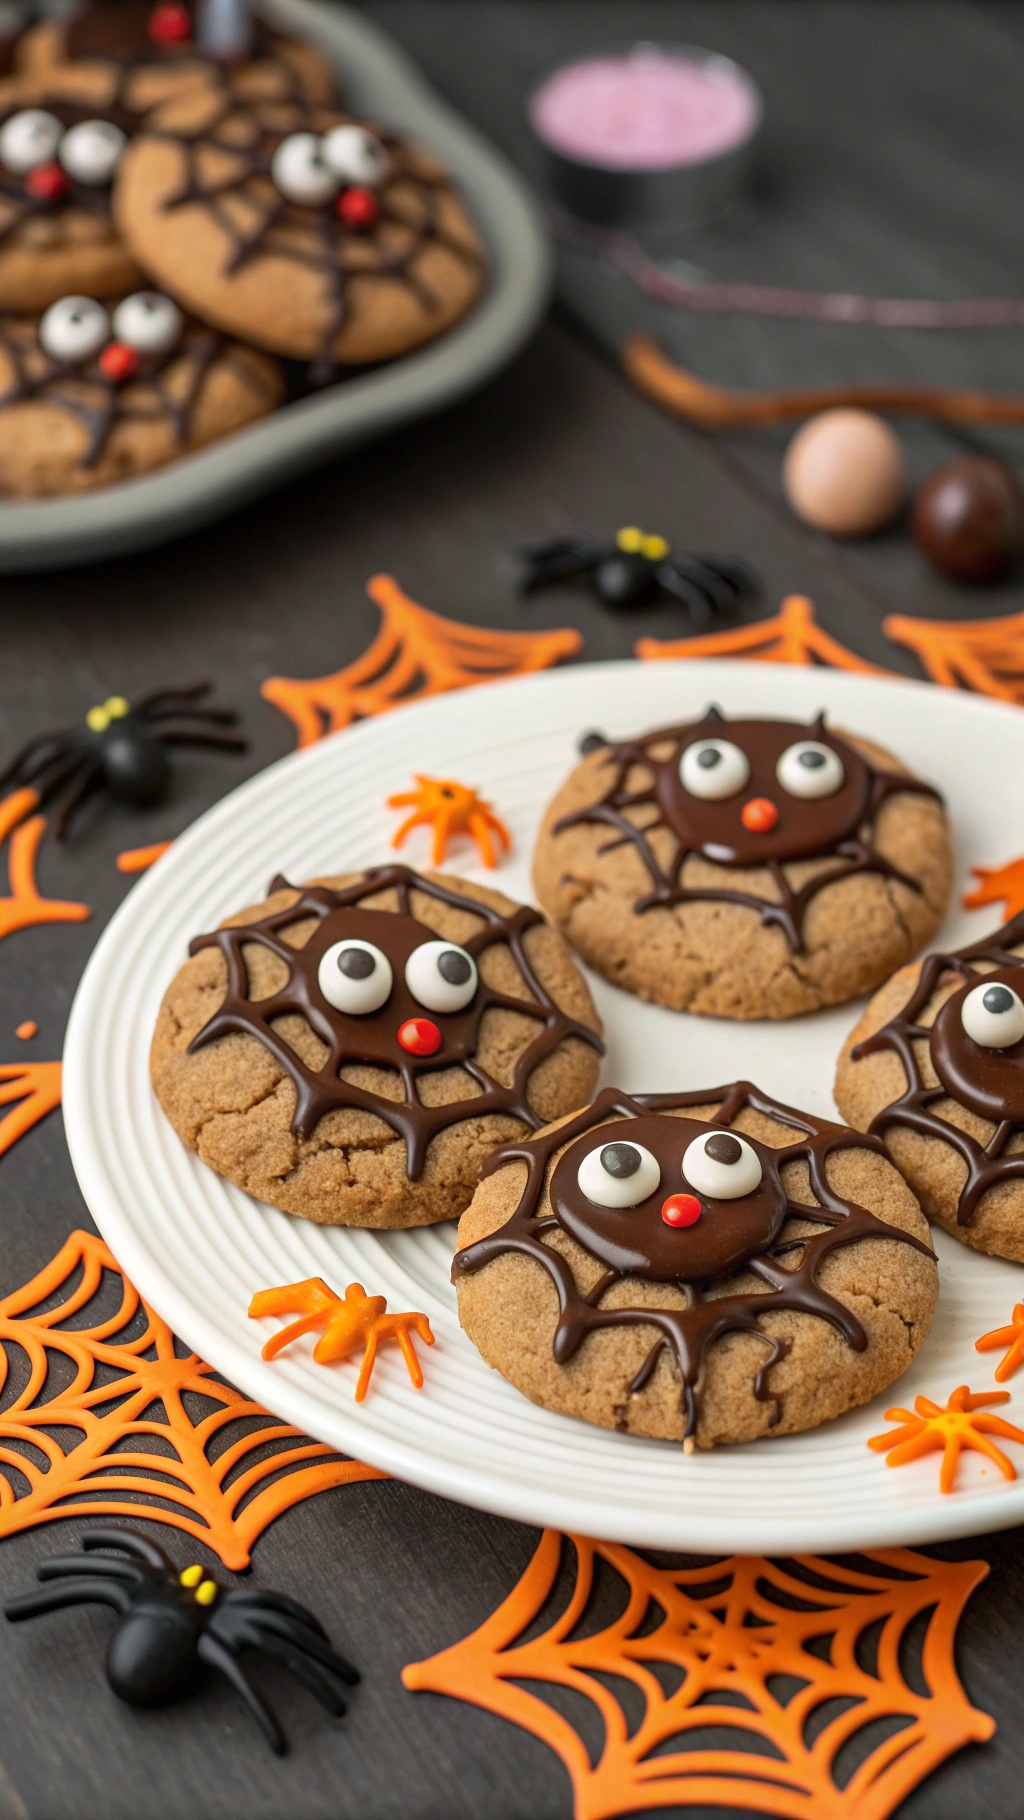
Halloween is a time for fun, creativity, and of course, tasty treats. These Spooky Spider Cookies are not only adorable but also budget-friendly, making them perfect for your Halloween festivities. With just a few simple ingredients, you can whip up a batch of these delightful cookies that will impress both kids and adults alike.
Imagine a plate filled with cookies that look like little spiders, complete with chocolate webs and candy eyes. They’re sure to be a hit at any Halloween gathering. Plus, you can make them for under $10, which is a win for your wallet!
Let’s get started on making these fun treats!
Ingredients
- 1 cup peanut butter
- 1 cup granulated sugar
- 1 large egg
- 1/2 cup chocolate chips
- 1/4 cup candy eyes
- Red candy or M&Ms for noses
- Chocolate frosting for web design
Instructions
- Preheat your oven to 350°F (175°C).
- In a mixing bowl, combine peanut butter, sugar, and egg. Mix until smooth.
- Drop spoonfuls of the dough onto a baking sheet lined with parchment paper, spacing them about 2 inches apart.
- Bake for 10-12 minutes until the edges are golden. Let them cool on the baking sheet for a few minutes before transferring them to a wire rack.
- Once cooled, melt the chocolate chips in a microwave-safe bowl. Use a piping bag or a plastic bag with the corner snipped off to create spider webs on each cookie.
- Place two candy eyes and a red candy for the nose on each cookie to complete the spider look.
These Spooky Spider Cookies are not only fun to make but also a great way to get into the Halloween spirit without spending a lot. Enjoy your baking!
Ghoulish Ghost Pops For A Frighteningly Fun Snack
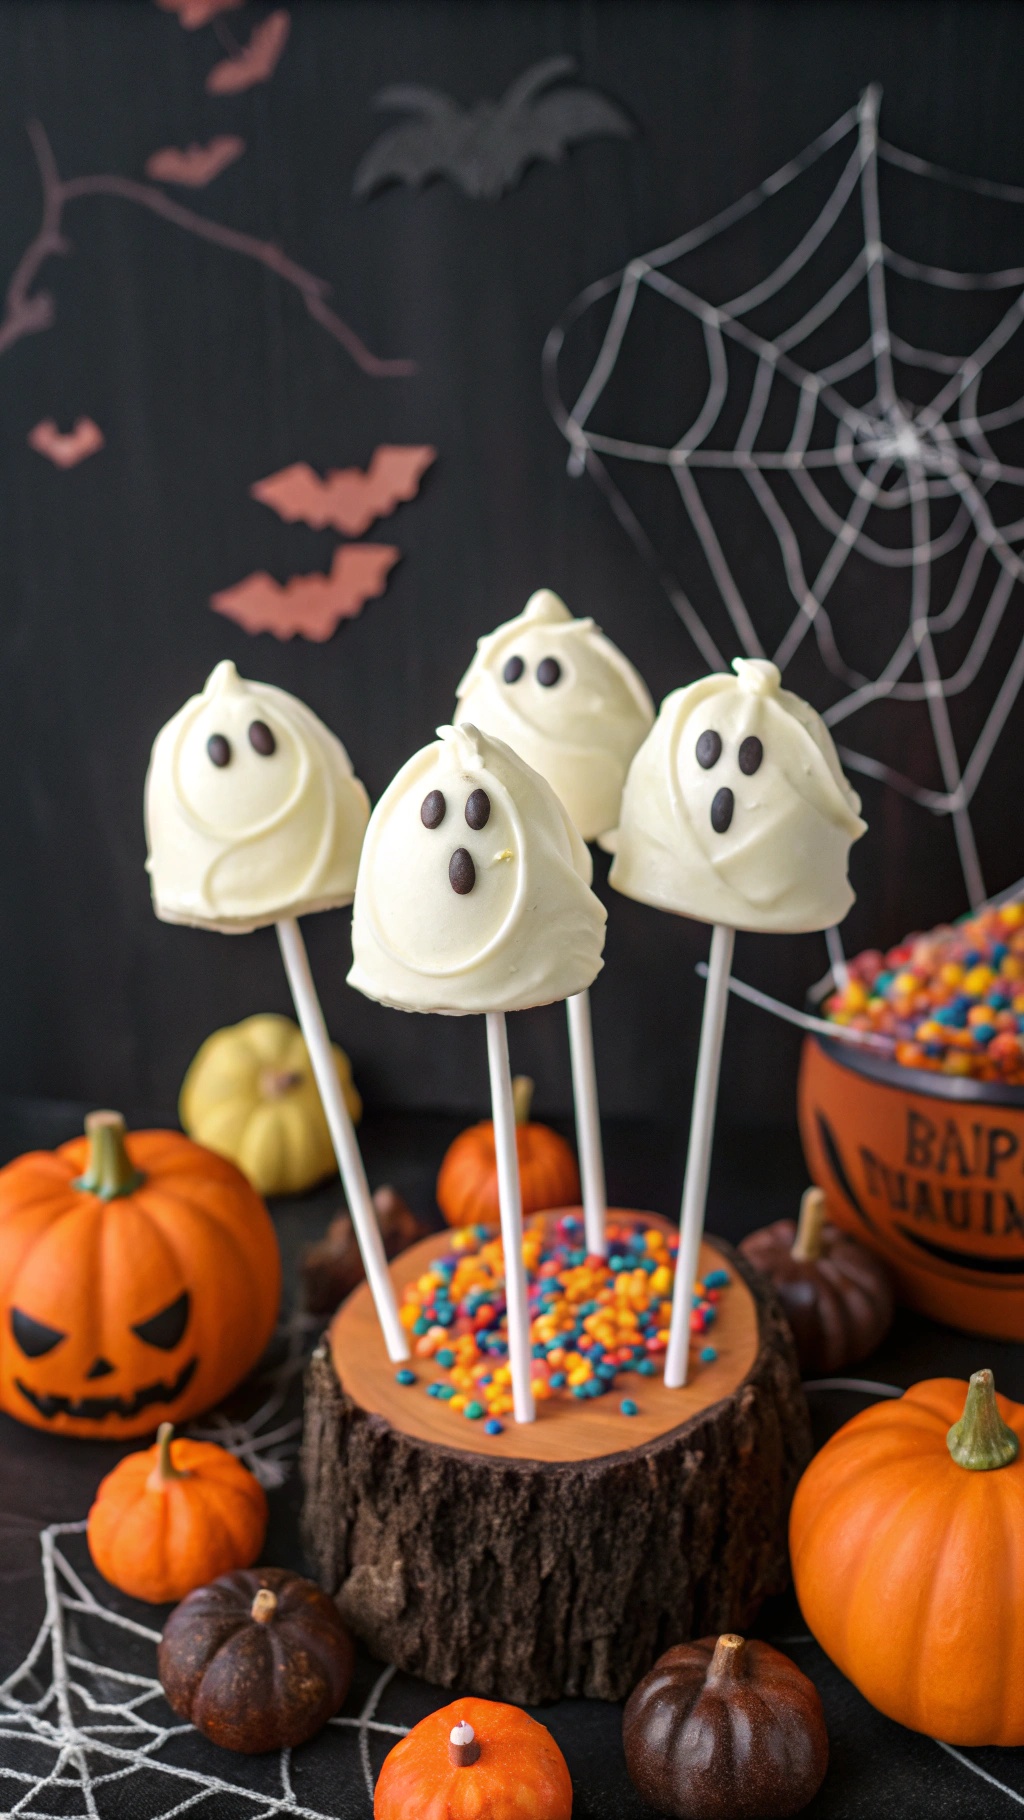
These Ghoulish Ghost Pops are a delightful treat for Halloween! They look cute and spooky, making them perfect for parties or just a fun snack at home. Each ghost is made from simple ingredients, and they’re easy to whip up, even on a budget.
To start, you’ll need some cake pops or marshmallows, white chocolate for coating, and mini chocolate chips for the eyes. The pops are placed on sticks, giving them a fun, festive look. You can decorate them with colorful sprinkles or place them in a spooky display with pumpkins and spider webs for added flair.
Kids will love helping with this treat, making it a great family activity. Plus, they’re budget-friendly, costing less than $10 to make a batch. So gather your ingredients and get ready to create these adorable ghostly snacks!
Ingredients
- 1 package of cake pops or large marshmallows
- 1 cup white chocolate chips
- Mini chocolate chips for eyes
- Pop sticks or lollipop sticks
- Colorful sprinkles (optional)
Instructions
- Melt the white chocolate chips in a microwave-safe bowl, heating in 30-second intervals until smooth.
- If using cake pops, dip each one into the melted chocolate, ensuring it’s fully coated. For marshmallows, insert a stick into each marshmallow and then dip into the chocolate.
- Place the coated pops on a baking sheet lined with parchment paper.
- Before the chocolate sets, add mini chocolate chips for eyes and sprinkle with colorful sprinkles if desired.
- Let the pops cool until the chocolate hardens. Enjoy your spooky treats!
Mummy Hot Dogs: A Creative Twist On A Classic
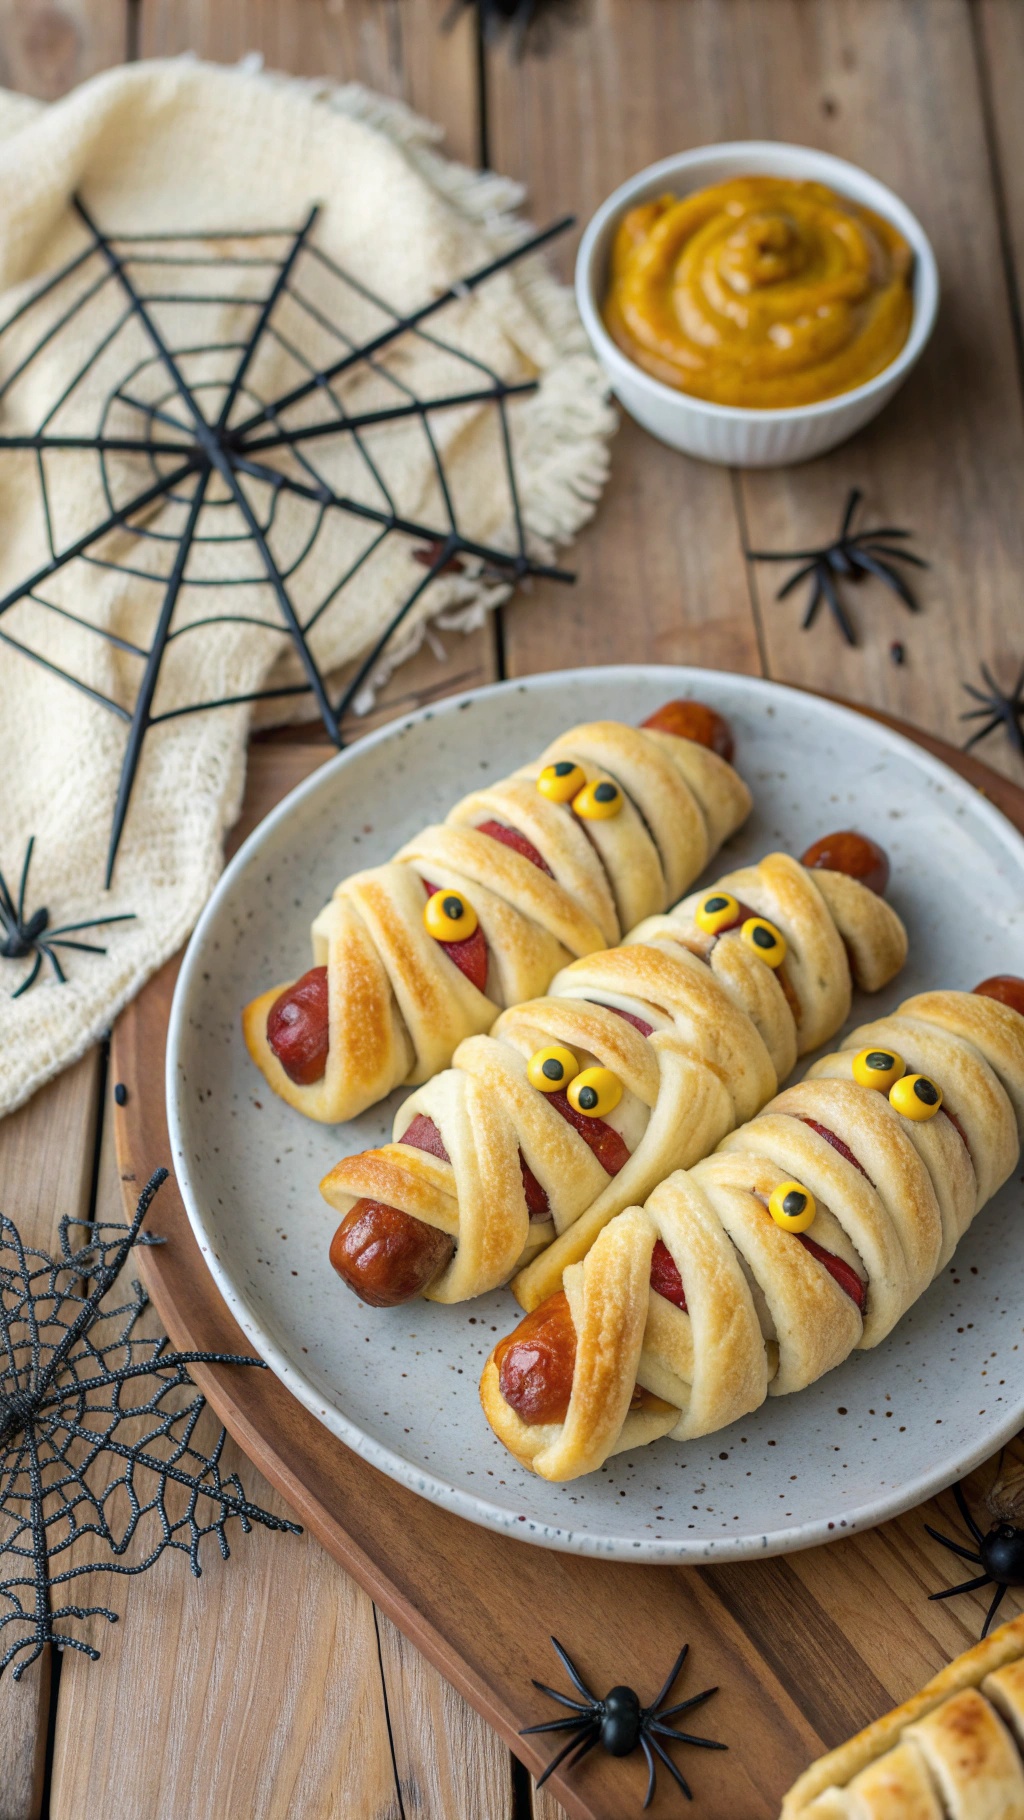
Mummy hot dogs are a fun and spooky treat that kids and adults alike will love. These little guys are made by wrapping hot dogs in crescent roll dough, giving them a mummy-like appearance. The result is a delicious snack that’s perfect for Halloween gatherings.
The image shows a plate of mummy hot dogs, neatly arranged and topped with candy eyes. They look adorable and are sure to be a hit at any Halloween party. The warm, golden-brown dough contrasts nicely with the dark hot dogs, creating a playful and festive vibe. Plus, they’re served with a side of mustard for dipping, adding a nice touch to the presentation.
Making mummy hot dogs is super easy and budget-friendly. You can whip up a batch for under $10, making them a great option for any Halloween celebration. Gather your ingredients, invite some friends, and get ready to create these spooky snacks!
Ingredients
- 8 hot dogs
- 1 can (8 oz) refrigerated crescent roll dough
- Mustard or ketchup for serving
- Sliced olives or small pieces of dough for eyes (optional)
Instructions
- Preheat the Oven: Preheat your oven to 375°F (190°C).
- Prepare the Dough: Unroll the crescent roll dough and separate it into triangles. Cut each triangle into thin strips.
- Wrap the Hot Dogs: Take a hot dog and wrap it with the dough strips, leaving a small space for the 'eyes'. Repeat with all hot dogs.
- Add Eyes: If desired, place small pieces of dough or sliced olives on the wrapped hot dogs to create eyes.
- Bake: Place the wrapped hot dogs on a baking sheet lined with parchment paper. Bake for 12-15 minutes or until the dough is golden brown.
- Serve: Remove from the oven and let cool slightly. Serve with mustard or ketchup for dipping.
Witch'S Brew Jello Cups For A Magical Treat
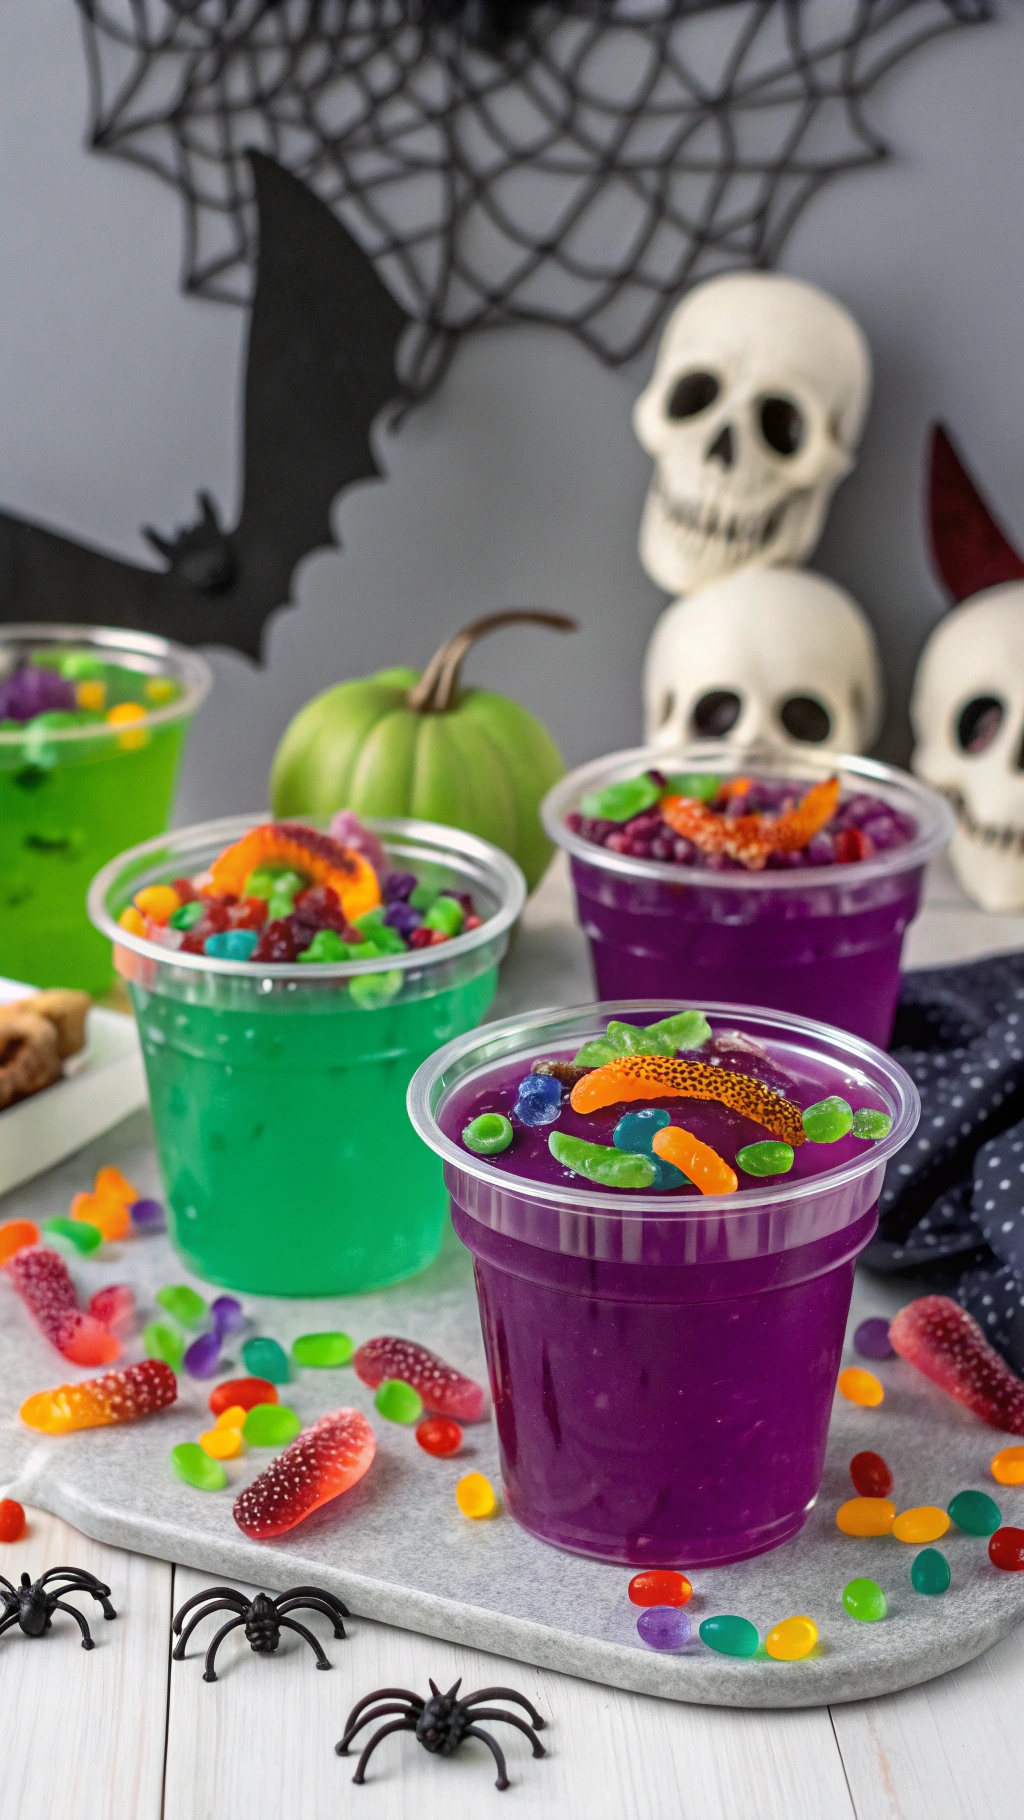
These Witch's Brew Jello Cups are a fun and spooky treat perfect for Halloween. With vibrant colors and gummy candies on top, they look like something straight out of a witch's cauldron. The cups are filled with jello in shades of green and purple, creating a magical appearance that kids and adults will love.
To make these delightful treats, you don’t need much. Just a few simple ingredients will do the trick. You can customize the flavors and colors to match your Halloween theme. These cups are not only budget-friendly but also easy to prepare, making them a great choice for parties or gatherings.
Gather your friends and family to help create these fun jello cups. They can be a great activity for kids, allowing them to choose their favorite candies to top their own cups. The combination of wiggly jello and chewy candies makes for a delightful texture that everyone will enjoy.
Ingredients
- 2 boxes of jello (one green, one purple)
- 4 cups boiling water
- 2 cups cold water
- Assorted gummy candies (like worms and frogs)
- Plastic cups
Instructions
- Prepare the Jello: In separate bowls, dissolve each box of jello in 2 cups of boiling water. Stir until fully dissolved.
- Add Cold Water: Mix in 1 cup of cold water to each bowl. Stir well.
- Layer the Jello: Pour the green jello into half of the plastic cups and the purple jello into the other half. Refrigerate until set, about 4 hours.
- Decorate: Once the jello is firm, top each cup with assorted gummy candies to create a spooky effect.
- Serve: Enjoy your Witch's Brew Jello Cups at your Halloween party!
Creepy Crawly Cupcakes For A Delightfully Scary Dessert
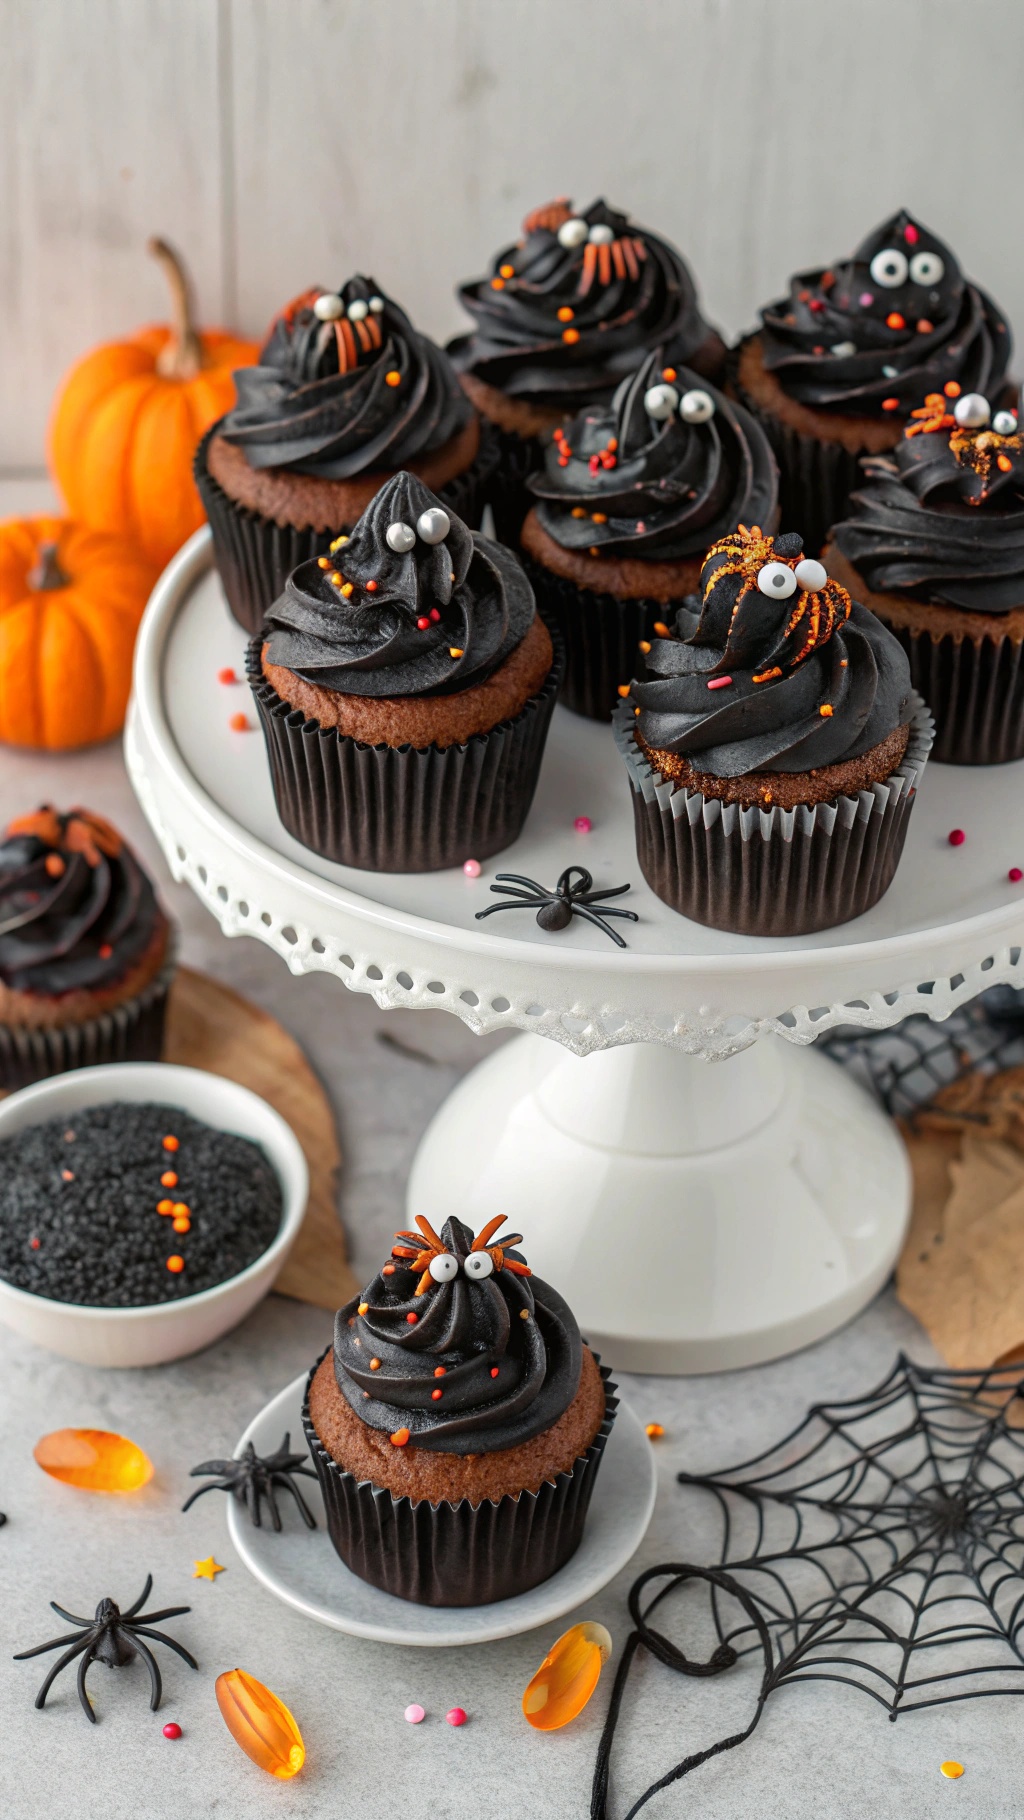
These Creepy Crawly Cupcakes are perfect for Halloween! With their dark frosting and fun decorations, they bring a spooky vibe to any gathering. The cupcakes are topped with black icing, resembling little monsters ready to crawl right off the plate. You’ll find colorful sprinkles, edible eyes, and even tiny spider decorations that make them look both creepy and cute.
Making these treats is not only easy but also budget-friendly. You can whip up a batch for under $10, making them a great choice for parties or family fun. Kids will love helping to decorate, and they’re sure to impress your guests!
Ingredients
- 1 box chocolate cake mix
- 3 large eggs
- 1 cup water
- 1/2 cup vegetable oil
- 1 can black frosting
- Edible eyes
- Halloween-themed sprinkles
- Plastic spiders (for decoration)
Instructions
- Preheat your oven to 350°F (175°C) and line a cupcake pan with liners.
- In a large bowl, mix the chocolate cake mix, eggs, water, and vegetable oil until smooth.
- Pour the batter into the cupcake liners, filling each about 2/3 full.
- Bake for 18-20 minutes or until a toothpick comes out clean. Let them cool completely.
- Once cooled, use the black frosting to swirl on top of each cupcake.
- Decorate with edible eyes, sprinkles, and place a plastic spider on top for a fun touch.
Pumpkin Patch Rice Krispie Treats For A Festive Crunch
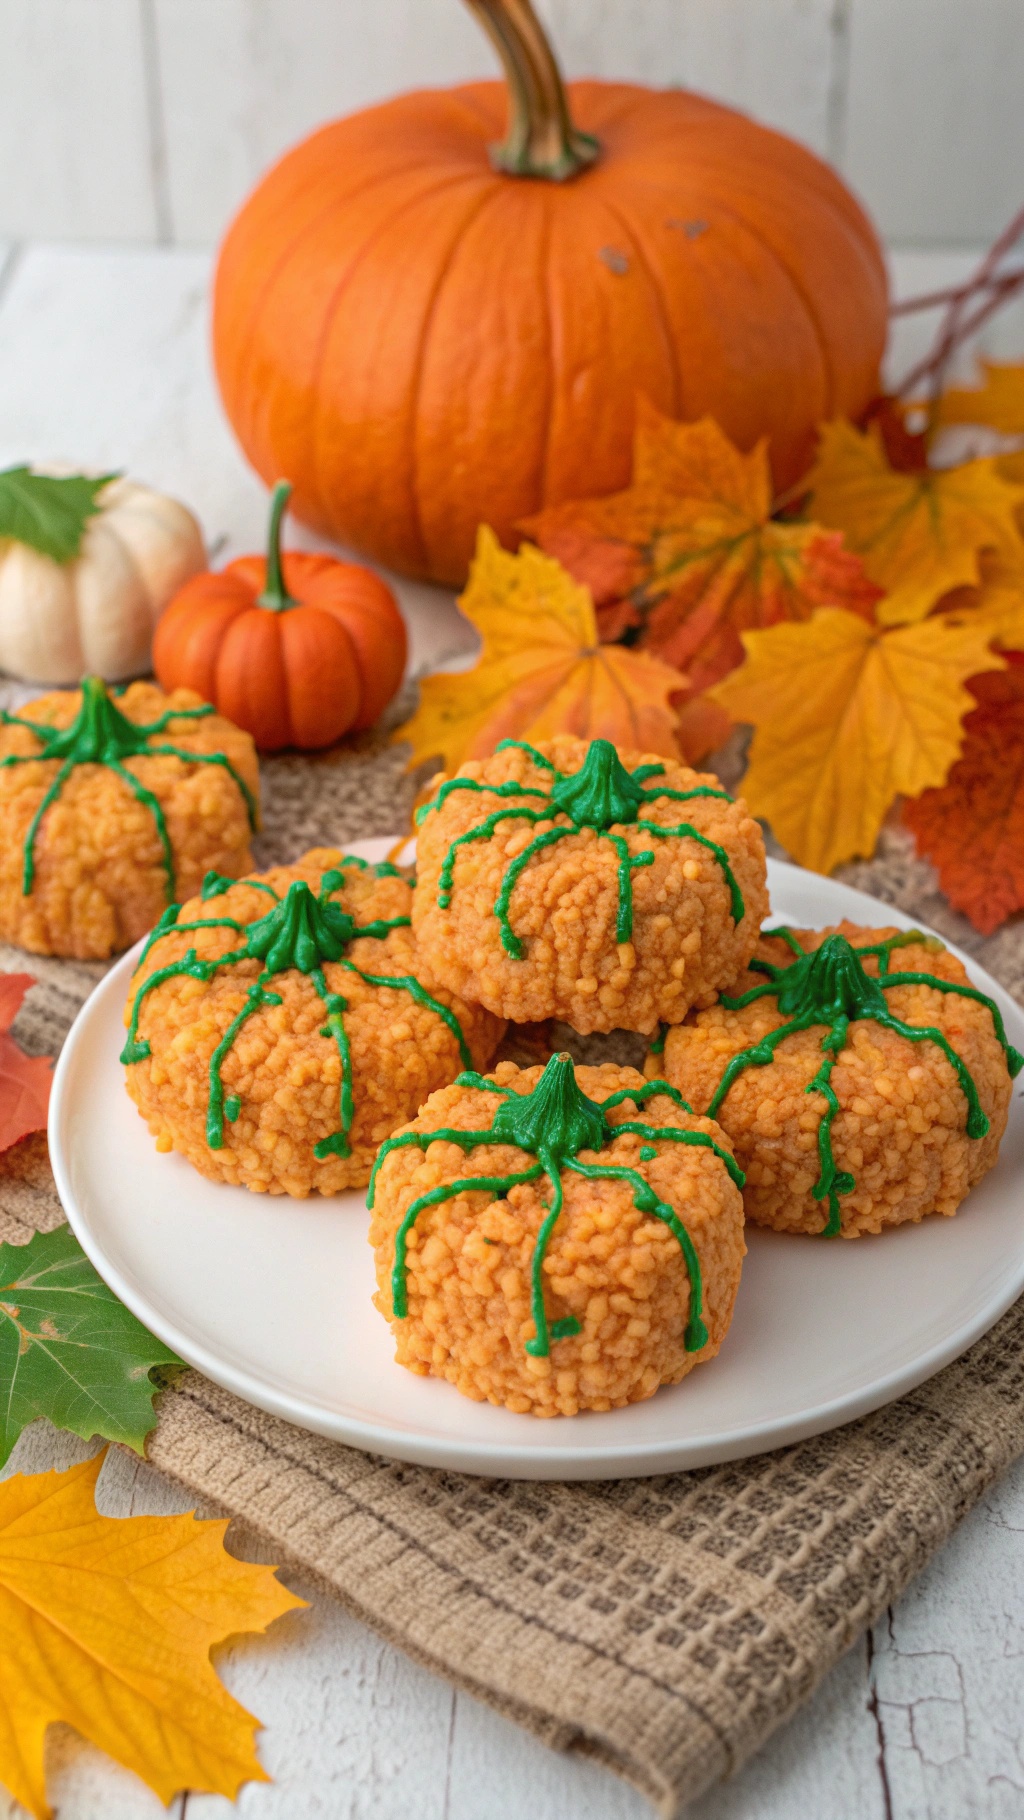
These Pumpkin Patch Rice Krispie Treats are a fun and festive way to celebrate Halloween without breaking the bank. With their bright orange color and cute pumpkin shapes, they are sure to be a hit at any gathering. Plus, they are super easy to make!
Start by gathering your ingredients. You’ll need Rice Krispies cereal, marshmallows, butter, and some green icing for decoration. The combination of gooey marshmallows and crunchy cereal creates a delightful texture that everyone loves.
To make these treats, melt the butter and marshmallows together until smooth. Stir in the Rice Krispies until well coated. Once the mixture cools slightly, shape it into pumpkin forms. Use the green icing to add vines and leaves for that perfect pumpkin patch look!
These treats are not only budget-friendly but also a great activity to do with kids. They can help shape the pumpkins and decorate them. Enjoy these sweet bites while watching your favorite Halloween movies!
Ingredients
- 3 tablespoons butter
- 1 package (10 oz) mini marshmallows
- 6 cups Rice Krispies cereal
- Orange food coloring (optional)
- Green icing for decoration
Instructions
- Melt the butter in a large pot over low heat. Add the marshmallows and stir until completely melted.
- If using, add a few drops of orange food coloring to the melted mixture and stir until evenly colored.
- Remove from heat and add the Rice Krispies cereal. Stir until well coated.
- Let the mixture cool for a few minutes, then shape it into small pumpkin forms using your hands.
- Decorate with green icing to create vines and leaves on top of each pumpkin.
- Allow to set for about 30 minutes before serving.
Frankenstein Marshmallow Treats For A Sweet Surprise
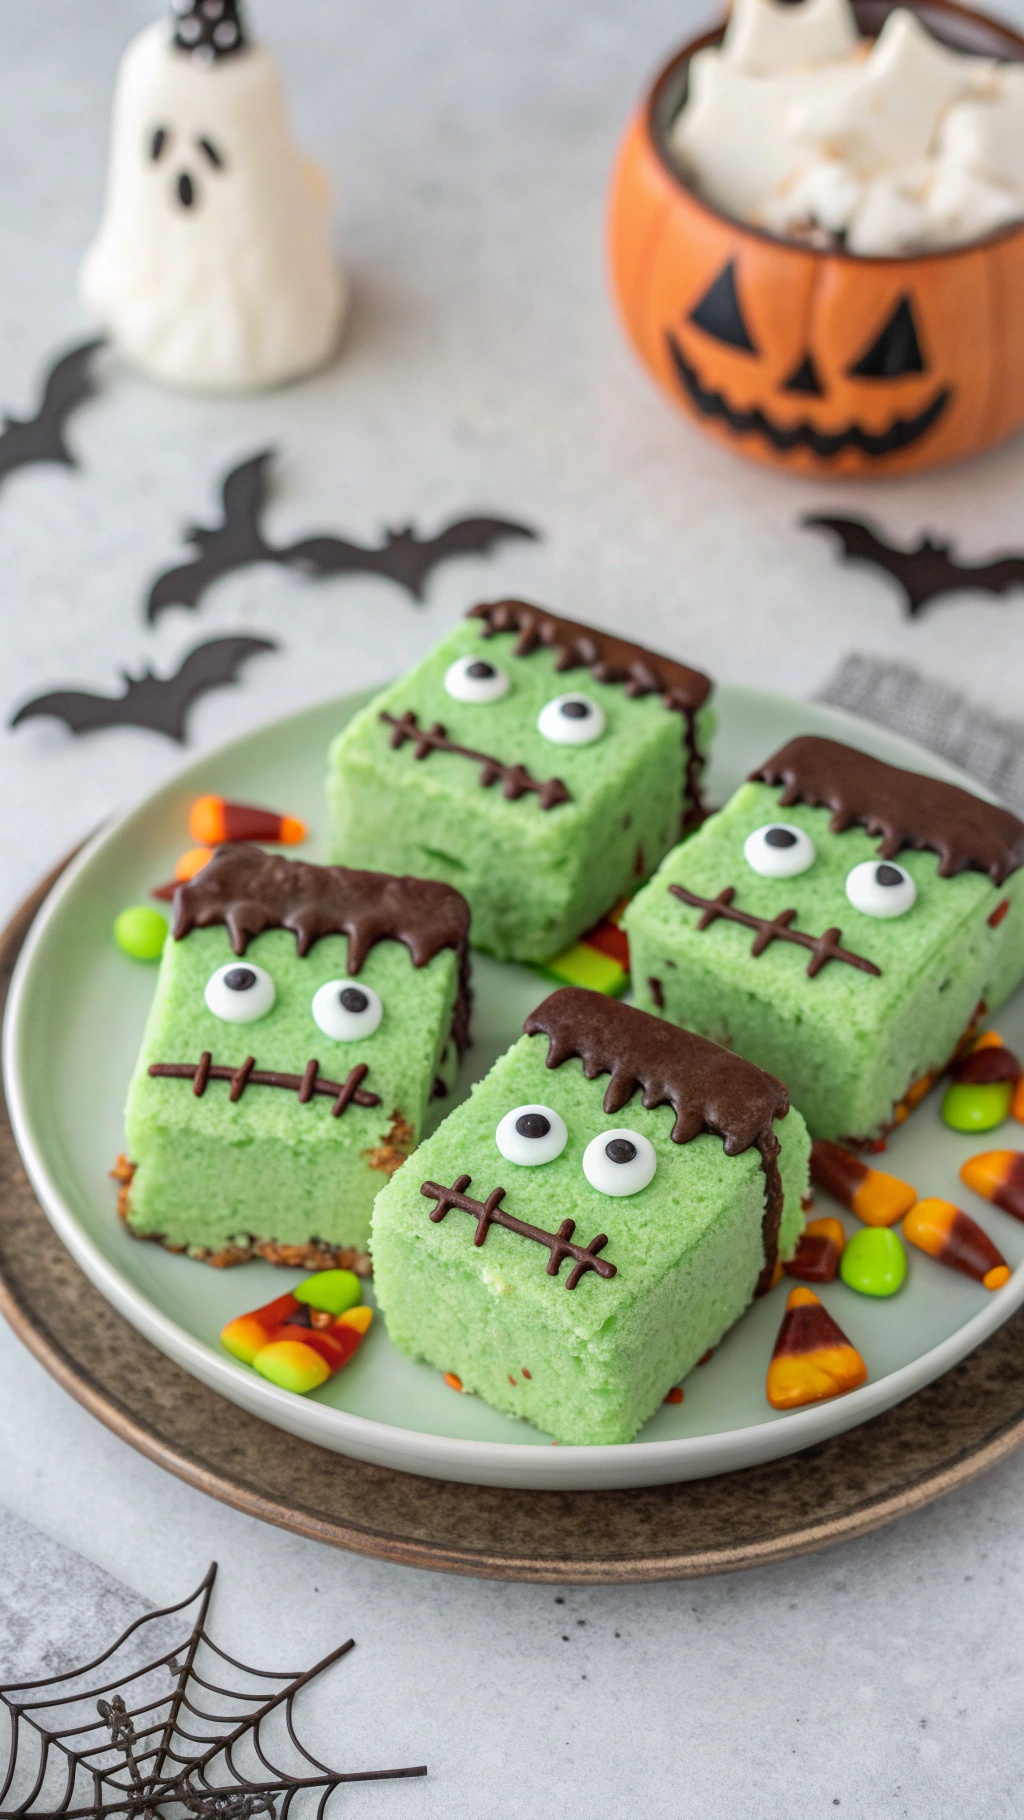
These Frankenstein marshmallow treats are a fun and easy way to celebrate Halloween without breaking the bank. With their bright green color and playful design, they are sure to bring smiles to everyone’s faces. The treats are made with simple ingredients and can be whipped up in no time, making them perfect for last-minute gatherings or school parties.
To make these delightful snacks, you’ll need marshmallows, green food coloring, chocolate, and some candy eyes. The combination of flavors and textures makes them a hit with kids and adults alike. Plus, they’re budget-friendly, costing less than $10 to make!
Gather your friends or family and get ready to create these spooky yet sweet treats. They’re not just tasty; they also add a fun touch to your Halloween festivities. Let’s get started on making these adorable Frankenstein marshmallow treats!
Ingredients
- 1 cup marshmallows
- 2 cups rice cereal
- 1/4 cup butter
- Green food coloring
- 1 cup chocolate chips
- Candy eyes
- Chocolate icing or melted chocolate for decoration
Instructions
- In a large saucepan, melt the butter over low heat. Add the marshmallows and stir until completely melted.
- Remove from heat and mix in the rice cereal until well combined.
- Add a few drops of green food coloring and mix until the cereal is evenly coated.
- Press the mixture into a greased 9x9 inch pan and let it cool for about 30 minutes.
- Once cooled, cut the treats into squares. Melt the chocolate chips in a microwave-safe bowl and dip the top of each square into the chocolate.
- While the chocolate is still wet, place candy eyes on top and use chocolate icing to draw on Frankenstein's mouth and stitches.
- Let the chocolate set before serving. Enjoy your spooky treats!
Chocolate-Dipped Apple Slices For A Healthy Halloween Snack
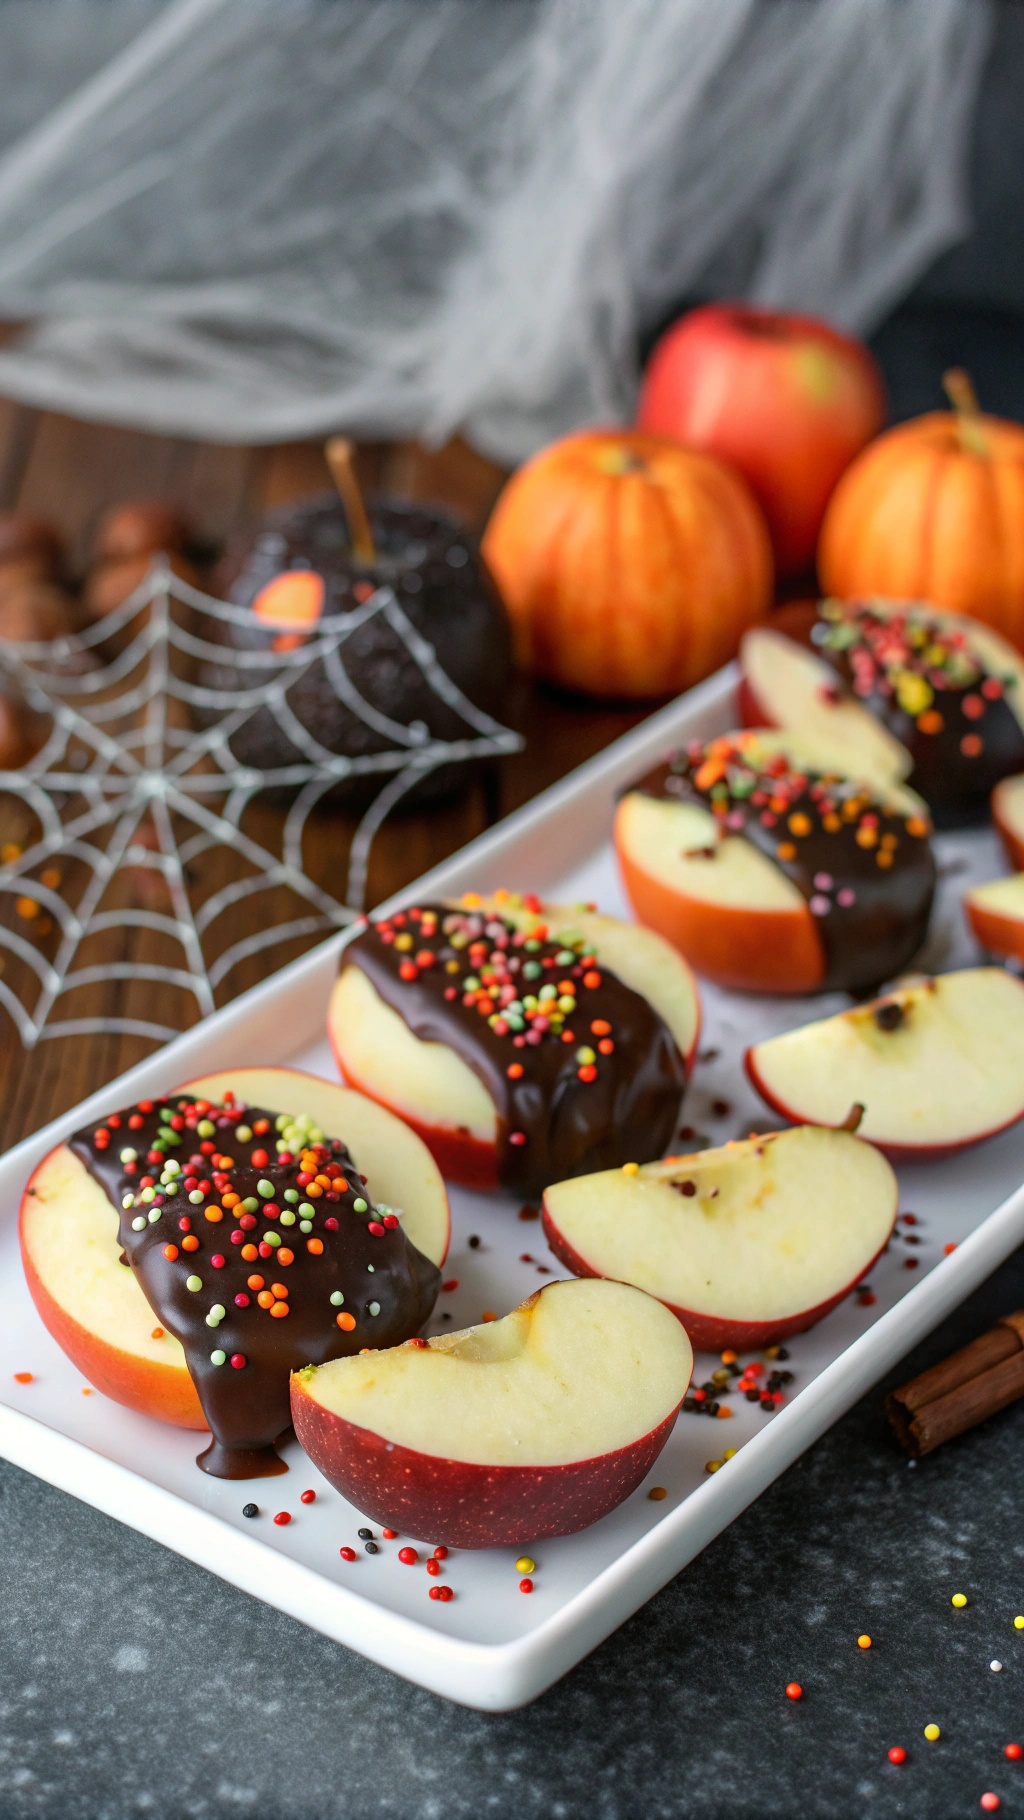
Halloween treats don’t have to be all about candy. Chocolate-dipped apple slices are a fun and healthy option that everyone will love. The image shows vibrant red apple slices, half-dipped in rich chocolate and sprinkled with colorful candy bits. This combination is not only eye-catching but also delicious!
Making these treats is super simple and can be done in no time. You’ll need fresh apples, chocolate for melting, and some fun sprinkles to add that festive touch. This snack is perfect for kids and adults alike, offering a sweet taste without the guilt.
Here’s how to whip up these delightful chocolate-dipped apple slices:
Ingredients
- 2 large apples (any variety you prefer)
- 1 cup chocolate chips (milk, dark, or white)
- 1 tablespoon coconut oil (optional, for smoother chocolate)
- 1/4 cup colorful sprinkles
Instructions
- Prepare the Apples: Wash and slice the apples into wedges. You can remove the core if you like.
- Melt the Chocolate: In a microwave-safe bowl, combine chocolate chips and coconut oil. Microwave in 30-second intervals, stirring in between, until melted and smooth.
- Dip the Apple Slices: Take each apple slice and dip half into the melted chocolate. Allow any excess chocolate to drip off.
- Add Sprinkles: While the chocolate is still wet, sprinkle the colorful bits on top. This adds a fun Halloween vibe!
- Set and Serve: Place the dipped apple slices on a baking sheet lined with parchment paper. Let them cool until the chocolate hardens. Enjoy your healthy Halloween snack!
Candy Corn Fruit Cups For A Healthy Twist
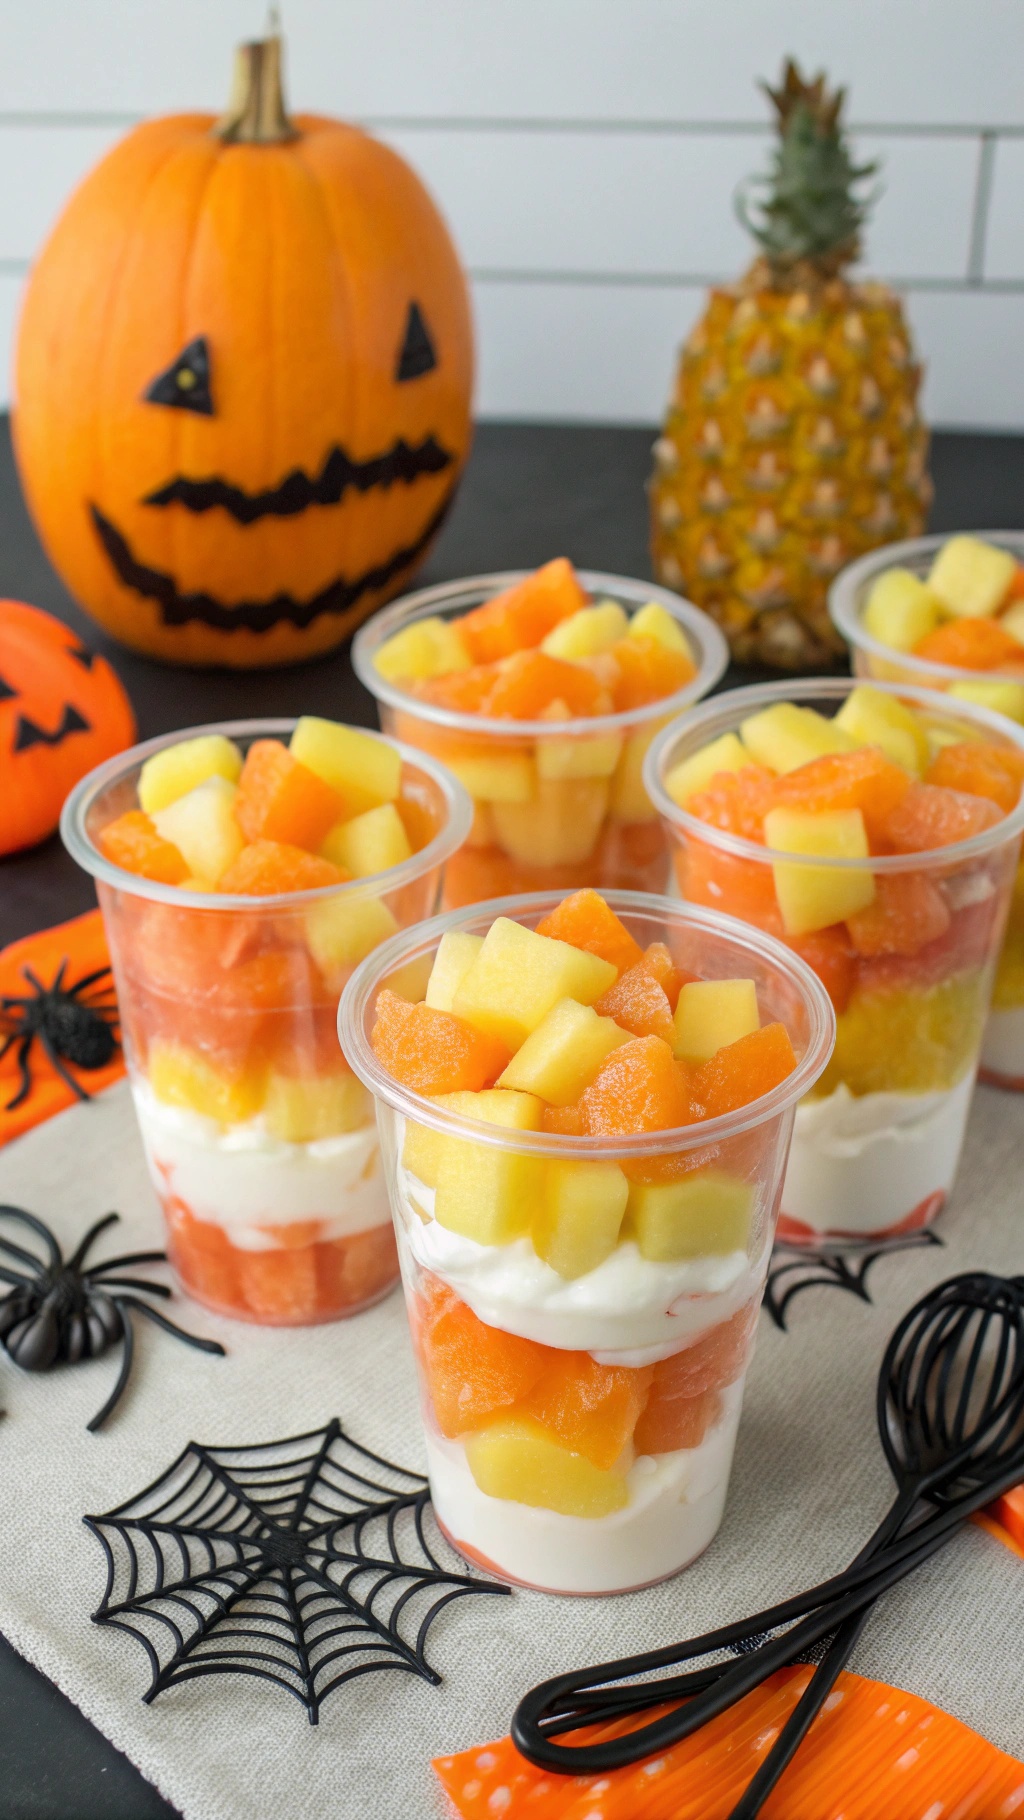
Candy Corn Fruit Cups are a fun and healthy treat for Halloween. These colorful cups resemble the classic candy corn but are filled with fresh fruit instead. They are perfect for parties or as a festive snack for kids. The layers of fruit not only look great but also provide a nutritious option that everyone will enjoy.
To make these cups, you can use a mix of your favorite fruits. Think of vibrant oranges, yellows, and whites to mimic the candy corn colors. The cups can be prepared ahead of time, making them a convenient choice for busy Halloween festivities.
Ingredients
- 1 cup diced pineapple
- 1 cup diced mango
- 1 cup diced cantaloupe
- 1 cup Greek yogurt
- Honey or maple syrup (optional)
Instructions
- Prepare the Fruit: Start by peeling and dicing the pineapple, mango, and cantaloupe into small cubes.
- Layer the Cups: In clear plastic cups, add a layer of Greek yogurt at the bottom. Then, add a layer of diced pineapple, followed by a layer of yogurt again.
- Add More Layers: Next, add a layer of diced mango, followed by more yogurt, and finish with a layer of cantaloupe on top.
- Sweeten if Desired: Drizzle a little honey or maple syrup on top for extra sweetness if you like.
- Serve: Chill the cups in the fridge until ready to serve. Enjoy your healthy Halloween treat!
Spooktacular Popcorn Balls For A Chewy Treat
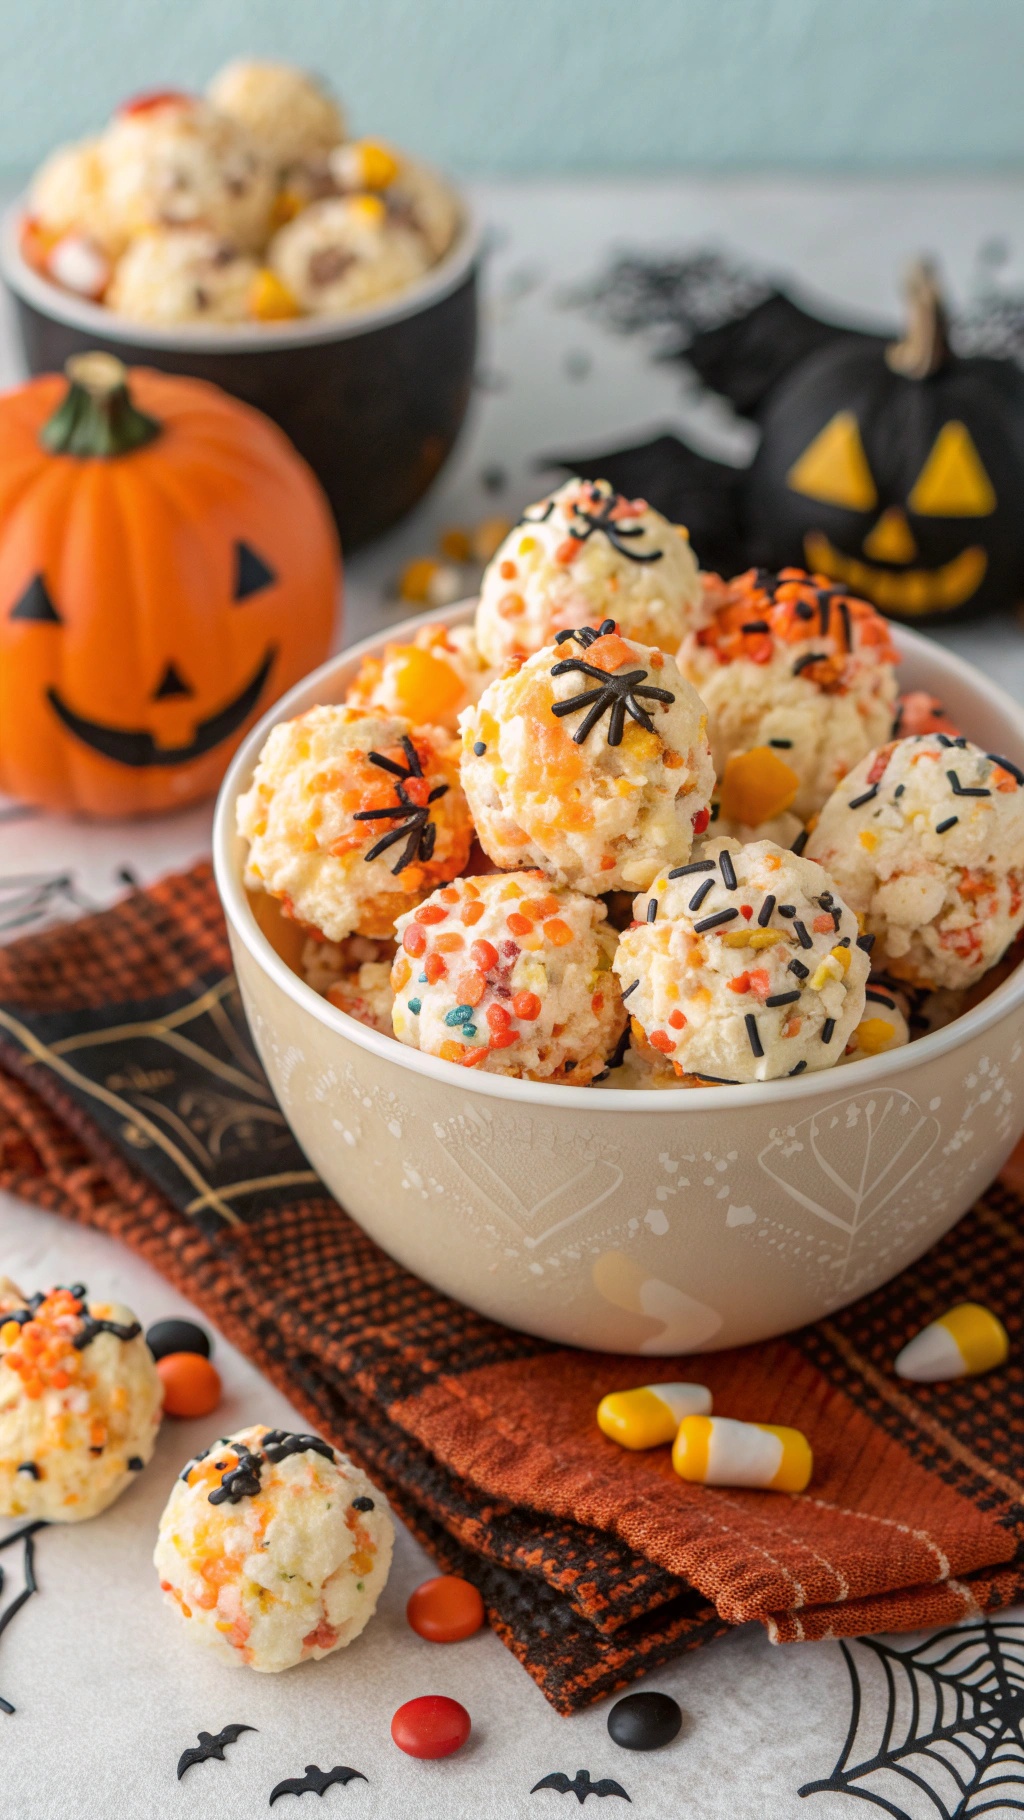
Popcorn balls are a classic Halloween treat that bring a fun twist to your spooky celebrations. These delightful snacks are not only easy to make, but they also fit perfectly into a budget of $10 or less. The image shows a bowl filled with colorful popcorn balls, decorated with festive sprinkles and candy. They look inviting and are sure to be a hit at any Halloween gathering!
Making these popcorn balls is a simple process. You can customize them with your favorite candies or sprinkles, making them as spooky or sweet as you like. They are chewy, crunchy, and oh-so-delicious!
Ingredients
- 8 cups popped popcorn
- 1 cup mini marshmallows
- 1/4 cup unsalted butter
- 1/2 cup granulated sugar
- 1/4 cup corn syrup
- 1/2 teaspoon vanilla extract
- 1/2 cup Halloween-themed sprinkles
Instructions
- Prepare the Popcorn: Pop the popcorn using your preferred method. Place it in a large bowl, making sure to remove any unpopped kernels.
- Make the Mixture: In a saucepan over medium heat, combine the butter, sugar, corn syrup, and mini marshmallows. Stir until melted and smooth.
- Add Flavor: Remove the saucepan from heat and stir in the vanilla extract.
- Combine: Pour the melted mixture over the popcorn. Stir well to coat all the popcorn evenly.
- Shape the Balls: Let the mixture cool slightly, then use your hands (greased with butter) to form balls about the size of a golf ball. Place them on a baking sheet lined with parchment paper.
- Decorate: While the popcorn balls are still warm, sprinkle them with Halloween-themed sprinkles for a festive touch.
- Cool: Allow the popcorn balls to cool completely before serving. Enjoy your spooktacular treat!
Eerie Eyeball Cheese Balls For A Savory Snack
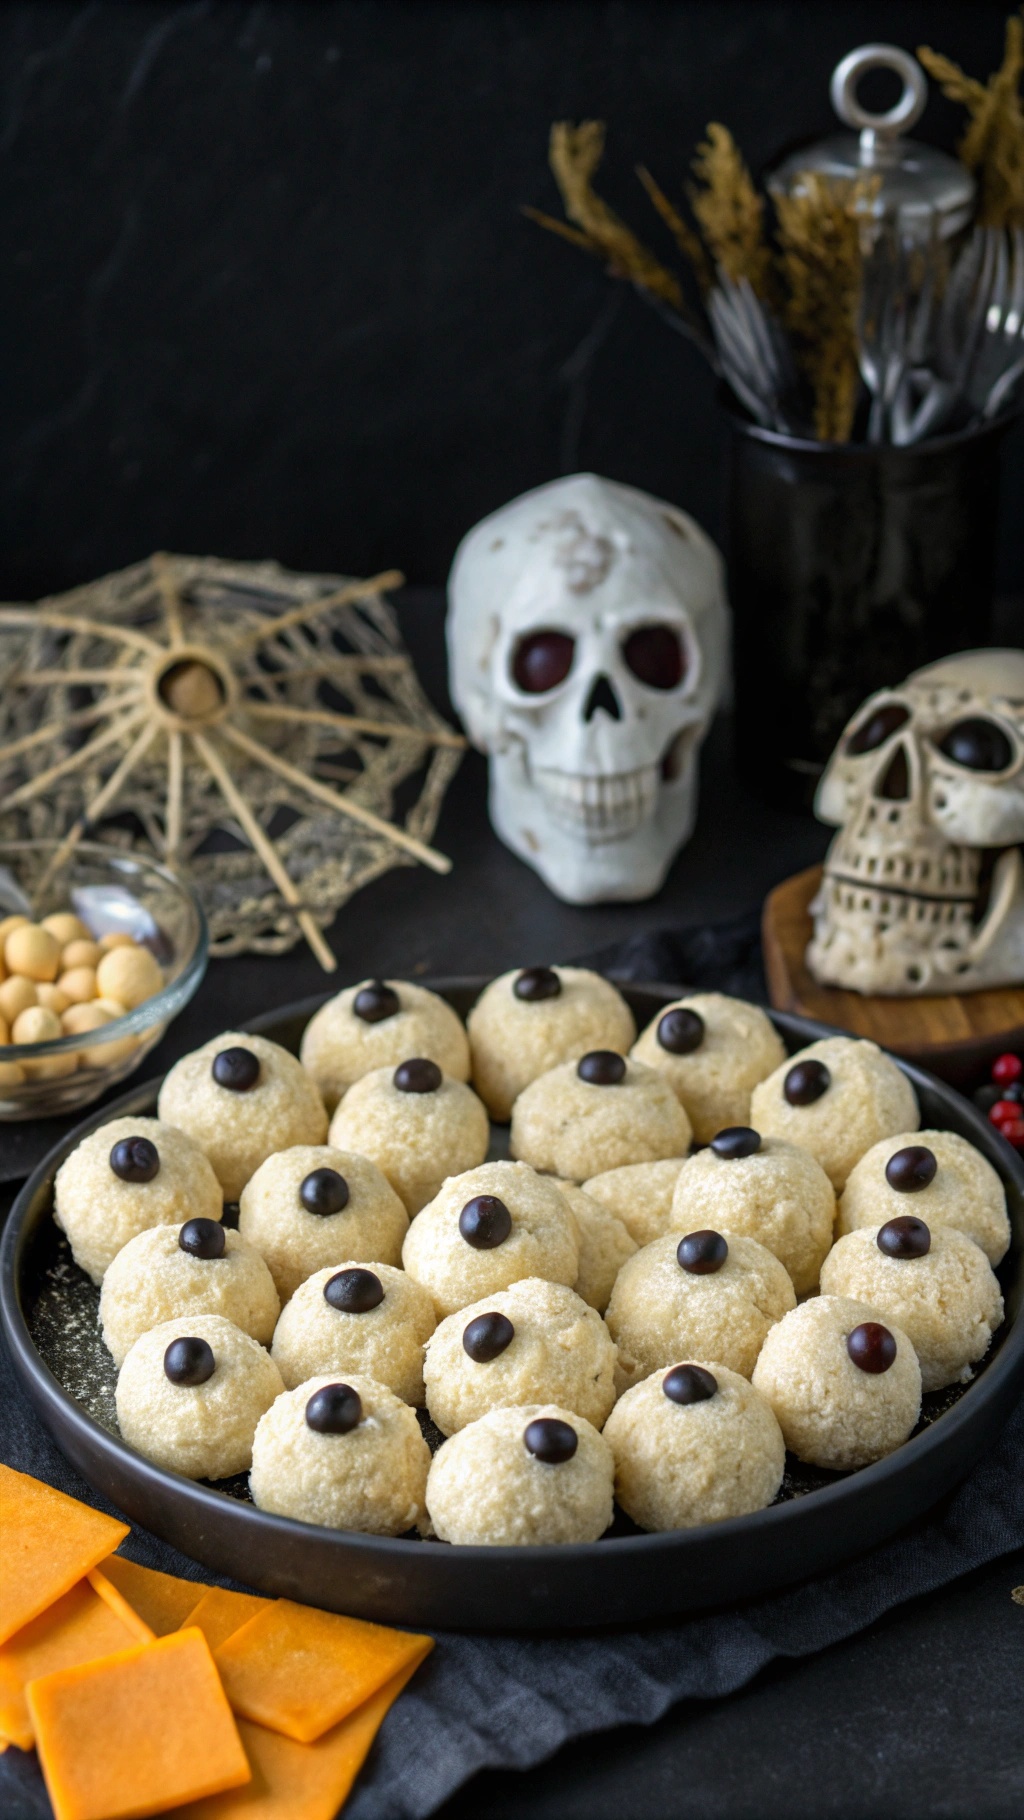
These Eerie Eyeball Cheese Balls are a fun and spooky treat perfect for Halloween gatherings. They look like little eyeballs, making them a hit at any party. Made with simple ingredients, they are easy to whip up and will impress your guests without breaking the bank.
The cheese balls are round and topped with a dark chocolate piece, resembling a creepy eyeball. Surround them with some colorful cheese slices to add a festive touch. This snack is not only delicious but also adds a playful vibe to your Halloween spread.
Ingredients
- 8 oz cream cheese, softened
- 1 cup shredded cheddar cheese
- 1/2 cup grated Parmesan cheese
- 1/2 teaspoon garlic powder
- 1/2 teaspoon onion powder
- 1/4 teaspoon salt
- 1/4 teaspoon black pepper
- 1/4 cup chopped fresh herbs (like parsley or chives)
- Dark chocolate-covered raisins or chocolate chips for the eyeball
- Cheddar cheese slices for decoration
Instructions
- In a mixing bowl, combine the softened cream cheese, shredded cheddar, Parmesan, garlic powder, onion powder, salt, and pepper. Mix until smooth.
- Form the cheese mixture into small balls, about the size of a golf ball.
- Place a dark chocolate-covered raisin or chocolate chip on top of each cheese ball to create the eyeball effect.
- Arrange the cheese balls on a serving platter and sprinkle with chopped herbs for a pop of color.
- Cut the cheddar cheese slices into fun shapes and place them around the cheese balls for decoration.
- Serve immediately or refrigerate until ready to serve.
Witch Hat Cookies For A Fun And Easy Treat
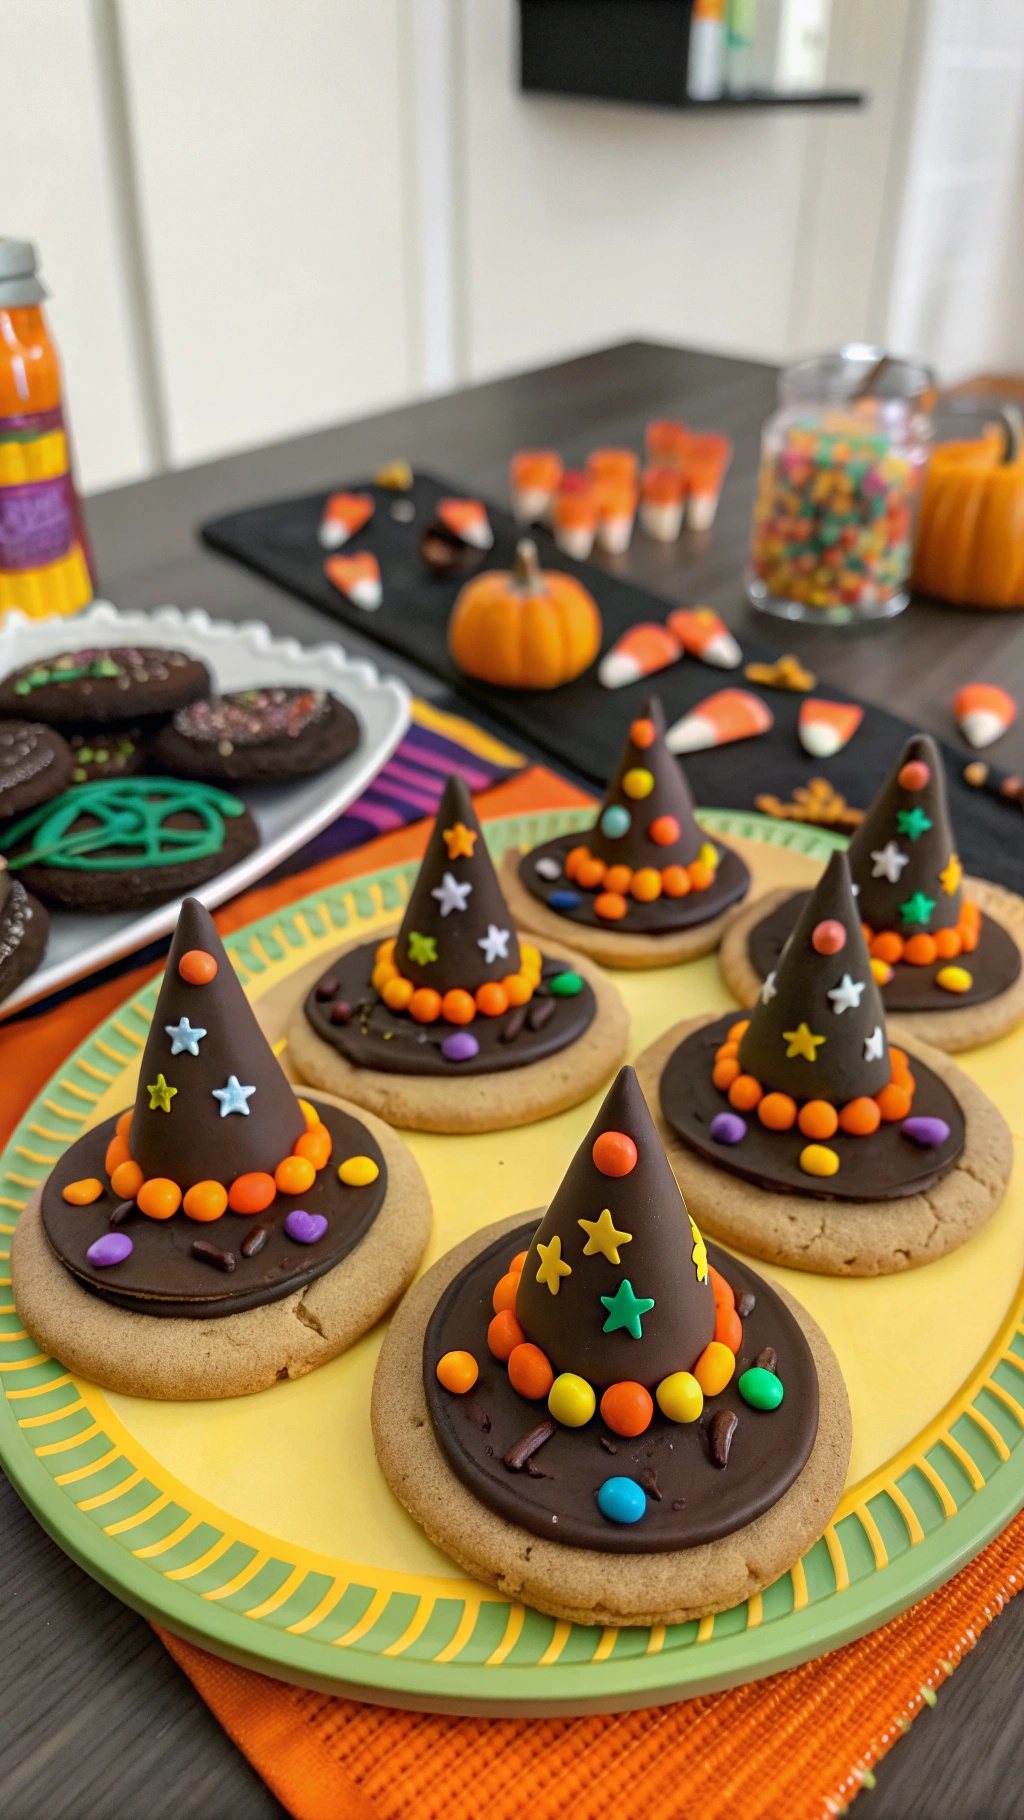
Witch hat cookies are a delightful and simple treat perfect for Halloween. They are not only fun to make, but they also look great on any festive table. The cookies feature a chocolate cookie base topped with a chocolate disk and a cone-shaped candy hat, all decorated with colorful candies. These treats are sure to bring smiles to kids and adults alike!
To create these whimsical cookies, you’ll need a few basic ingredients. The combination of chocolate flavors and vibrant colors makes them a standout treat. Plus, they are budget-friendly, costing $10 or less to make!
Ingredients
- 1 package of chocolate cookies
- 1 cup chocolate frosting
- 1 package of ice cream cones
- 1 cup candy melts (black or brown)
- Assorted candy decorations (like M&Ms or sprinkles)
Instructions
- Prepare the Base: Start by placing the chocolate cookies on a baking sheet. These will serve as the base of your witch hats.
- Make the Hats: Melt the candy melts according to package instructions. Dip the top of each ice cream cone into the melted candy and let it set for a few minutes.
- Assemble the Cookies: Spread a layer of chocolate frosting on each cookie. Then, place the dipped cone on top of the frosting, creating the witch hat shape.
- Decorate: Use the assorted candies to decorate the hats. You can add colorful candies around the base of the cone and sprinkle some on top for extra flair.
- Let Set: Allow the cookies to sit for a bit so everything can firm up. Then, they’re ready to serve!
Enjoy making these witch hat cookies with family and friends. They are a fun and easy treat that will make your Halloween celebrations even sweeter!
Monster Brownies For A Chillingly Delicious Dessert
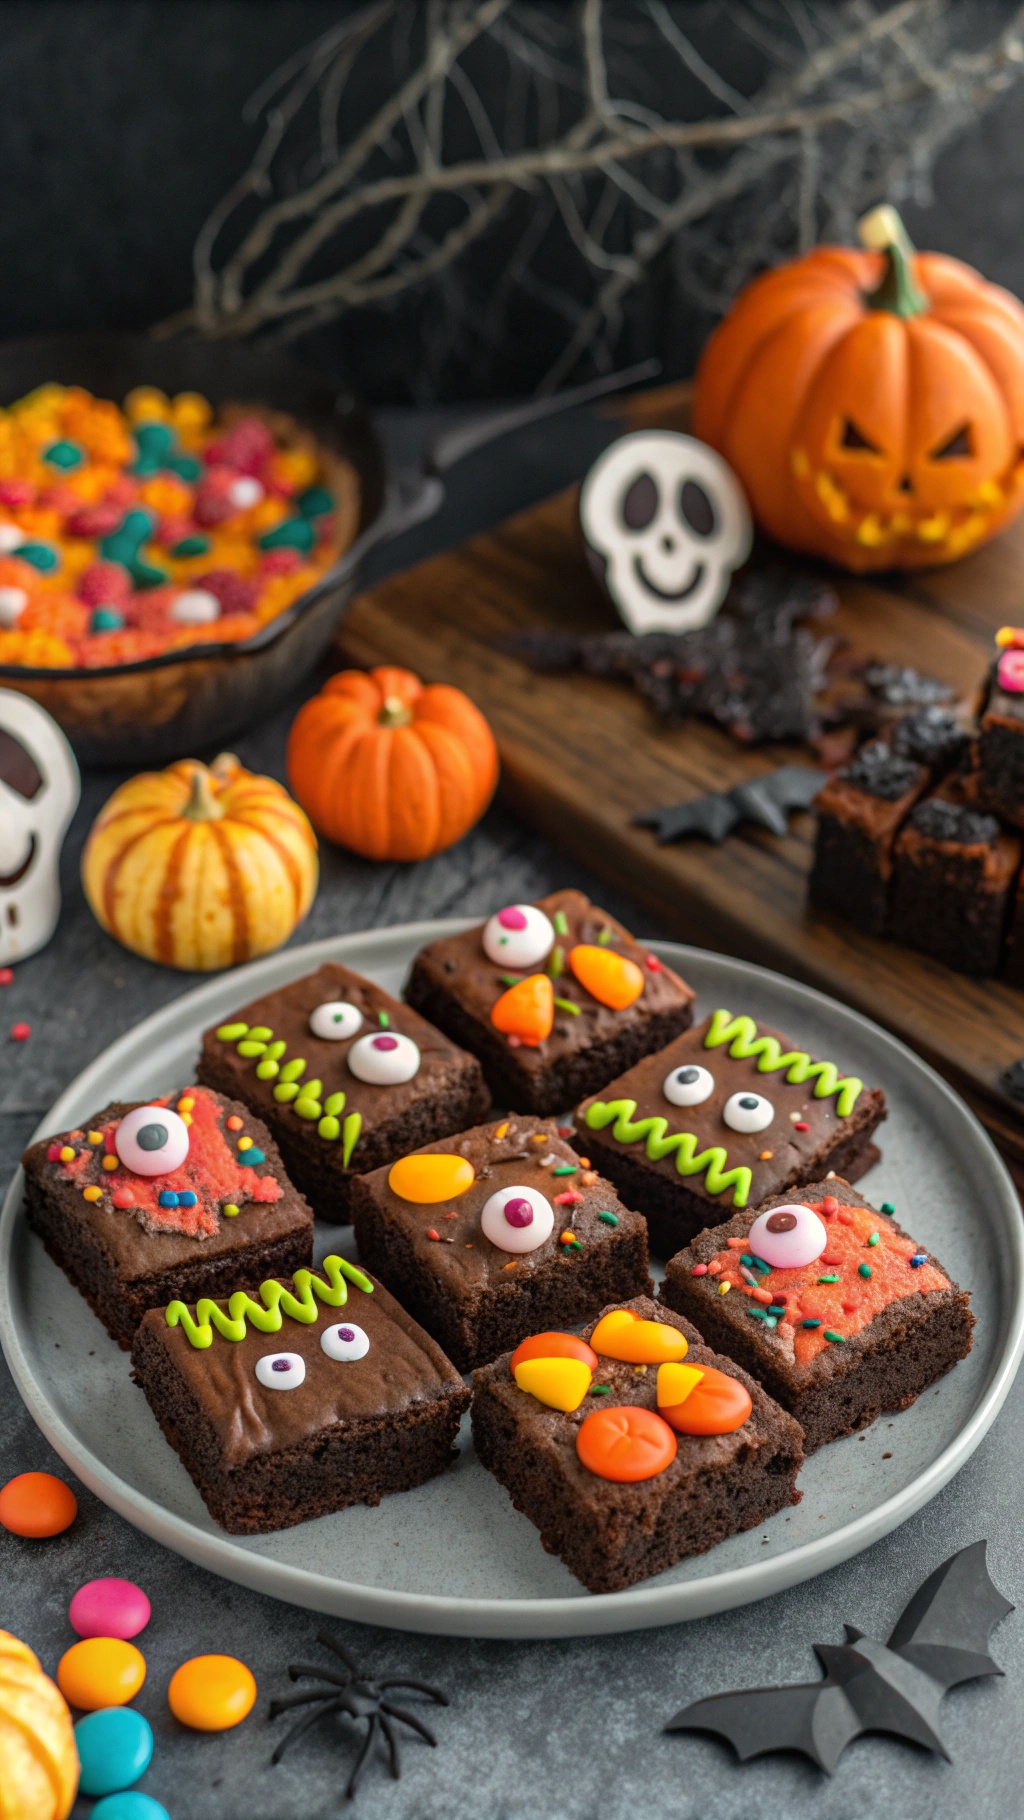
These Monster Brownies are the perfect treat for Halloween! They are fun, colorful, and easy to make, making them a hit with kids and adults alike. Picture a plate of rich, fudgy brownies topped with vibrant icing and playful candy decorations. Each brownie is transformed into a spooky monster with googly eyes, colorful sprinkles, and candy corn. They not only taste great but also look fantastic on any Halloween dessert table.
Making these brownies is a breeze. Start with a simple brownie mix, or whip up a batch from scratch if you're feeling adventurous. Once baked and cooled, let your creativity shine as you decorate each brownie to resemble a different monster. Use icing to create silly mouths and add candy eyes for a fun touch. These treats are not just delicious; they also bring a festive spirit to your Halloween celebrations!
Ingredients
- 1 box brownie mix (plus ingredients needed on the box)
- 1 cup chocolate frosting
- Assorted candy eyes
- Colorful sprinkles
- Candy corn
- Green icing (for monster hair)
Instructions
- Preheat your oven and prepare the brownie mix according to the package instructions.
- Pour the batter into a greased baking pan and bake until a toothpick comes out clean.
- Let the brownies cool completely before frosting.
- Spread chocolate frosting evenly over the cooled brownies.
- Use candy eyes, sprinkles, and candy corn to decorate each brownie like a monster.
- Finish with green icing for monster hair and let your creativity run wild!
- Slice into squares and serve at your Halloween party.
Ghostly Banana Pops For A Fun And Healthy Snack
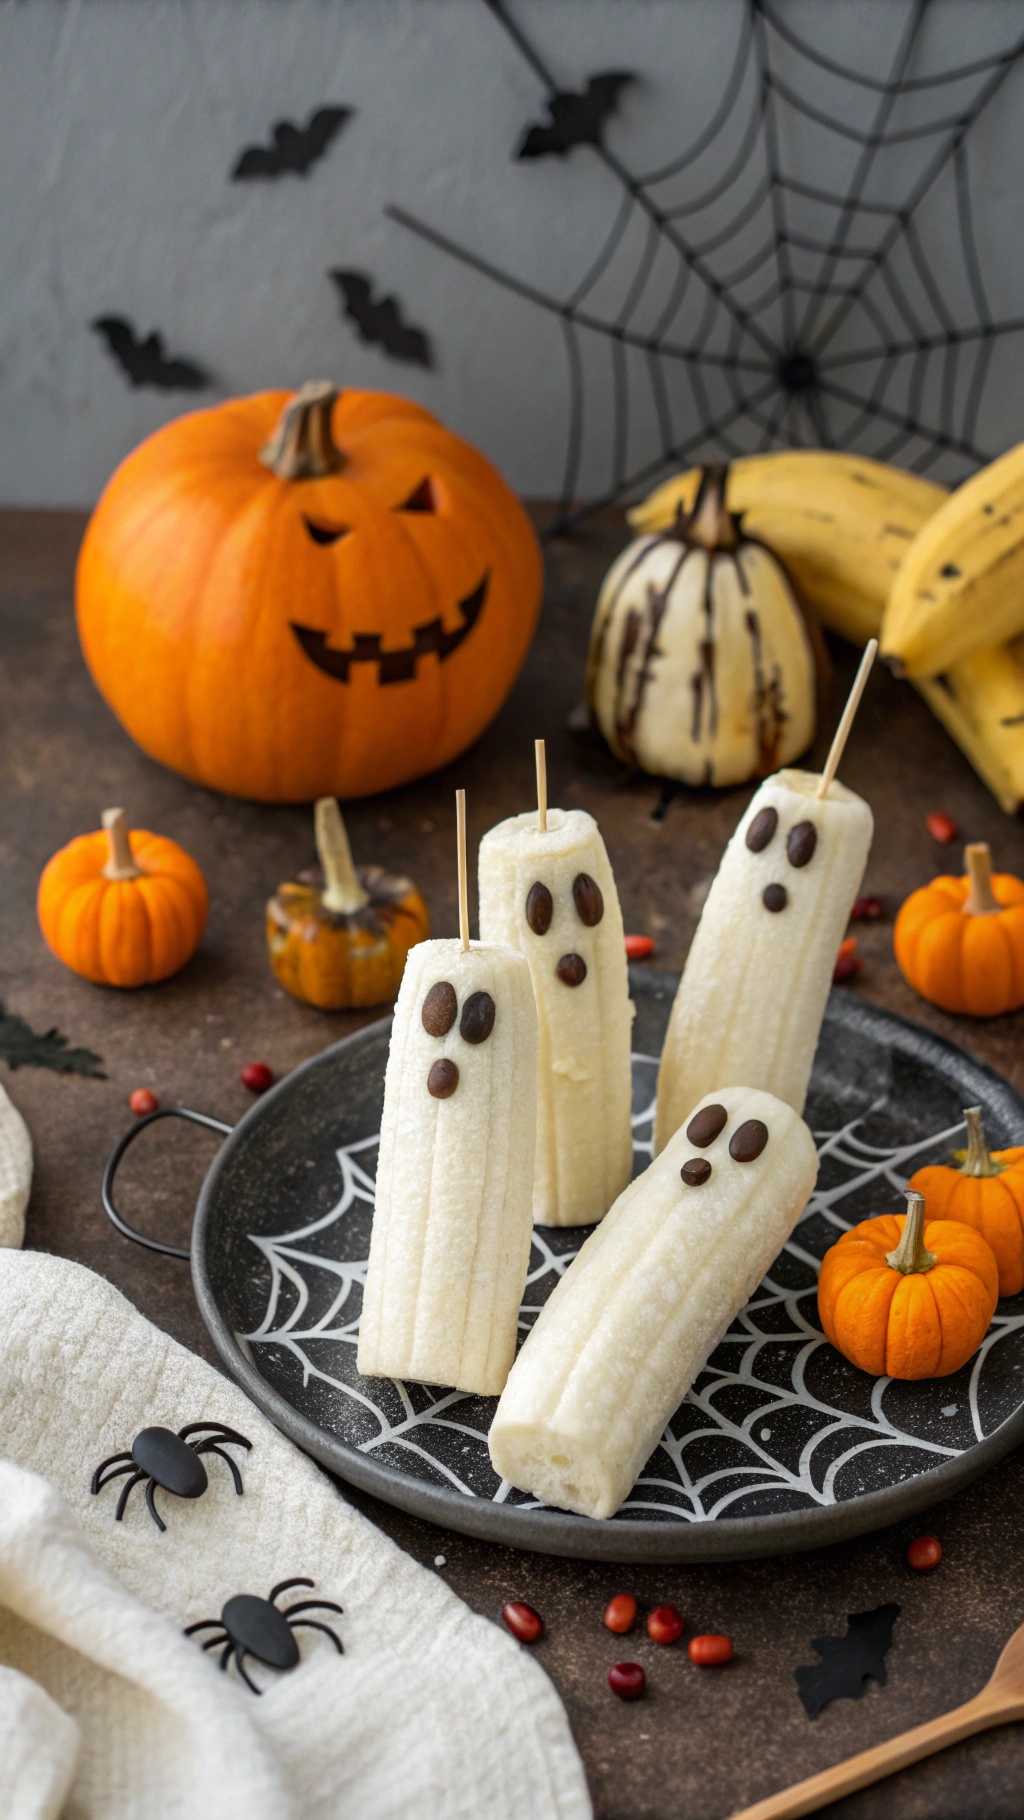
These ghostly banana pops are a delightful treat that’s perfect for Halloween. They are not only fun to look at but also healthy, making them a great choice for kids and adults alike. The bananas are transformed into spooky ghosts, complete with chocolate chip eyes, and they make for a quick and easy snack.
To create these adorable treats, you’ll need ripe bananas, chocolate chips, and popsicle sticks. Simply peel the bananas and cut them in half. Insert a popsicle stick into each half, then use chocolate chips to create ghostly faces. You can even freeze them for a refreshing treat on a warm day!
These banana pops are budget-friendly, costing less than $10 to make, and they add a fun twist to your Halloween festivities. They’re a great way to encourage kids to eat fruit while enjoying the spooky season.
Ingredients
- 2 ripe bananas
- 1/4 cup chocolate chips
- 4 popsicle sticks
Instructions
- Peel the bananas and cut them in half.
- Insert a popsicle stick into each banana half.
- Using chocolate chips, create eyes on each banana to form ghost faces.
- For a frozen treat, place the banana pops in the freezer for about 1-2 hours.
- Serve and enjoy your ghostly banana pops!
Creepy Crawly Chocolate-Covered Pretzels For A Sweet Treat
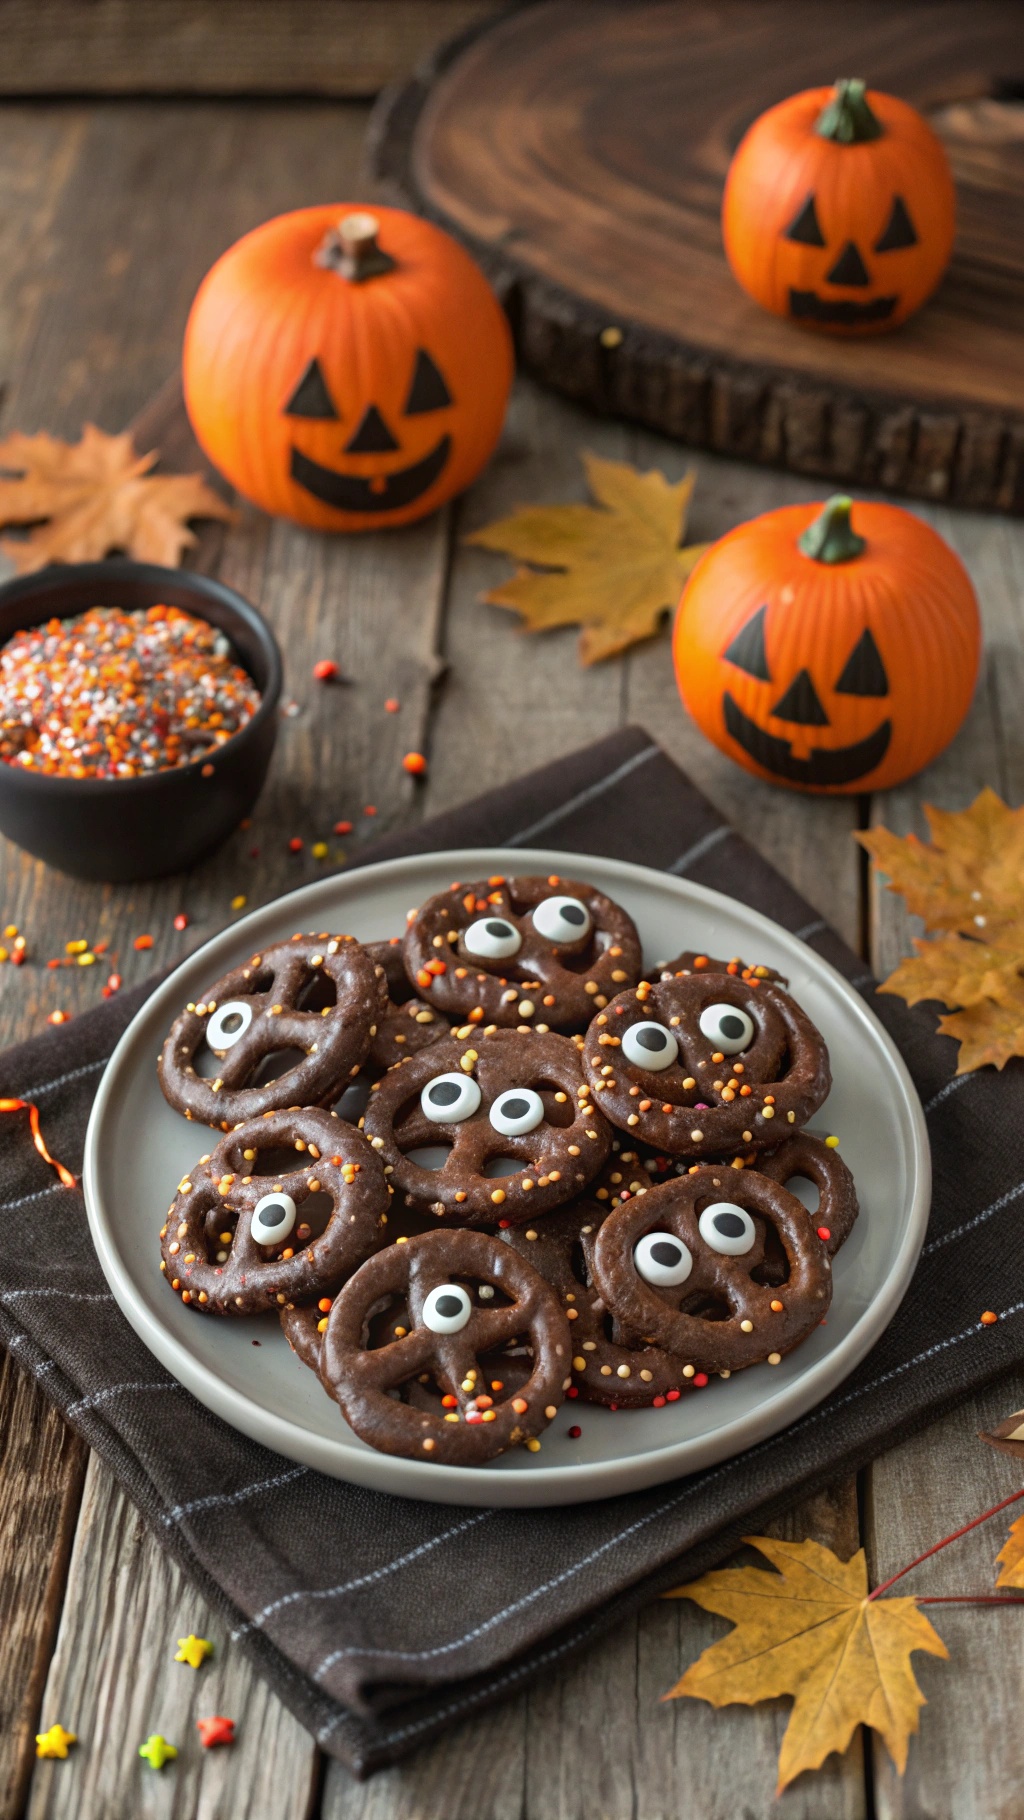
These Creepy Crawly Chocolate-Covered Pretzels are a fun and easy Halloween treat that won’t break the bank. With just a few ingredients, you can create a spooky snack that’s perfect for parties or just to enjoy at home. The combination of salty pretzels and sweet chocolate makes for a delightful treat that everyone will love.
The image shows a plate of chocolate-covered pretzels decorated with colorful sprinkles and candy eyes, giving them a playful, creepy vibe. Surrounding the plate are festive pumpkins and autumn leaves, setting the perfect Halloween scene. These treats are not only cute but also simple to make, making them a great choice for kids and adults alike.
Ingredients
- 1 bag of pretzels (about 8 oz)
- 1 cup chocolate chips (milk or dark)
- 1/2 cup candy eyes
- 1/2 cup Halloween-themed sprinkles
Instructions
- Melt the Chocolate: In a microwave-safe bowl, melt the chocolate chips in 30-second intervals, stirring in between until smooth.
- Dip the Pretzels: Dip each pretzel into the melted chocolate, making sure to coat it well. Let the excess chocolate drip off.
- Add Decorations: Place the dipped pretzels on a baking sheet lined with parchment paper. While the chocolate is still wet, add candy eyes and sprinkles on top.
- Let Them Set: Allow the pretzels to cool and harden completely. You can speed this up by placing them in the fridge for about 15 minutes.
- Serve and Enjoy: Once set, serve your creepy crawly pretzels on a festive platter and enjoy!
Gummy Worm Dirt Cups For A Fun, Layered Dessert
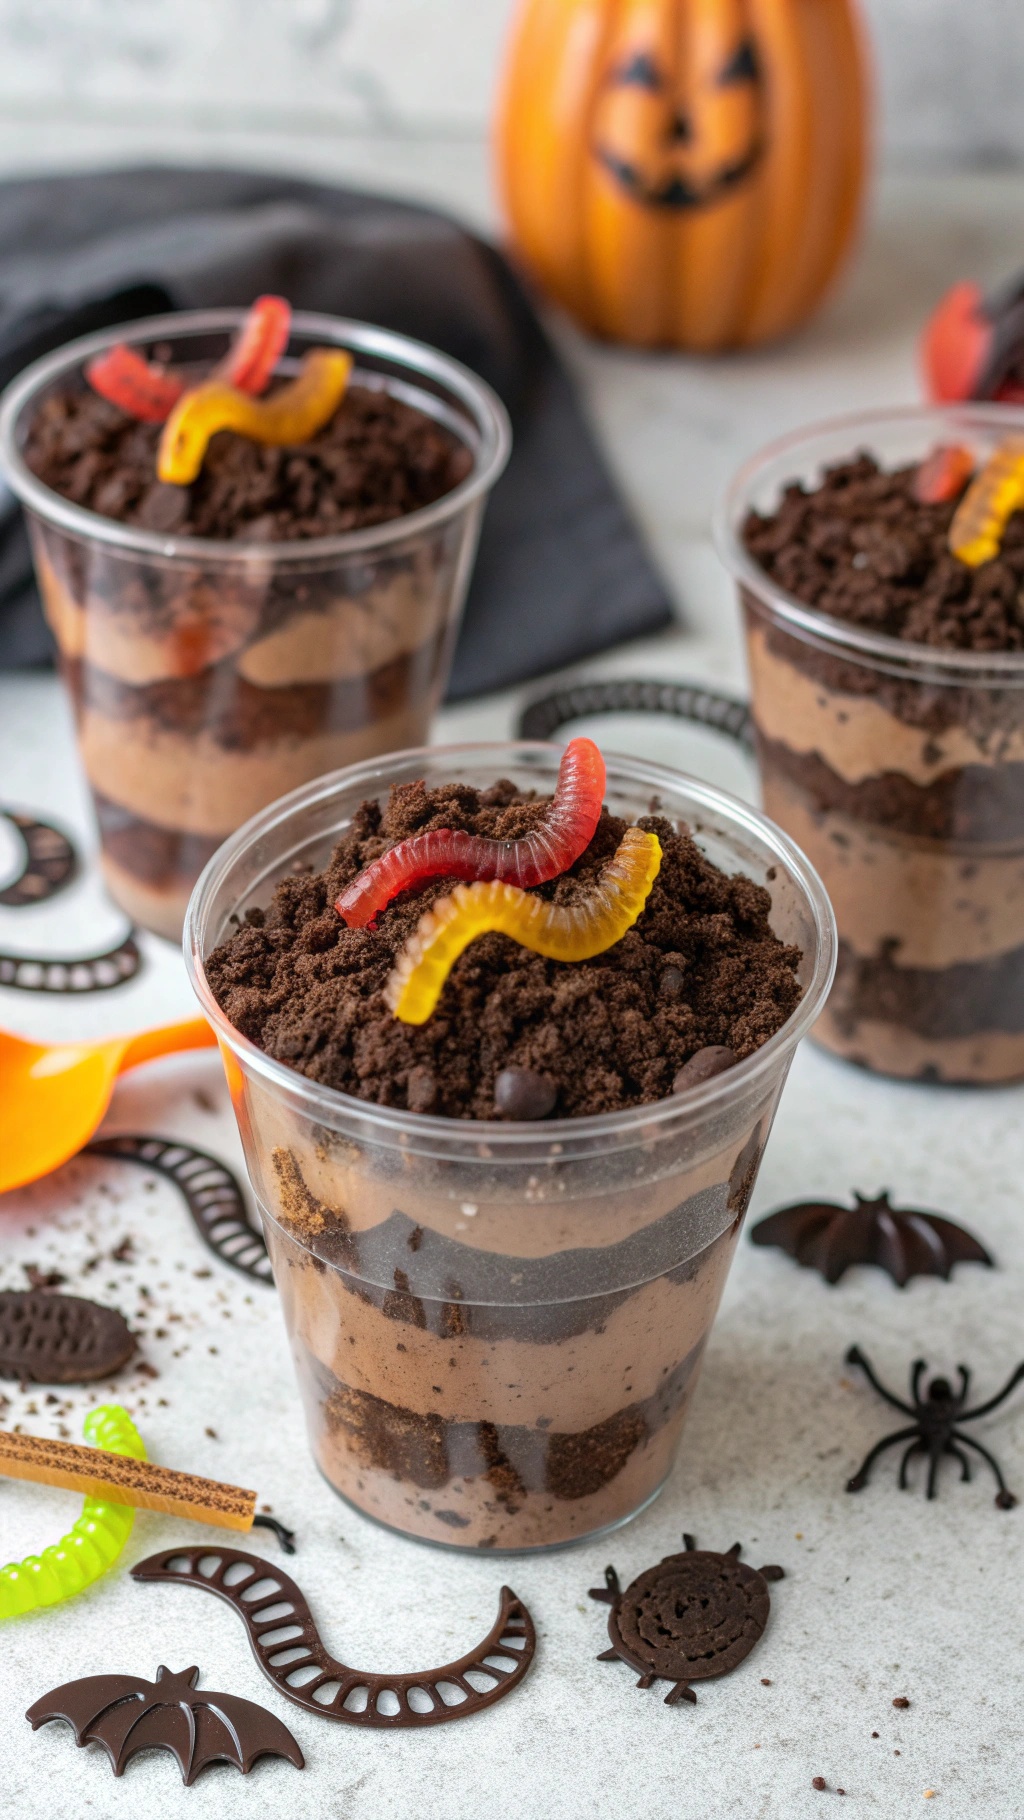
Gummy Worm Dirt Cups are a playful treat that brings a spooky twist to any Halloween gathering. These layered desserts are not only fun to look at but also simple to make, making them perfect for kids and adults alike. The combination of chocolate pudding, crushed cookies, and gummy worms creates a delightful experience that’s sure to impress.
To start, you’ll need some basic ingredients. The layers of chocolate pudding and crushed Oreos mimic the look of dirt, while the gummy worms add a fun and creepy element. These cups can be prepared in advance, making them a great option for busy Halloween festivities.
Gather your supplies and get ready to create a dessert that’s both delicious and visually appealing. These cups are a hit at parties and are sure to bring smiles to everyone’s faces!
Ingredients
- 1 package (3.9 oz) chocolate instant pudding mix
- 2 cups milk
- 1 package (15.35 oz) Oreo cookies, crushed
- 1 cup whipped topping
- Gummy worms for decoration
Instructions
- In a mixing bowl, whisk together the chocolate pudding mix and milk until smooth. Let it sit for about 5 minutes to thicken.
- In clear cups, layer the chocolate pudding at the bottom, followed by a layer of crushed Oreos.
- Add a layer of whipped topping, then repeat the layers until the cups are filled.
- Top each cup with a generous amount of crushed Oreos to resemble dirt.
- Finally, place gummy worms on top for decoration. Serve immediately or refrigerate until ready to enjoy.
Boo-Tiful Chocolate Bark For A Quick And Easy Treat
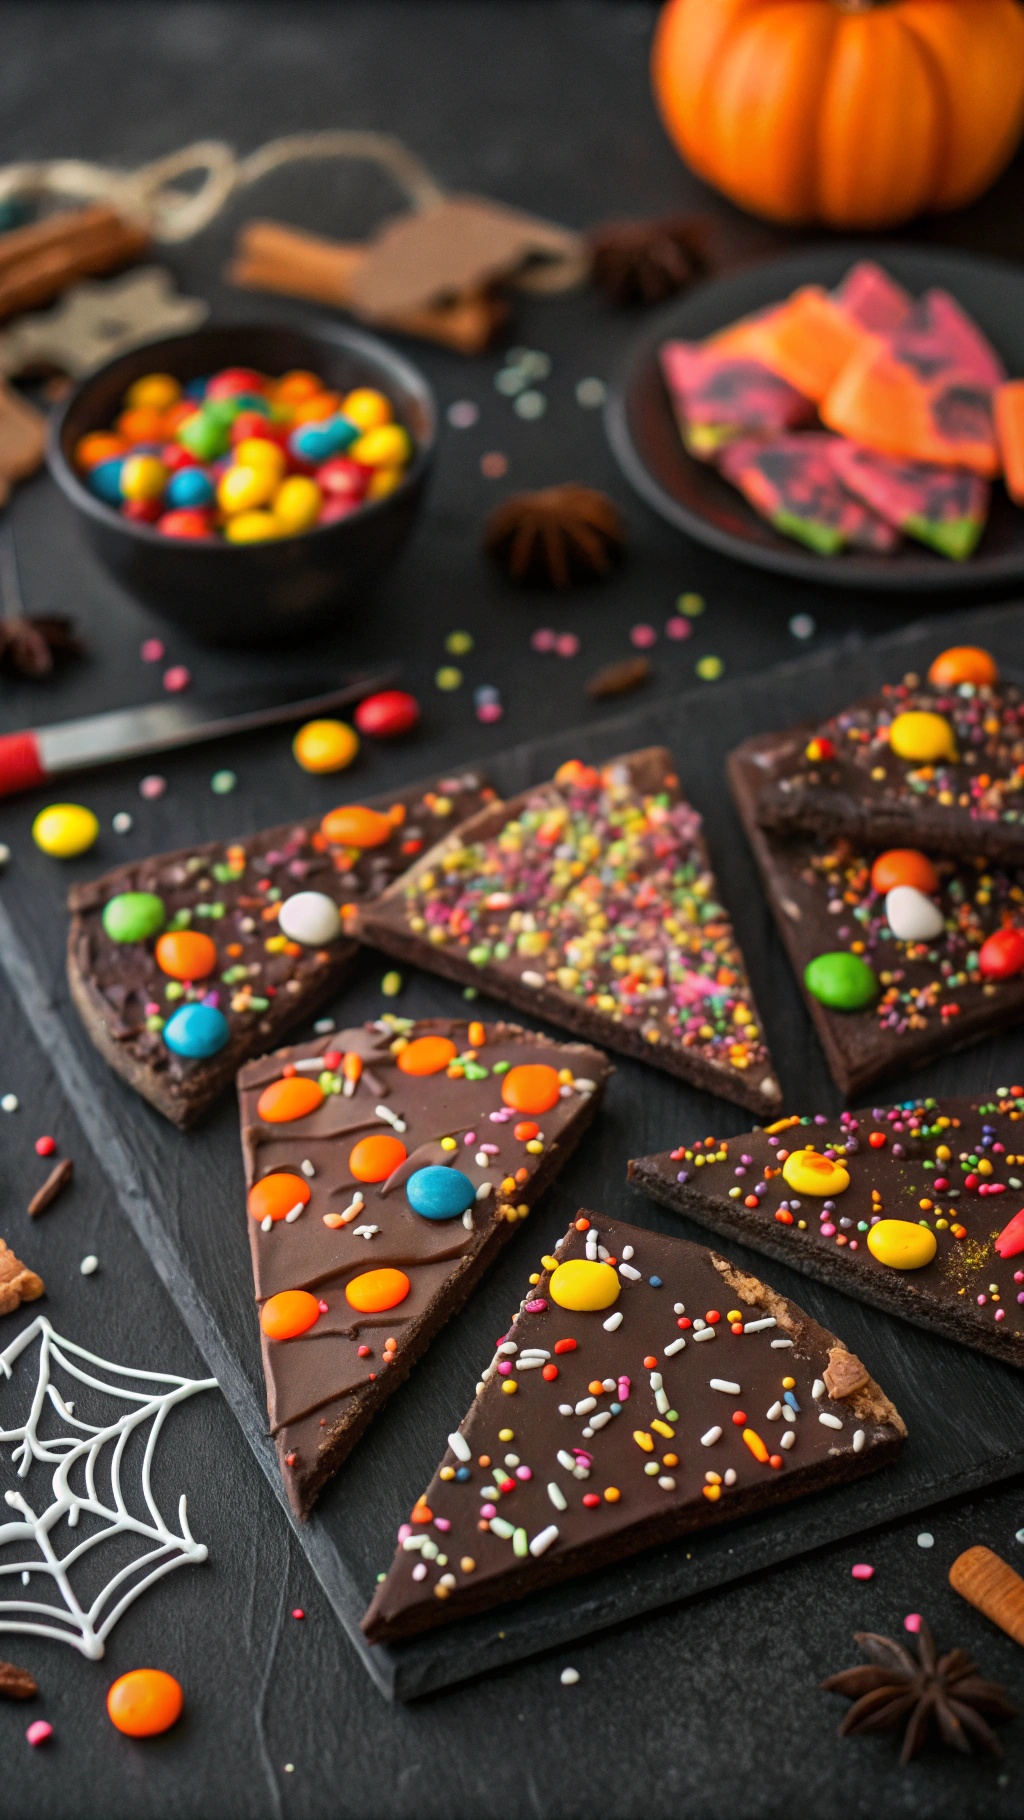
Chocolate bark is a fun and simple treat that fits perfectly into the Halloween spirit. This colorful creation is not only tasty but also visually appealing, making it a hit at any gathering. You can whip it up in no time and keep it budget-friendly, too!
To make your chocolate bark, start with melting some chocolate. You can use dark, milk, or white chocolate depending on your preference. Once melted, pour it onto a lined baking sheet and spread it out evenly. The fun part comes next: decorating! Use an assortment of candies, sprinkles, and even nuts to create a festive design. Think of vibrant colors that pop against the chocolate base.
Let the bark cool and harden, then break it into pieces. It’s perfect for sharing or for a spooky snack while watching Halloween movies. Plus, it’s a great activity to do with kids, letting them unleash their creativity!
Ingredients
- 2 cups chocolate chips (dark, milk, or white)
- 1 cup assorted candies (M&Ms, gummy worms, etc.)
- 1/2 cup sprinkles
- Optional: nuts or dried fruit
Instructions
- Prepare the Baking Sheet: Line a baking sheet with parchment paper.
- Melting the Chocolate: In a microwave-safe bowl, melt the chocolate chips in 30-second intervals, stirring until smooth.
- Spread the Chocolate: Pour the melted chocolate onto the prepared baking sheet and spread it out evenly.
- Add Toppings: Sprinkle the assorted candies, sprinkles, and any other toppings over the melted chocolate.
- Cool and Break: Let the chocolate cool at room temperature or in the fridge until it hardens. Once set, break it into pieces.


Comments
Post a Comment