10 Easy Gluten Free Desserts You Can Make with Everyday Ingredients
10 Easy Gluten Free Desserts You Can Make with Everyday Ingredients
Craving something sweet but need to keep it gluten-free? You’re in the right place! This collection of easy gluten-free desserts uses everyday ingredients you probably already have in your pantry. Say goodbye to complicated recipes and hello to delicious treats that everyone can enjoy, whether you have dietary restrictions or just love a good dessert!
Irresistible No-Bake Peanut Butter Bars For Quick Treats
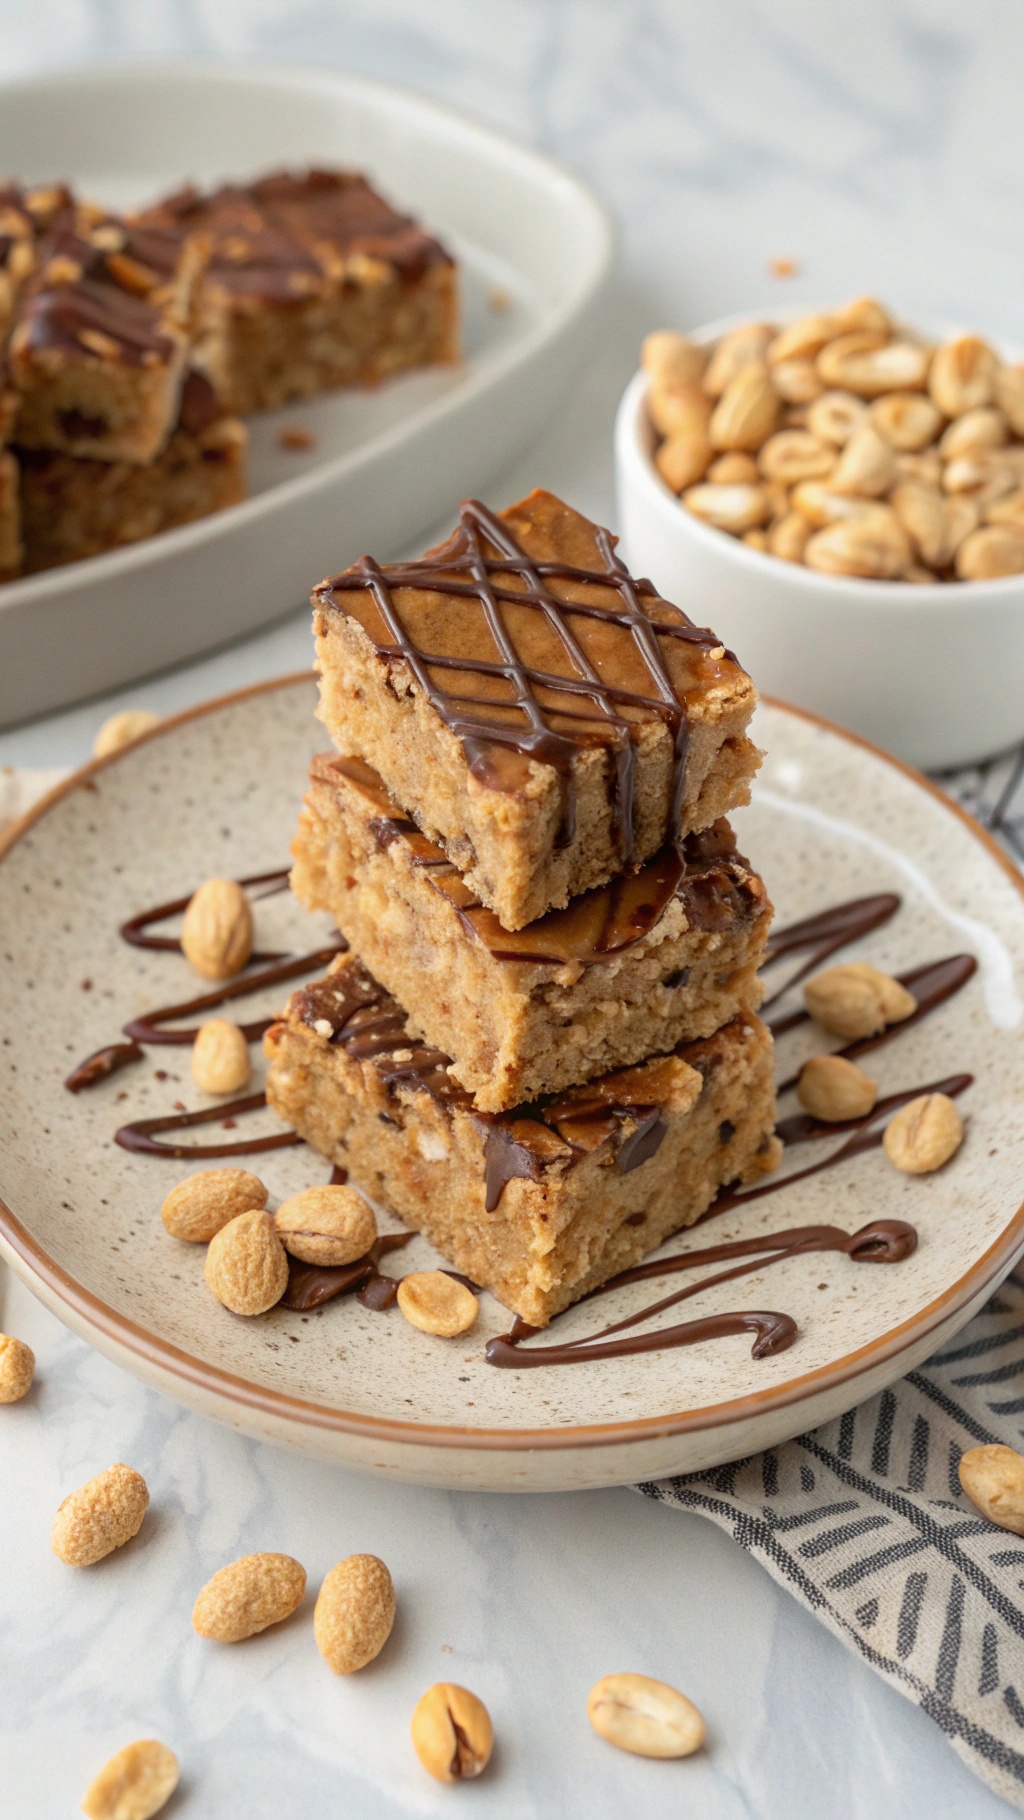
No-bake peanut butter bars are a fantastic treat that everyone will love. These bars are rich, creamy, and packed with flavor. They are perfect for satisfying your sweet tooth without the hassle of baking. Plus, they use simple ingredients that you probably already have at home.
In the image, you can see a stack of delicious peanut butter bars drizzled with chocolate. The bars are golden brown and look incredibly inviting. Surrounding them are some peanuts, adding a nice touch of texture and flavor. This dessert is not only easy to make but also gluten-free, making it a great option for those with dietary restrictions.
Making these bars is a breeze. You just mix the ingredients, press them into a pan, and let them chill. They are perfect for a quick snack or dessert. Serve them at parties, or keep them in the fridge for a sweet treat whenever you need it!
Ingredients
- 1 cup natural peanut butter
- 1/2 cup honey or maple syrup
- 2 cups gluten-free rolled oats
- 1/2 cup chocolate chips (optional)
- 1/4 cup chopped nuts (optional)
- 1/4 cup dried fruit (optional)
- 1 teaspoon vanilla extract
Instructions
- Prepare the Pan: Line an 8x8 inch baking dish with parchment paper, leaving some overhang for easy removal.
- Mix Ingredients: In a large bowl, combine the peanut butter, honey, and vanilla extract. Stir until smooth. Add the rolled oats and mix until fully incorporated. If desired, fold in chocolate chips, nuts, or dried fruit.
- Press Mixture: Transfer the mixture to the prepared baking dish. Press it down firmly and evenly using a spatula or your hands.
- Chill: Refrigerate the bars for at least 1-2 hours until firm.
- Cut and Serve: Once set, lift the bars out of the pan using the parchment paper. Cut into squares or rectangles and enjoy!
Creamy Banana Pudding With A Gluten-Free Twist
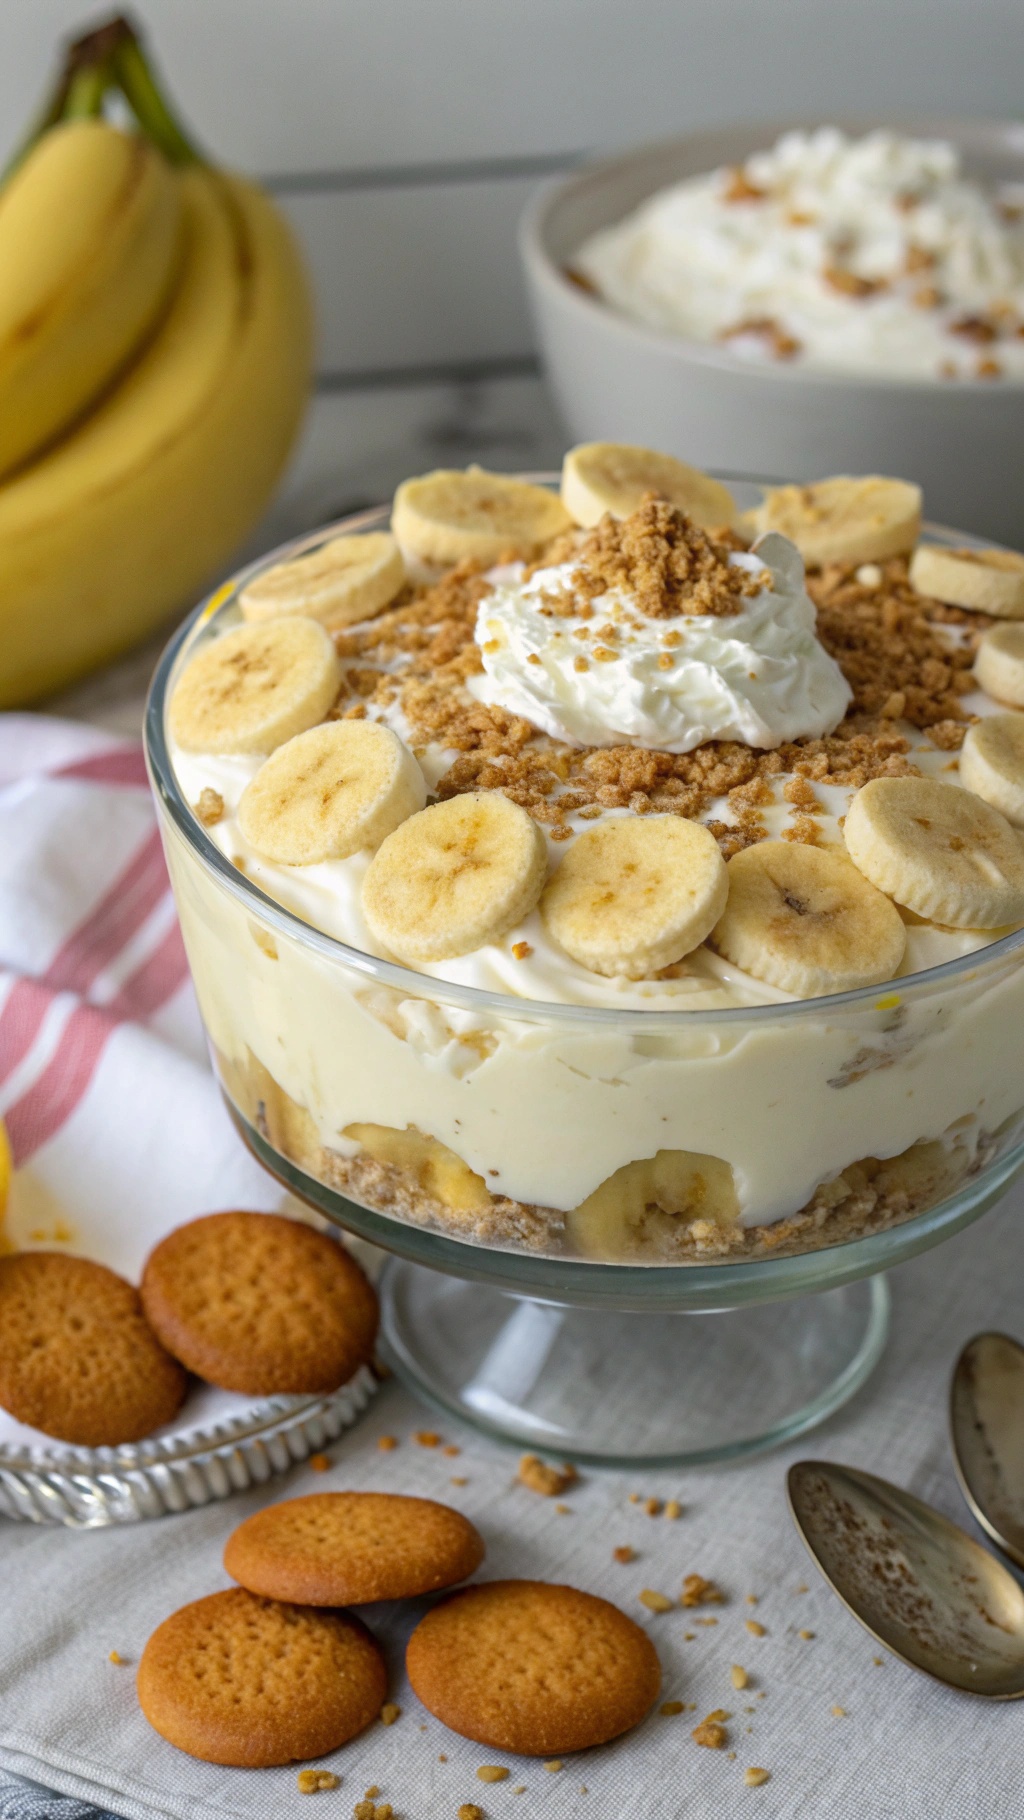
This creamy banana pudding is a delightful treat that everyone can enjoy, especially those looking for gluten-free options. The image showcases a beautiful glass dish filled with layers of smooth pudding, fresh banana slices, and a sprinkle of crushed cookies on top. The vibrant yellow of the bananas adds a cheerful touch, while the whipped cream gives it a light and fluffy finish.
Using gluten-free cookies instead of traditional ones makes this dessert accessible for those with dietary restrictions. The combination of textures—from the creamy pudding to the crunchy cookie topping—creates a satisfying experience in every bite. Plus, it’s simple to make with everyday ingredients!
Let’s get started on this easy recipe that’s perfect for any occasion!
Ingredients
- 2 ripe bananas, sliced
- 2 cups gluten-free vanilla pudding mix
- 4 cups milk
- 1 teaspoon vanilla extract
- 1 cup whipped cream
- 1 cup gluten-free cookies, crushed (like vanilla wafers)
Instructions
- Prepare the Pudding: In a large bowl, whisk together the gluten-free vanilla pudding mix and milk until smooth. Stir in the vanilla extract.
- Layer the Ingredients: In a glass dish, start with a layer of crushed cookies, followed by a layer of pudding, and then a layer of banana slices. Repeat the layers until all ingredients are used, finishing with pudding on top.
- Add Whipped Cream: Spread whipped cream over the top layer of pudding. Sprinkle with additional crushed cookies for garnish.
- Chill: Cover the dish and refrigerate for at least 2 hours before serving to allow the flavors to meld.
- Serve: Scoop out portions and enjoy this creamy, gluten-free banana pudding!
Easy Fruit Sorbet For A Refreshing Dessert
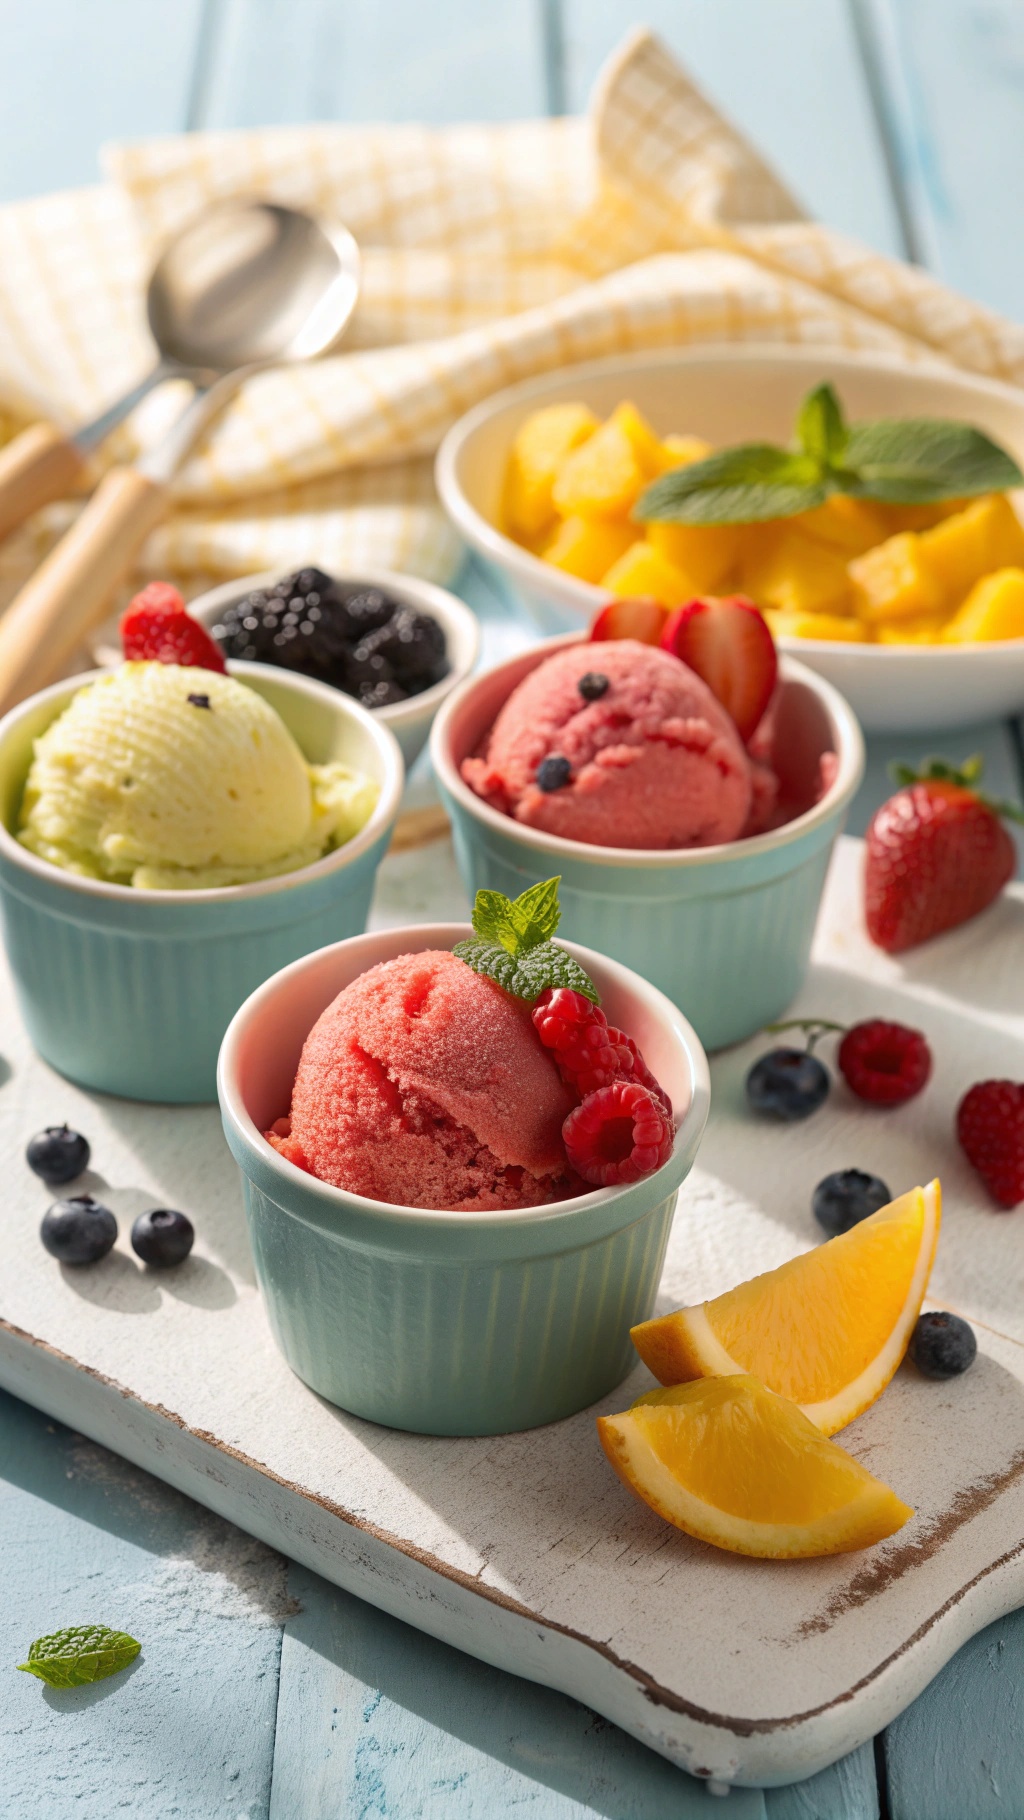
Fruit sorbet is a fantastic way to enjoy a sweet treat without any gluten. It’s light, refreshing, and perfect for warm days. The image shows vibrant scoops of sorbet in lovely pastel bowls, surrounded by fresh fruits like strawberries, blueberries, and oranges. Each scoop looks inviting, making it hard to resist!
Making sorbet at home is simple. You can use any fruit you love. Just blend it with a bit of sweetener and freeze. The result is a smooth, icy dessert that’s sure to impress. Plus, you can customize it to your taste!
Here’s a quick recipe to whip up your own fruit sorbet.
Ingredients
- 4 cups fresh fruit (like strawberries, mangoes, or raspberries)
- 1/2 cup granulated sugar (adjust based on fruit sweetness)
- 1 tablespoon lemon juice
- 1/2 cup water
Instructions
- Prepare the Fruit: Wash and chop your fruit into smaller pieces.
- Blend: In a blender, combine the fruit, sugar, lemon juice, and water. Blend until smooth.
- Taste and Adjust: Check the sweetness. Add more sugar if needed and blend again.
- Freeze: Pour the mixture into a shallow dish and freeze for about 4-6 hours, stirring every hour to break up ice crystals.
- Serve: Once frozen, scoop into bowls and enjoy your refreshing sorbet!
Simple Rice Pudding For Cozy Evenings
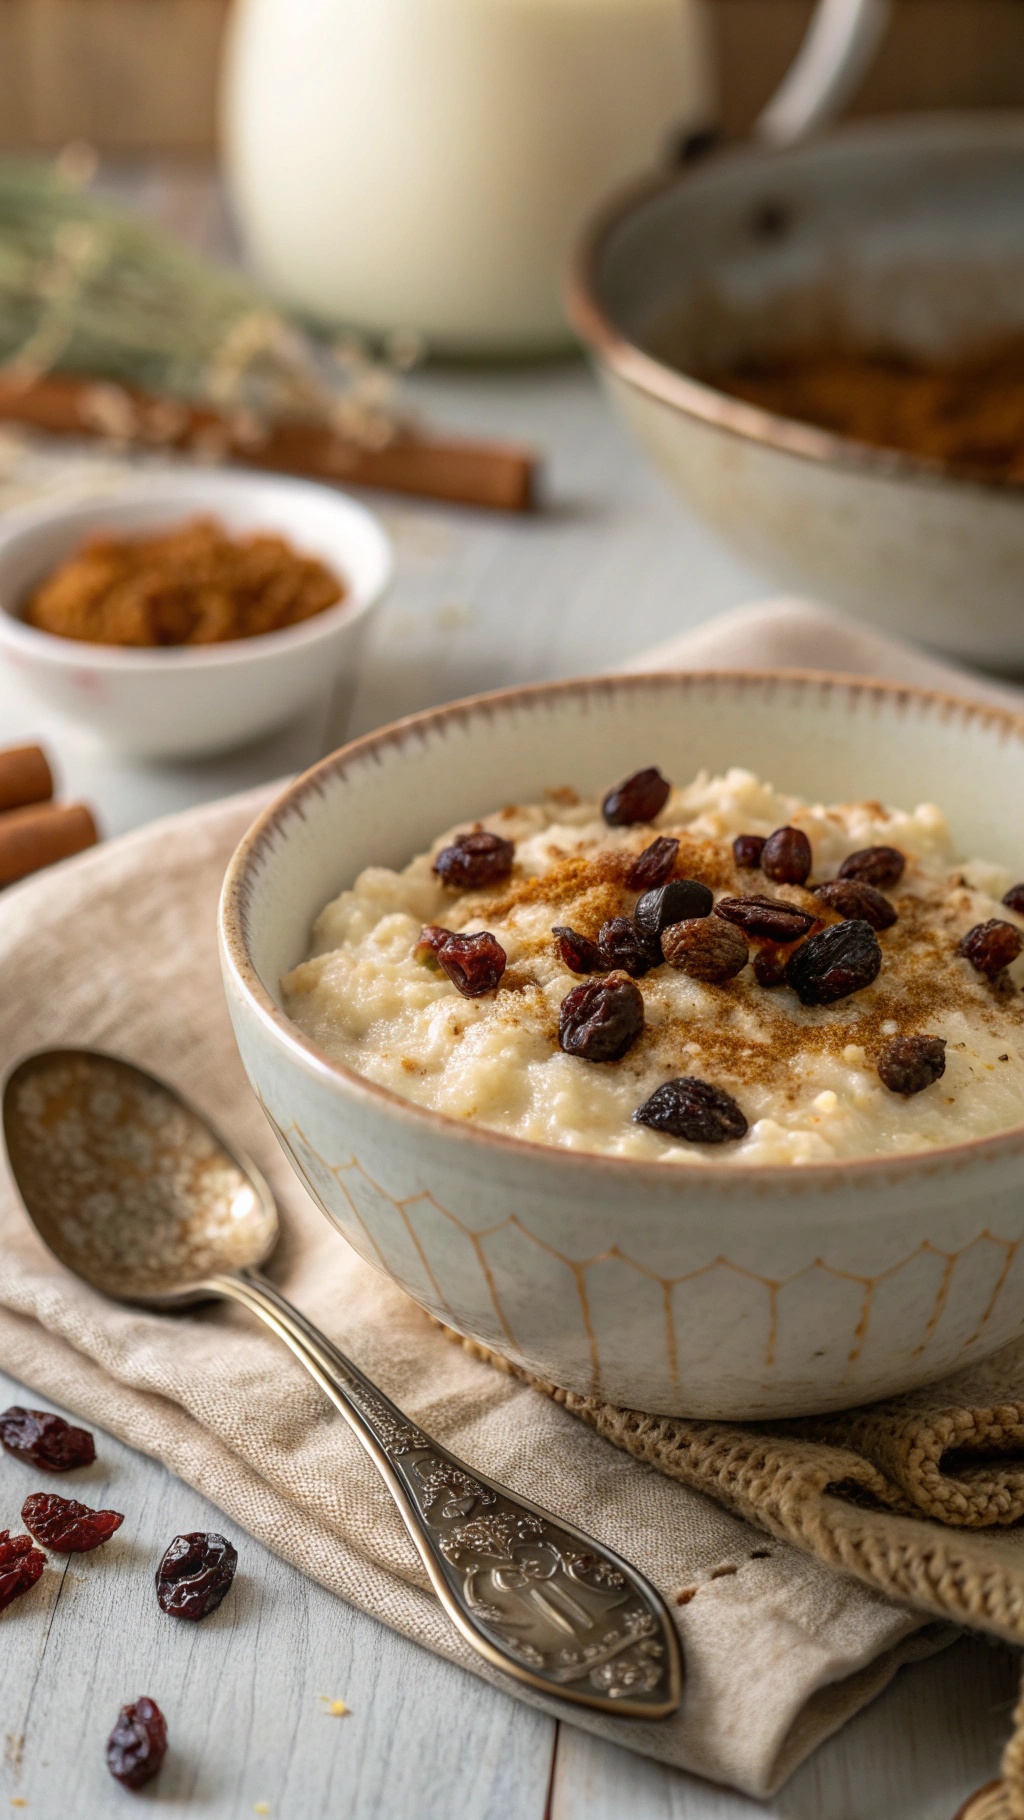
Rice pudding is a classic dessert that brings warmth and comfort, especially on chilly evenings. This simple recipe uses everyday ingredients, making it easy to whip up whenever you crave something sweet. The creamy texture and the hint of cinnamon create a delightful treat that feels like a warm hug in a bowl.
In the image, you can see a beautifully presented bowl of rice pudding topped with plump raisins and a sprinkle of cinnamon. The soft, creamy rice contrasts with the chewy raisins, adding a lovely texture. The background features a few spices and a glass of milk, hinting at the comforting flavors that come together in this dish.
This rice pudding is not only gluten-free but also a great way to use leftover rice. It’s perfect for sharing with family or enjoying all by yourself. Let’s get started on making this cozy dessert!
Ingredients
- 1 cup cooked rice
- 2 cups milk (or dairy-free alternative)
- 1/4 cup sugar
- 1/2 teaspoon vanilla extract
- 1/2 teaspoon ground cinnamon
- 1/4 cup raisins
- Pinch of salt
Instructions
- Combine Ingredients: In a medium saucepan, mix the cooked rice, milk, sugar, vanilla extract, cinnamon, and salt.
- Cook: Heat the mixture over medium heat, stirring occasionally. Cook for about 15-20 minutes until the pudding thickens and becomes creamy.
- Add Raisins: Stir in the raisins and cook for an additional 5 minutes.
- Serve: Remove from heat and let it cool slightly. Serve warm, topped with extra cinnamon if desired.
Zesty Lemon Bars With A Gluten-Free Crust
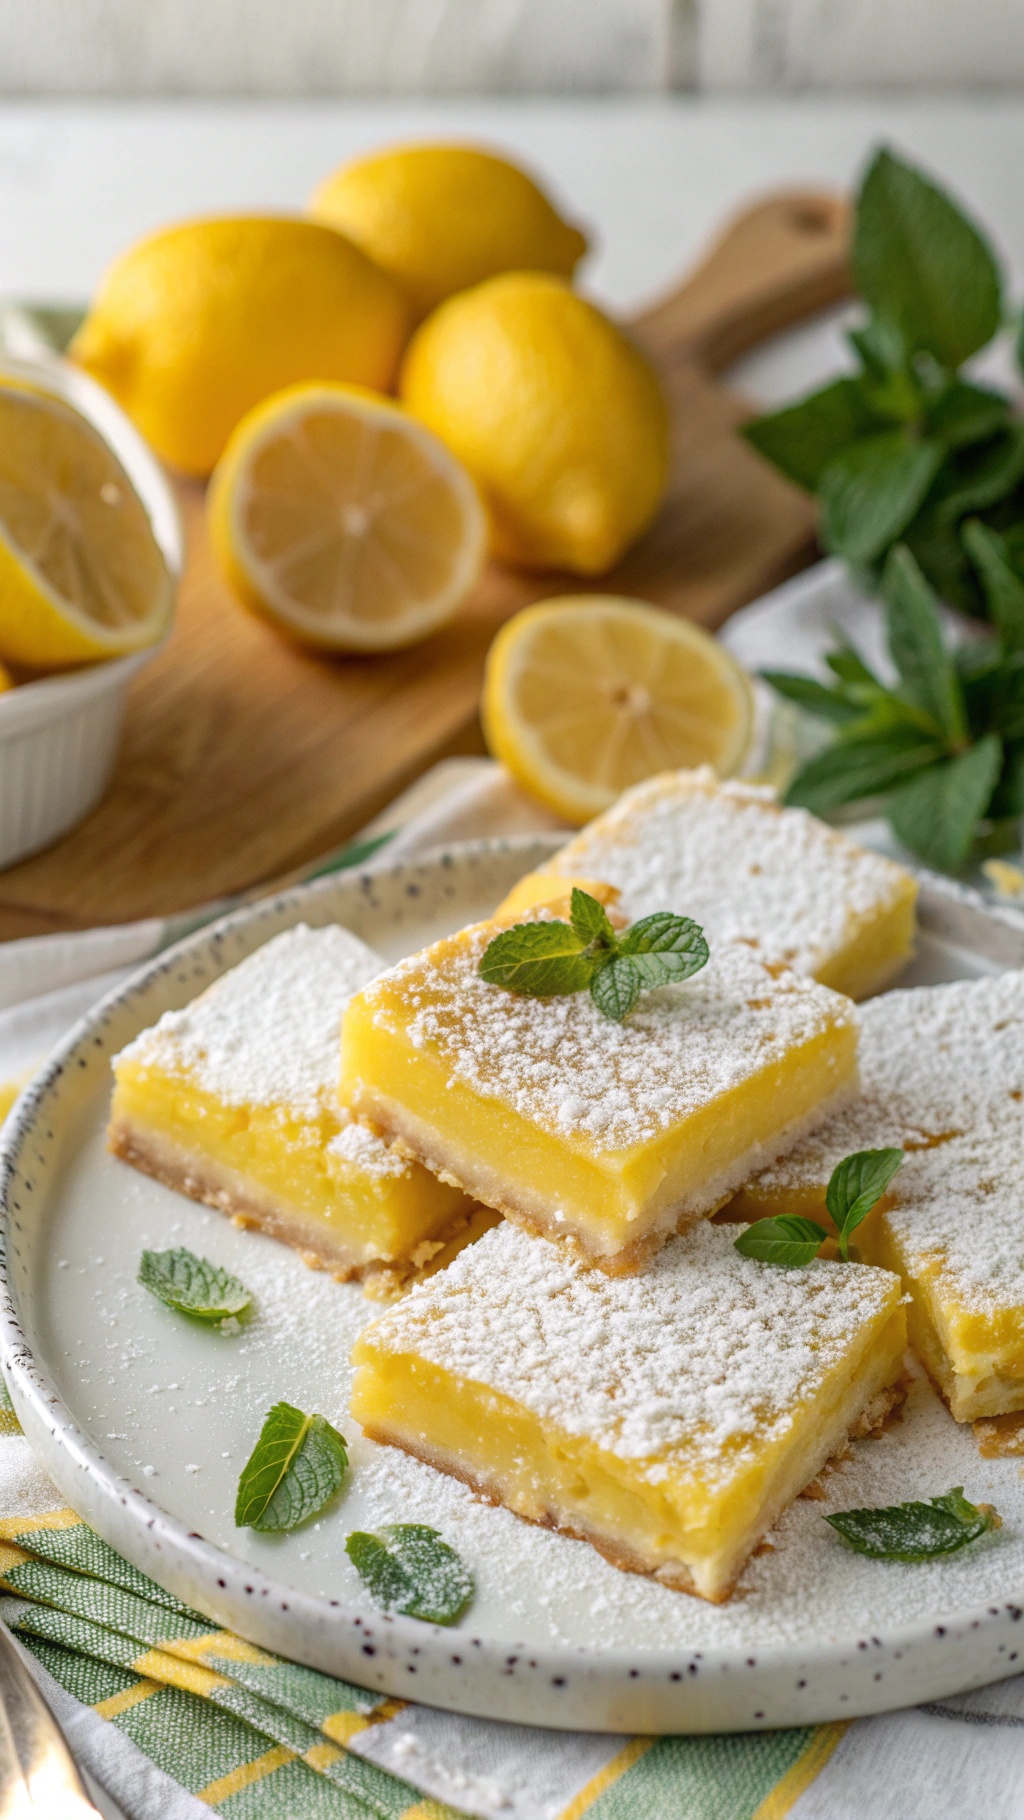
These zesty lemon bars are a delightful treat that everyone can enjoy, especially those looking for gluten-free options. The bright yellow filling is bursting with fresh lemon flavor, balanced perfectly by a buttery, gluten-free crust. Topped with a light dusting of powdered sugar and fresh mint leaves, they are as beautiful as they are delicious.
Making these lemon bars is simple and requires everyday ingredients. You’ll love how easy it is to whip up a batch for a sunny afternoon or a special gathering. The combination of tart lemon and sweet crust makes each bite refreshing and satisfying.
Let’s get into the recipe so you can enjoy these tasty treats!
Ingredients
- 1 1/2 cups gluten-free all-purpose flour
- 1/2 cup powdered sugar
- 1/2 cup unsalted butter, softened
- 1 cup granulated sugar
- 2 large eggs
- 1/2 cup fresh lemon juice
- 1 tablespoon lemon zest
- 1/2 teaspoon baking powder
- 1/4 teaspoon salt
Instructions
- Preheat your oven to 350°F (175°C). Grease an 8x8 inch baking dish.
- In a mixing bowl, combine the gluten-free flour, powdered sugar, and softened butter. Mix until crumbly, then press the mixture into the bottom of the prepared baking dish to form the crust.
- Bake the crust for about 15 minutes, or until lightly golden.
- While the crust is baking, whisk together the granulated sugar, eggs, lemon juice, lemon zest, baking powder, and salt in a separate bowl until smooth.
- Pour the lemon mixture over the baked crust and return to the oven. Bake for an additional 20-25 minutes, or until the filling is set.
- Allow the bars to cool completely before slicing. Dust with powdered sugar and garnish with fresh mint leaves before serving.
Cinnamon Sugar Apple Chips For A Healthy Snack
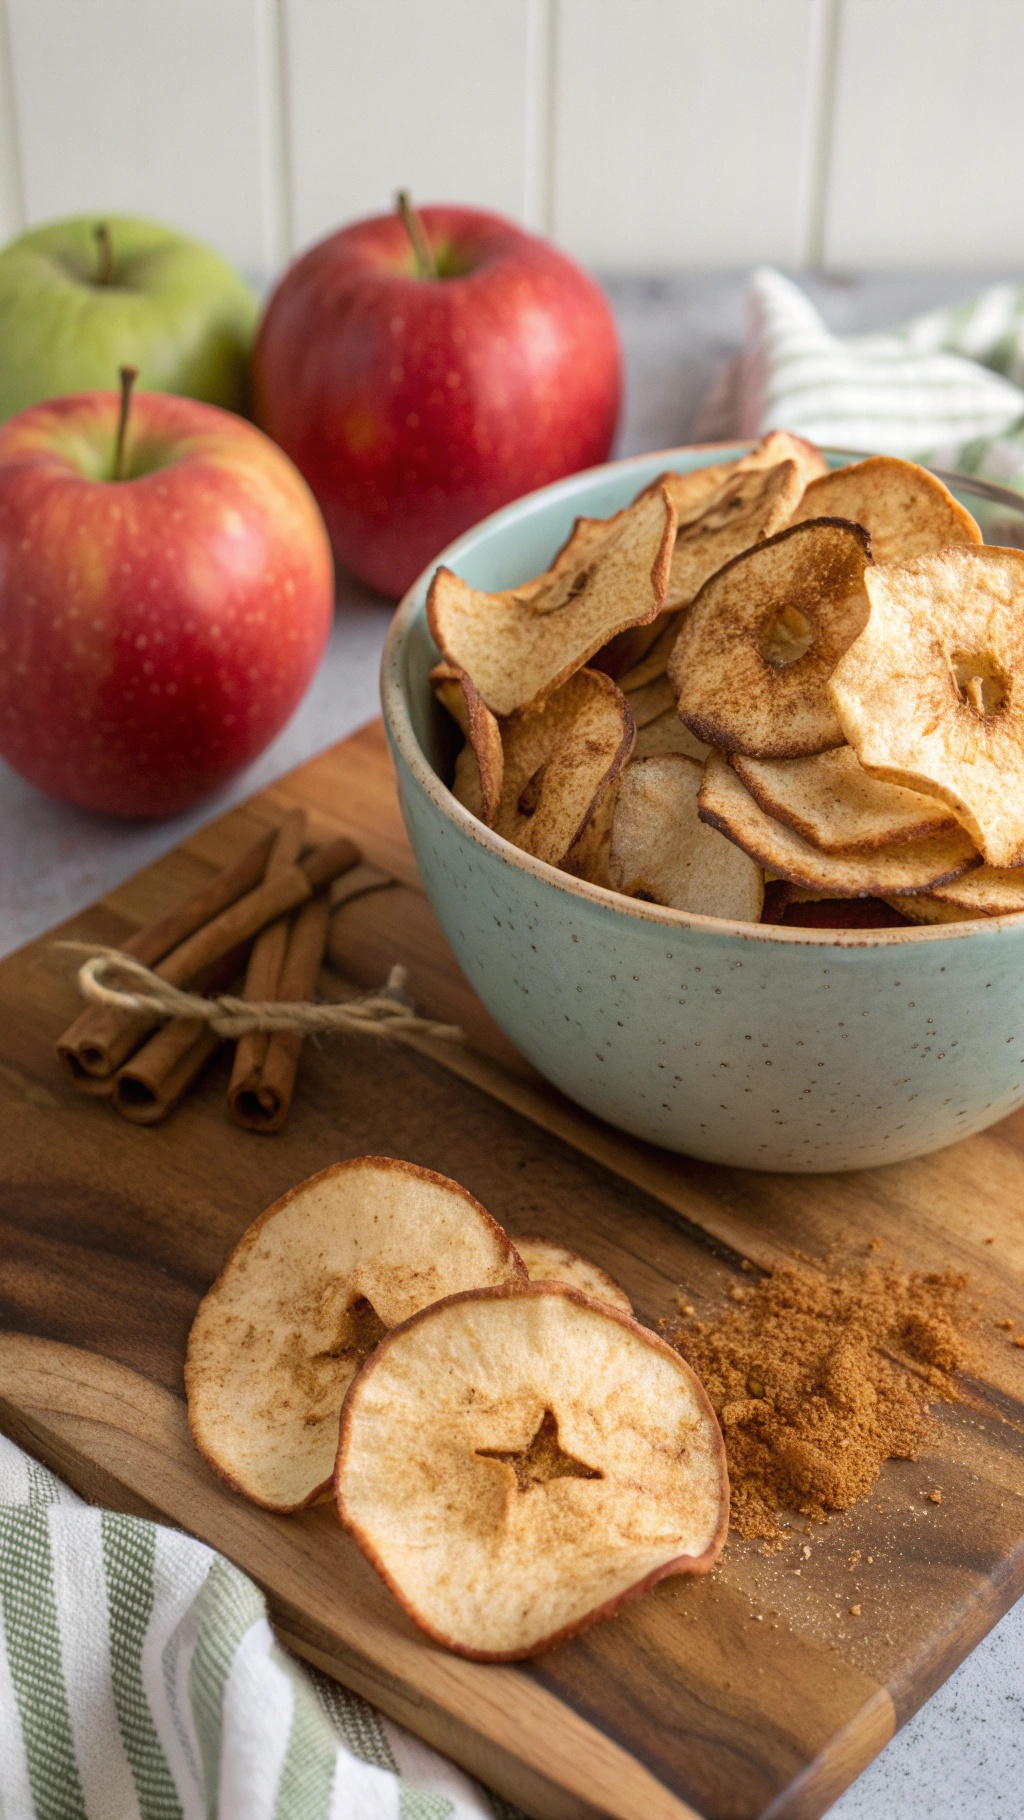
Cinnamon sugar apple chips are a delightful way to enjoy a healthy snack. These crispy treats are made from fresh apples, sliced thin and baked to perfection. The combination of cinnamon and sugar adds a sweet touch that makes them irresistible. You can easily make these at home using simple ingredients you likely already have in your pantry.
In the image, you can see a bowl filled with golden-brown apple chips, perfectly crisp and ready to munch on. Surrounding the bowl are fresh red and green apples, showcasing the main ingredient. A sprinkle of cinnamon sugar lies on the wooden board, hinting at the flavor that awaits. This snack is not only tasty but also gluten-free, making it a great option for everyone.
Making these apple chips is straightforward and fun. They are perfect for snacking on their own or adding to a trail mix. Plus, they store well, so you can make a big batch and enjoy them throughout the week!
Ingredients
- 2 large apples (any variety)
- 1 tablespoon granulated sugar
- 1 teaspoon ground cinnamon
- Cooking spray or parchment paper
Instructions
- Preheat your oven to 200°F (95°C).
- Slice the apples thinly using a mandoline or sharp knife. Remove the seeds.
- In a small bowl, mix the sugar and cinnamon together.
- Arrange the apple slices on a baking sheet lined with parchment paper or sprayed with cooking spray.
- Sprinkle the cinnamon sugar mixture evenly over the apple slices.
- Bake for about 1-2 hours, flipping halfway through, until the chips are crisp.
- Let them cool completely before enjoying. Store in an airtight container.
Chocolate Dipped Strawberries For Elegant Occasions

Chocolate dipped strawberries are a classic treat that brings a touch of elegance to any occasion. They are simple to make and require just a few everyday ingredients. The image showcases beautifully decorated strawberries, some drizzled with colorful chocolate and others adorned with sprinkles. This delightful dessert is perfect for celebrations, romantic dinners, or just a sweet indulgence.
To make these treats, start with fresh strawberries. The key is to choose ripe, firm berries for the best flavor and presentation. Melt dark, milk, or white chocolate in a microwave or double boiler, then dip each strawberry, allowing the excess chocolate to drip off. For a fun twist, you can add toppings like sprinkles, crushed nuts, or coconut flakes while the chocolate is still wet.
These chocolate dipped strawberries not only look stunning but also taste amazing. They combine the sweetness of chocolate with the tartness of the strawberries, creating a perfect balance. Serve them on a decorative platter, and they will surely impress your guests!
Ingredients
- 1 pound fresh strawberries
- 8 ounces dark chocolate (or milk/white chocolate)
- 1 tablespoon coconut oil (optional, for smoothness)
- Sprinkles or toppings of your choice
Instructions
- Wash and dry the strawberries thoroughly. Make sure they are completely dry for the chocolate to stick.
- In a microwave-safe bowl, combine the chocolate and coconut oil. Heat in 30-second intervals, stirring in between, until melted and smooth.
- Dip each strawberry into the melted chocolate, covering about two-thirds of the berry. Allow excess chocolate to drip off.
- If using toppings, sprinkle them on while the chocolate is still wet.
- Place the dipped strawberries on a parchment-lined tray and let them cool until the chocolate hardens.
- Enjoy your elegant chocolate dipped strawberries!
Smooth And Silky Coconut Macaroons For A Chewy Treat
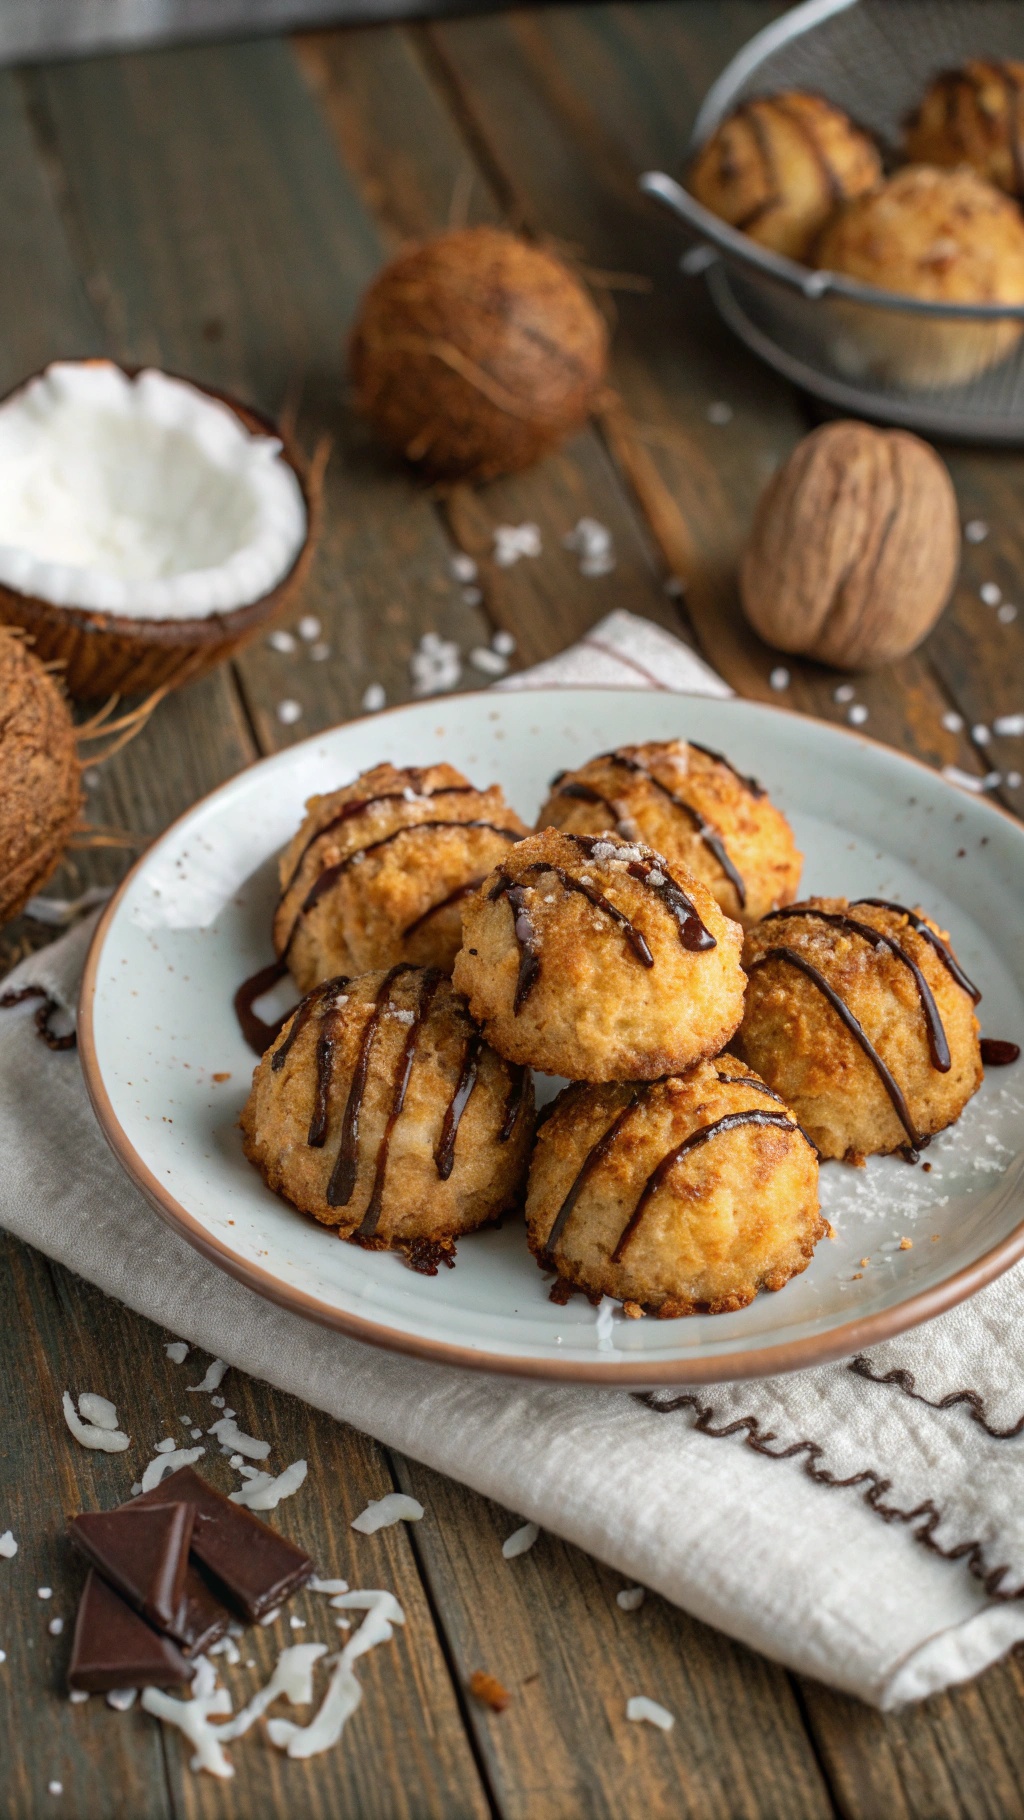
Coconut macaroons are a delightful treat that brings a taste of the tropics right to your kitchen. These chewy bites are made with simple ingredients, making them an easy choice for anyone looking to whip up a gluten-free dessert. The image shows a plate of golden-brown macaroons, drizzled with rich chocolate, and sprinkled with a touch of sea salt. The texture looks inviting, with a smooth exterior and a soft, chewy center.
The beauty of coconut macaroons lies in their simplicity. You only need a few ingredients, and they come together quickly. Plus, they’re perfect for satisfying your sweet tooth without any gluten worries. Whether you’re hosting a gathering or just treating yourself, these macaroons are sure to impress.
Ingredients
- 2 2/3 cups shredded coconut (unsweetened)
- 1/2 cup granulated sugar
- 1/4 cup almond flour
- 3 large egg whites
- 1 teaspoon vanilla extract
- 1/4 teaspoon salt
- 1/2 cup dark chocolate, melted (for drizzling)
- Sea salt (for garnish)
Instructions
- Preheat your oven to 325°F (160°C) and line a baking sheet with parchment paper.
- In a large bowl, mix together the shredded coconut, sugar, almond flour, egg whites, vanilla extract, and salt until well combined.
- Using a small cookie scoop or your hands, form the mixture into small balls and place them on the prepared baking sheet, leaving space between each macaroon.
- Bake for 20-25 minutes, or until the tops are golden brown. Remove from the oven and let them cool on the baking sheet for a few minutes.
- Once cooled, drizzle the melted dark chocolate over the macaroons and sprinkle with a pinch of sea salt. Allow the chocolate to set before serving.
Sweet And Chewy Peanut Butter Rice Crispy Treats
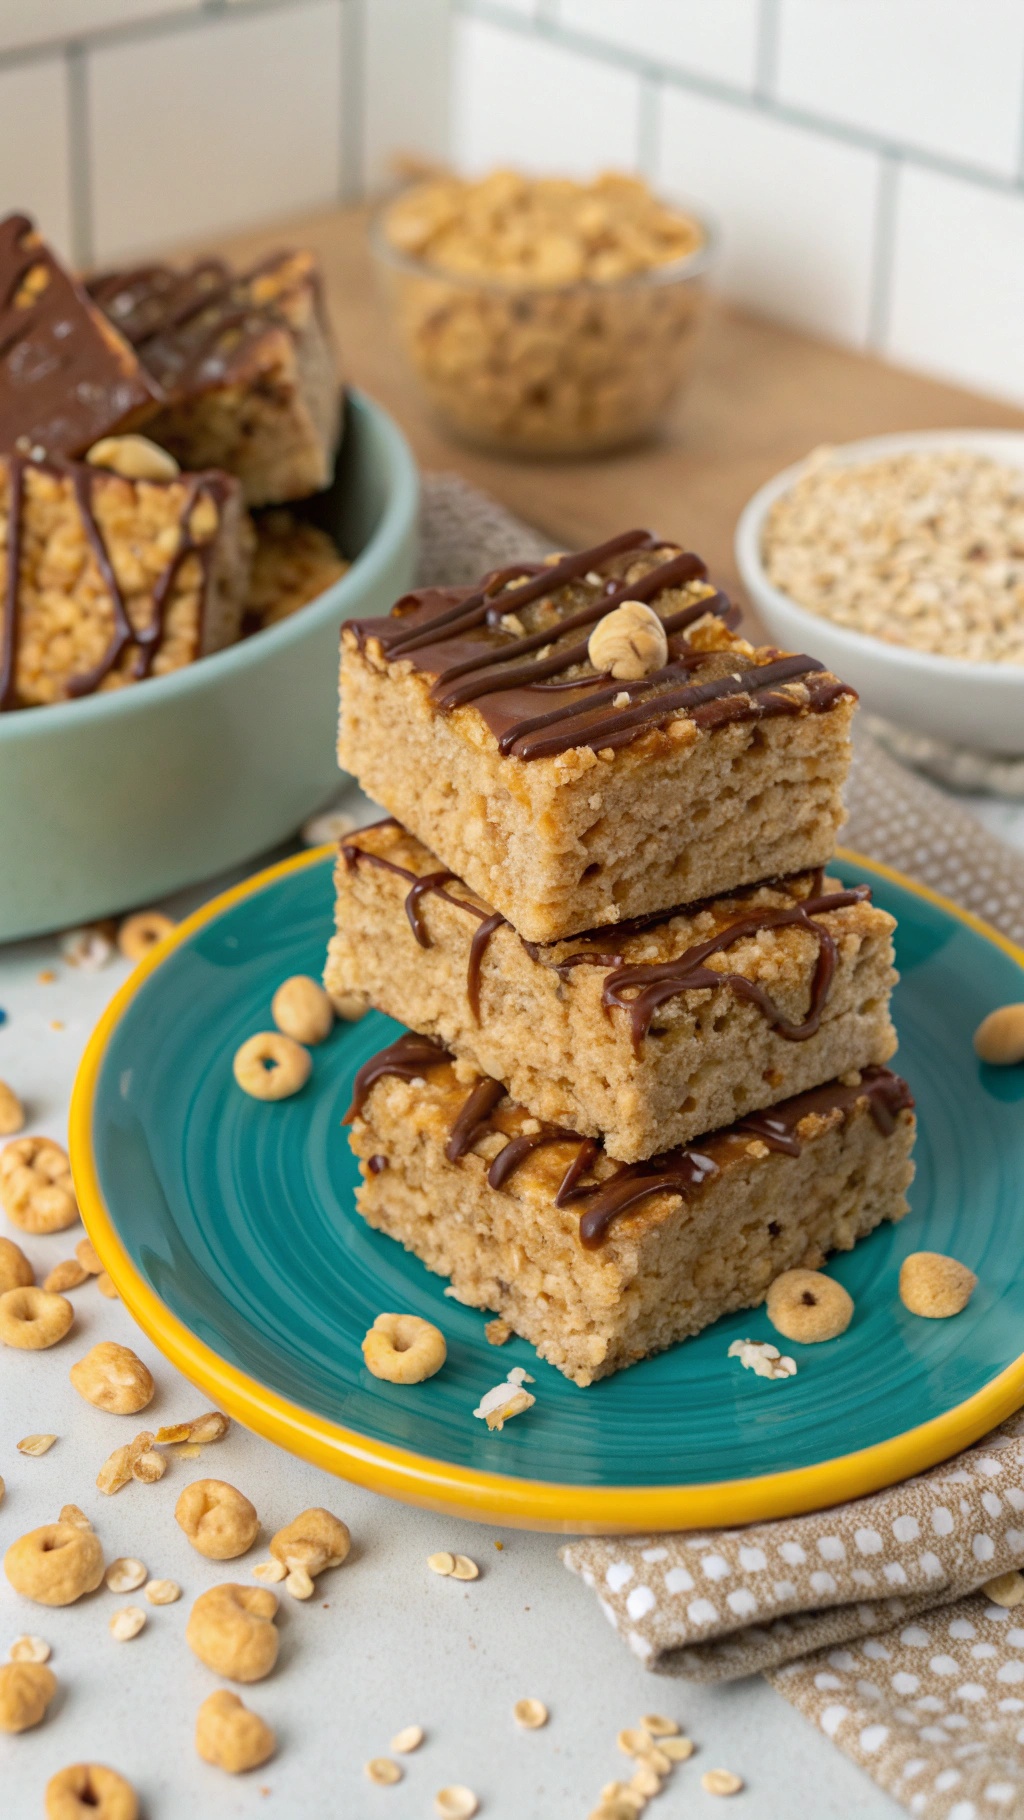
These Sweet and Chewy Peanut Butter Rice Crispy Treats are a delightful twist on the classic recipe. The image showcases a stack of golden, chewy bars drizzled with chocolate, making them look irresistible. Surrounded by scattered cereal and a bowl of more ingredients, it’s clear that this treat is easy to whip up with everyday items.
The combination of peanut butter and marshmallows creates a rich, gooey texture that pairs perfectly with the crunch of rice cereal. These treats are not only gluten-free but also a hit with kids and adults alike. They’re perfect for a quick snack or a sweet dessert after dinner.
Making these treats is simple and fun. Just gather your ingredients, and you’ll have a delicious dessert ready in no time!
Ingredients
- 4 cups rice cereal
- 1 cup peanut butter
- 1 cup mini marshmallows
- 1/4 cup honey or maple syrup
- 1/2 cup chocolate chips (optional)
- 1/4 cup chopped peanuts (optional)
Instructions
- Prepare the Pan: Line an 8x8 inch baking dish with parchment paper for easy removal.
- Melt the Mixture: In a large saucepan over low heat, combine peanut butter and honey. Stir until melted and smooth.
- Add Marshmallows: Remove from heat and stir in mini marshmallows until they are fully melted and combined.
- Mix in Cereal: Fold in the rice cereal until evenly coated with the peanut butter mixture.
- Transfer to Pan: Pour the mixture into the prepared baking dish and press down firmly to create an even layer.
- Optional Toppings: If using, melt chocolate chips and drizzle over the top. Sprinkle with chopped peanuts for added crunch.
- Cool and Cut: Allow to cool completely before cutting into squares. Enjoy your sweet and chewy treats!
Rich And Creamy Cheesecake With A Gluten-Free Crust
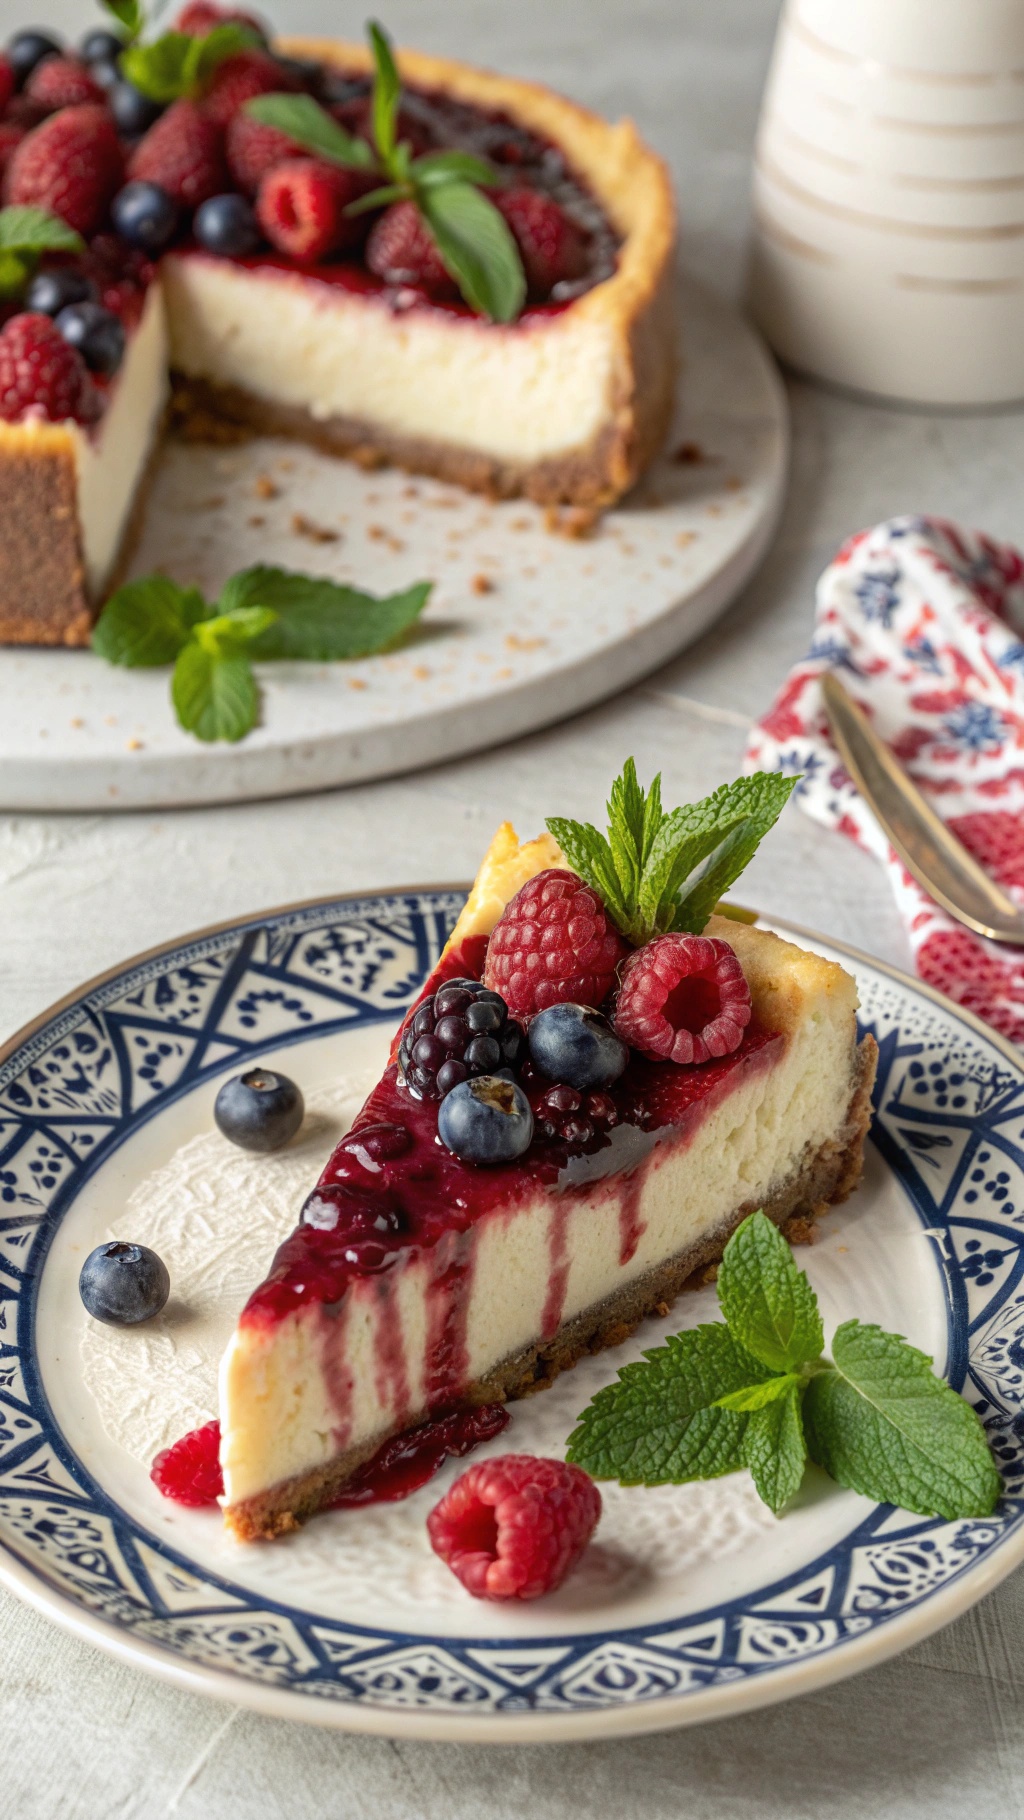
This rich and creamy cheesecake is a delightful treat that everyone can enjoy, especially those who need to avoid gluten. The image showcases a beautifully sliced cheesecake topped with fresh berries and a glossy berry sauce. The crust is golden and crumbly, made from gluten-free ingredients, making it perfect for those with dietary restrictions.
The cheesecake itself is smooth and luscious, with a hint of vanilla that pairs perfectly with the tartness of the berries. Each slice is not just a dessert; it’s a celebration of flavors and textures. The vibrant colors of the berries add a refreshing touch, making it visually appealing as well.
Making this cheesecake is easier than you might think. With simple ingredients and straightforward steps, you can whip up this dessert in no time. It’s perfect for gatherings, special occasions, or just a sweet treat after dinner.
Ingredients
- 1 ½ cups gluten-free graham cracker crumbs
- ½ cup unsalted butter, melted
- 2 cups cream cheese, softened
- 1 cup granulated sugar
- 3 large eggs
- 1 teaspoon vanilla extract
- 1 cup sour cream
- 1 cup mixed berries (raspberries, blueberries, blackberries)
- ¼ cup berry sauce (optional)
Instructions
- Preheat the oven to 325°F (160°C). Grease a 9-inch springform pan.
- In a bowl, mix the gluten-free graham cracker crumbs with melted butter until combined. Press the mixture firmly into the bottom of the prepared pan.
- In a large mixing bowl, beat the cream cheese and sugar until smooth. Add the eggs one at a time, mixing well after each addition. Stir in the vanilla extract and sour cream until fully combined.
- Pour the cheesecake batter over the crust in the springform pan. Bake for about 50-60 minutes, or until the center is set but slightly jiggly.
- Turn off the oven and let the cheesecake cool inside with the door slightly ajar for about an hour. This helps prevent cracking.
- Once cooled, refrigerate for at least 4 hours or overnight. Before serving, top with fresh berries and drizzle with berry sauce if desired.


Comments
Post a Comment