11 Delicious No Bake Desserts That Satisfy Your Cravings While Keeping You on Track
11 Delicious No Bake Desserts That Satisfy Your Cravings While Keeping You on Track
If you're craving something sweet but don't want to stray from your clean eating habits, these 11 no-bake desserts are just what you need. Packed with wholesome ingredients, they satisfy your sweet tooth without the guilt. From creamy treats to fruity delights, these recipes are quick to whip up and perfect for those moments when you need a little indulgence without compromising your goals.
Refreshing Coconut Chia Seed Pudding
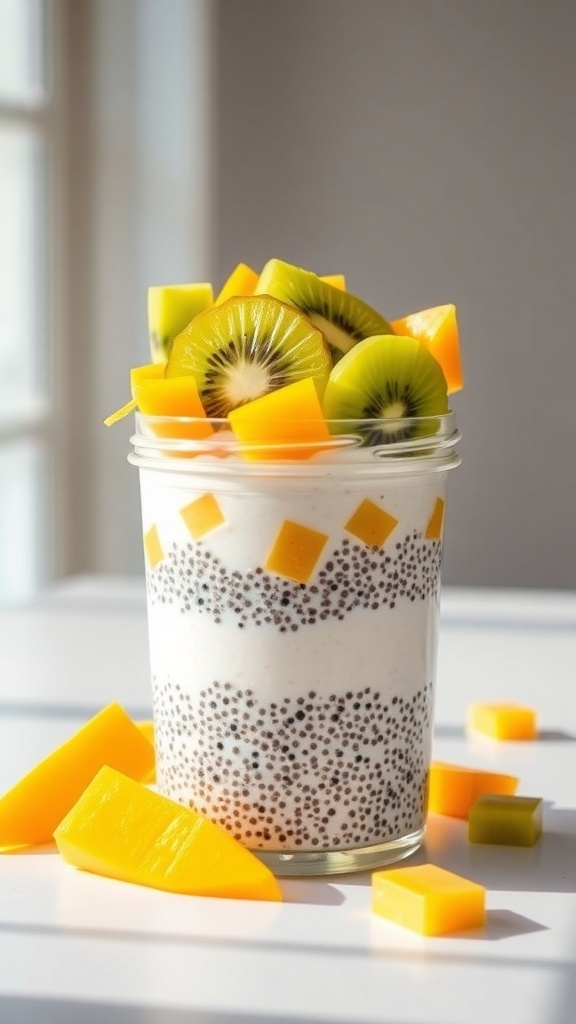
This Coconut Chia Seed Pudding is a delightful treat that satisfies your sweet tooth without straying from your clean eating goals. The image shows a beautifully layered pudding, featuring creamy coconut and tiny black chia seeds, topped with vibrant pieces of mango and kiwi. It’s not just a feast for the eyes; it’s packed with nutrients too!
Chia seeds are a fantastic source of omega-3 fatty acids, fiber, and protein. When mixed with coconut milk, they create a rich and creamy texture that feels indulgent. The fresh fruit on top adds a burst of flavor and color, making this dessert not only healthy but also visually appealing.
Making this pudding is super simple. Just mix your ingredients, let them sit, and you’re ready to enjoy a refreshing dessert that feels like a treat. Perfect for warm days or whenever you need a light snack!
Ingredients
- 1 cup coconut milk
- 1/4 cup chia seeds
- 2 tablespoons honey or maple syrup
- 1 teaspoon vanilla extract
- Fresh mango, diced
- Fresh kiwi, sliced
Instructions
- In a bowl, combine coconut milk, chia seeds, honey, and vanilla extract. Stir well to combine.
- Let the mixture sit for about 10 minutes, then stir again to prevent clumping.
- Cover and refrigerate for at least 2 hours or overnight until it thickens.
- Once thickened, layer the pudding in a glass with diced mango and sliced kiwi on top.
- Serve chilled and enjoy your refreshing treat!
Decadent No-Bake Peanut Butter Bars
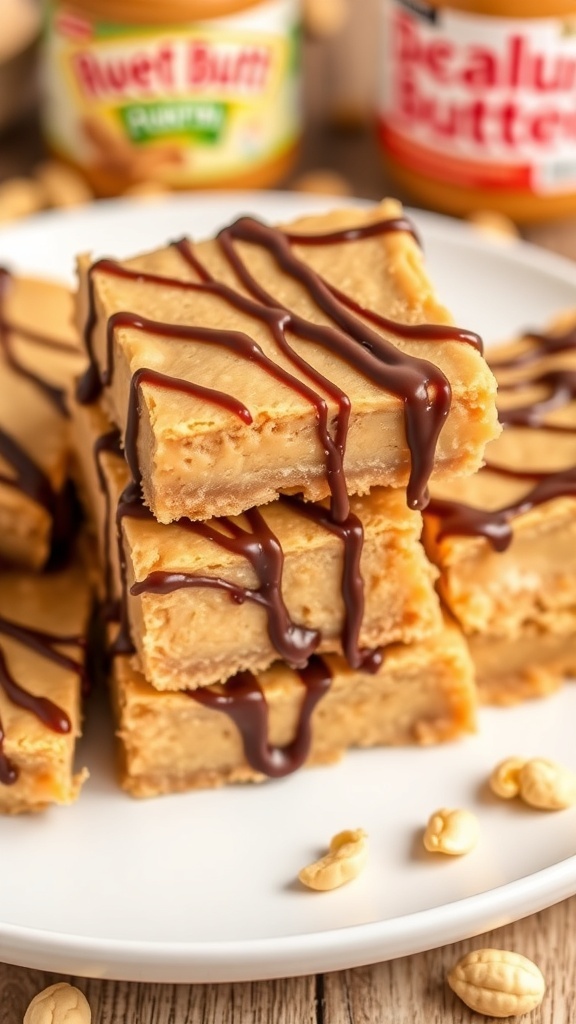
These no-bake peanut butter bars are a treat that satisfies your sweet tooth without the hassle of baking. They’re creamy, rich, and oh-so-delicious, making them a perfect snack for any time of the day. The image shows a stack of these bars drizzled with chocolate, highlighting their appealing texture and flavor. With a jar of peanut butter in the background, it’s clear that this recipe is all about that nutty goodness.
Making these bars is simple and requires just a few ingredients. You’ll love how easy it is to whip them up, and they’re perfect for meal prep. Just grab your peanut butter, some oats, and a few other staples, and you’re on your way to a delightful treat that fits your clean eating goals.
Ingredients
- 1 cup creamy peanut butter
- 1/2 cup honey or maple syrup
- 2 cups rolled oats
- 1/2 cup protein powder (optional)
- 1/4 cup dark chocolate chips
- 1 tablespoon coconut oil
Instructions
- Mix the Base: In a large bowl, combine peanut butter and honey until smooth. Stir in rolled oats and protein powder until well mixed.
- Prepare the Pan: Line an 8x8 inch baking dish with parchment paper. Press the mixture firmly into the bottom of the dish.
- Melt the Chocolate: In a small microwave-safe bowl, combine dark chocolate chips and coconut oil. Microwave in 30-second intervals, stirring until melted and smooth.
- Drizzle and Chill: Pour the melted chocolate over the peanut butter mixture and spread evenly. Place the dish in the refrigerator for at least 1 hour to set.
- Slice and Serve: Once set, remove from the dish and cut into bars. Enjoy your delicious no-bake peanut butter bars!
Sweet And Tangy Lemon Coconut Energy Bites
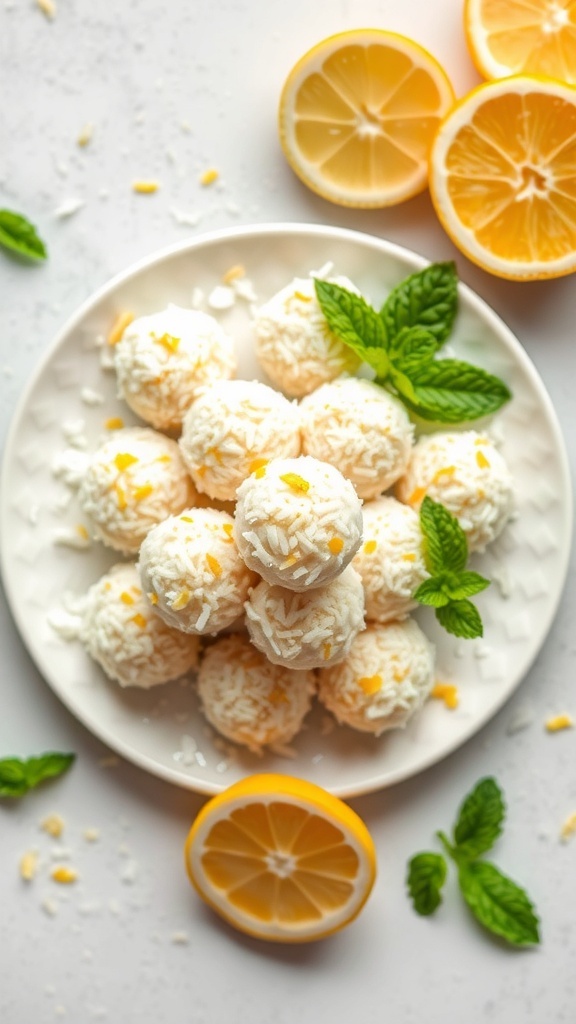
These Lemon Coconut Energy Bites are a delightful treat that perfectly balances sweetness and tanginess. They are not only easy to make but also fit right into your clean eating goals. The bright yellow of fresh lemons and the white coconut create a visually appealing snack that’s hard to resist.
Each bite is packed with flavor and energy, making them ideal for a quick pick-me-up during the day. Plus, they require no baking, which means you can whip them up in no time. The combination of coconut and lemon gives these bites a refreshing taste that feels like a little burst of sunshine.
To make these energy bites, you’ll need a few simple ingredients. Gather up some rolled oats, shredded coconut, honey, lemon juice, and a pinch of salt. These ingredients blend together to create a chewy, satisfying snack that you can enjoy anytime.
Ingredients
- 1 cup rolled oats
- 1 cup shredded coconut
- 1/4 cup honey or maple syrup
- 1/4 cup lemon juice
- Zest of 1 lemon
- 1/4 teaspoon salt
Instructions
- In a large bowl, combine the rolled oats, shredded coconut, honey, lemon juice, lemon zest, and salt.
- Mix everything together until well combined. The mixture should be sticky but manageable.
- Using your hands, form small balls about the size of a tablespoon.
- Place the energy bites on a baking sheet lined with parchment paper.
- Refrigerate for at least 30 minutes to firm up.
- Once set, enjoy your Lemon Coconut Energy Bites as a quick snack or dessert!
Deliciously Simple No-Bake Chocolate Chip Cookie Dough Bites
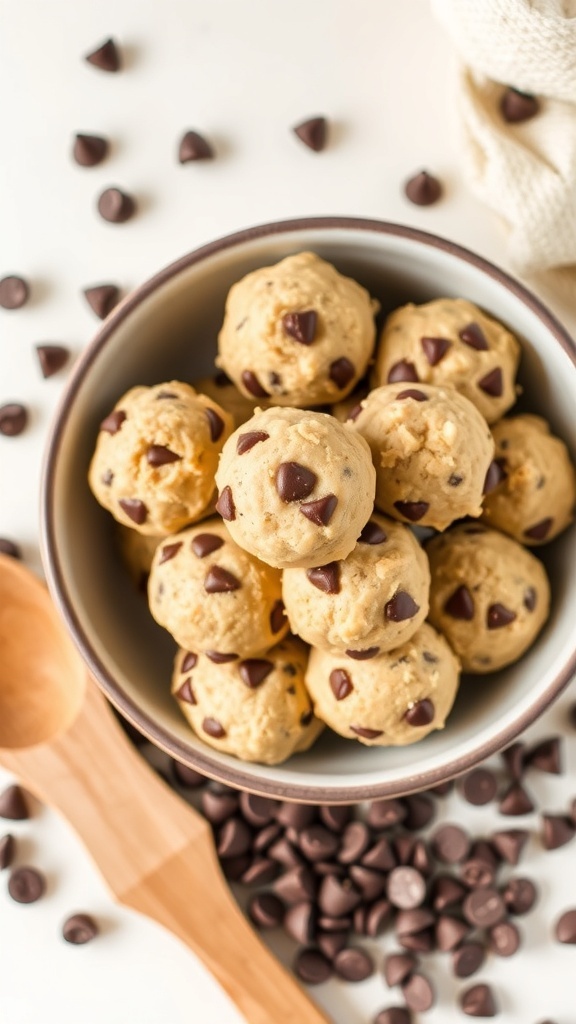
These no-bake chocolate chip cookie dough bites are a delightful treat that satisfies your sweet tooth without derailing your clean eating goals. They’re easy to whip up and perfect for when those cravings hit. Just look at that bowl filled with perfectly round bites, each one studded with chocolate chips. The texture looks creamy and inviting, making it hard to resist grabbing one (or two!).
Not only are these bites delicious, but they also come together in just a few simple steps. You can enjoy them as a quick snack or a dessert after dinner. Plus, they’re made with wholesome ingredients that keep your clean eating plan intact.
Ingredients
- 1 cup almond flour
- 1/4 cup maple syrup
- 1/4 cup nut butter (like almond or peanut butter)
- 1/2 teaspoon vanilla extract
- 1/4 teaspoon salt
- 1/3 cup chocolate chips
Instructions
- Mix the Base: In a large bowl, combine almond flour, maple syrup, nut butter, vanilla extract, and salt. Stir until well blended.
- Add Chocolate Chips: Fold in the chocolate chips until evenly distributed throughout the mixture.
- Form the Bites: Use your hands to roll the mixture into small balls, about 1 inch in diameter.
- Chill: Place the cookie dough bites on a plate or baking sheet and refrigerate for about 30 minutes to firm up.
- Enjoy: Once chilled, enjoy these tasty bites straight from the fridge or pack them for a snack on the go!
Citrusy No-Bake Key Lime Pie
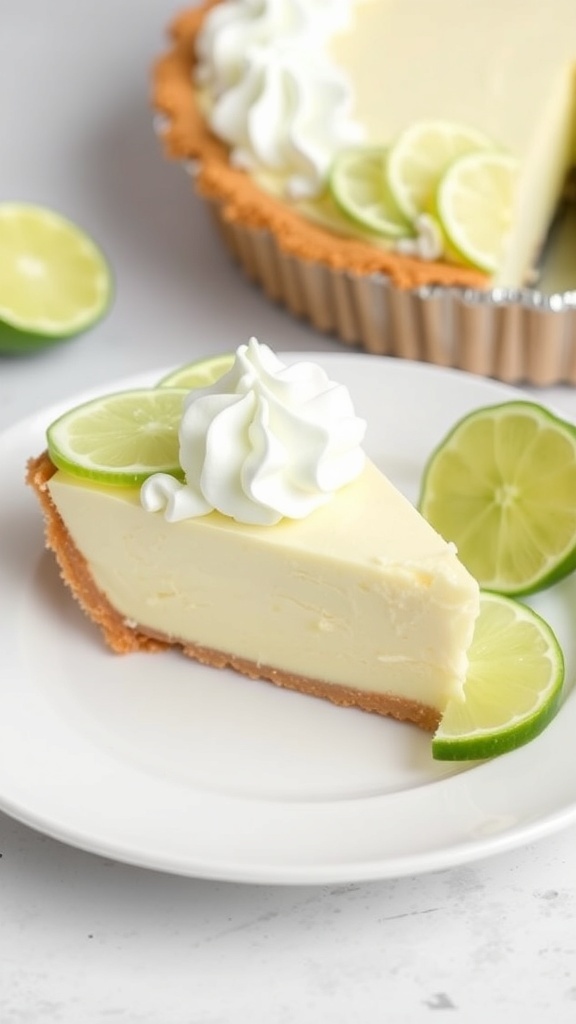
When you're craving something sweet, this No-Bake Key Lime Pie is a refreshing choice. The bright, zesty flavor of lime combined with a creamy filling makes it a perfect treat. Plus, it’s super easy to whip up without turning on the oven!
This pie features a buttery graham cracker crust that perfectly complements the tangy filling. Topped with a dollop of whipped cream and fresh lime slices, it’s not just delicious but also visually appealing. It’s a great option for gatherings or a simple dessert at home.
Let’s get to the fun part—making this delightful dessert!
Ingredients
- 1 ½ cups graham cracker crumbs
- ½ cup unsalted butter, melted
- 1 can (14 oz) sweetened condensed milk
- ½ cup sour cream
- ¾ cup fresh lime juice
- 1 tablespoon lime zest
- 1 cup heavy whipping cream
- 2 tablespoons powdered sugar
- Extra lime slices for garnish
Instructions
- Make the Crust: In a bowl, mix graham cracker crumbs and melted butter until combined. Press the mixture into the bottom and sides of a pie dish. Chill in the refrigerator for about 30 minutes.
- Prepare the Filling: In another bowl, whisk together sweetened condensed milk, sour cream, lime juice, and lime zest until smooth.
- Fill the Crust: Pour the lime filling into the chilled crust, smoothing the top with a spatula. Refrigerate for at least 4 hours, or until set.
- Whip the Cream: In a mixing bowl, beat heavy whipping cream and powdered sugar until stiff peaks form. Spread or pipe the whipped cream over the pie before serving.
- Garnish: Add lime slices on top for a fresh touch. Slice and enjoy!
Rich And Creamy No-Bake Nutella Cheesecake
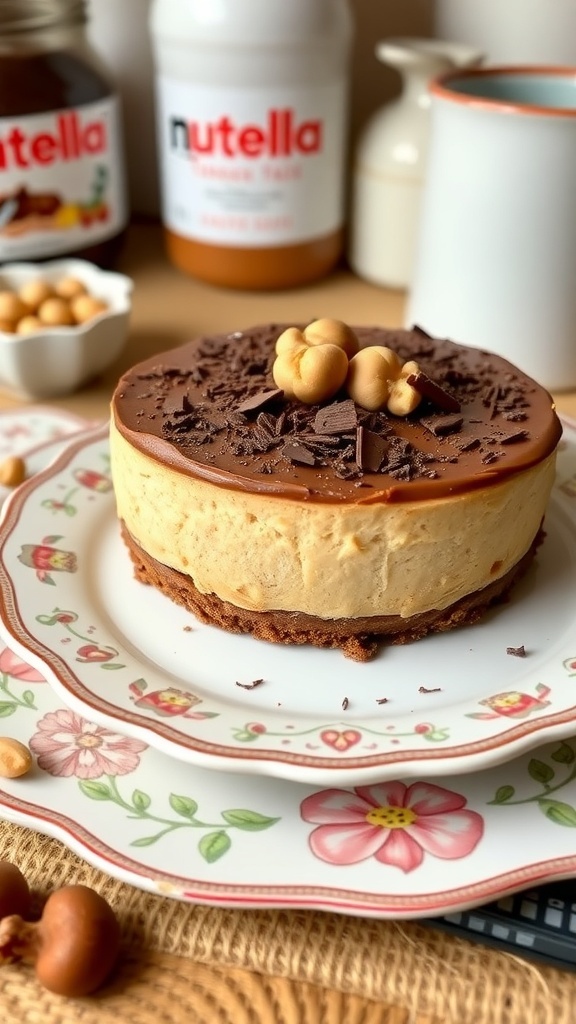
This Rich and Creamy No-Bake Nutella Cheesecake is a delightful treat that satisfies your sweet tooth without the hassle of baking. The image showcases a beautifully crafted cheesecake topped with a glossy layer of Nutella, garnished with chocolate shavings and cute little hazelnut decorations. It’s a feast for the eyes and the taste buds!
The base of this cheesecake is made from crushed cookies mixed with melted butter, creating a crunchy contrast to the smooth, creamy filling. The filling itself is a dreamy blend of cream cheese, whipped cream, and, of course, Nutella, making it rich yet light. This dessert is perfect for any occasion, whether it's a family gathering or a cozy night in.
Making this cheesecake is simple and quick, allowing you to enjoy a delicious dessert without spending hours in the kitchen. Plus, it aligns perfectly with your clean eating goals, as it uses wholesome ingredients while still delivering that indulgent flavor.
Ingredients
- 1 ½ cups crushed graham crackers
- ½ cup unsalted butter, melted
- 2 cups cream cheese, softened
- 1 cup Nutella
- 1 cup heavy whipping cream
- ½ cup powdered sugar
- 1 teaspoon vanilla extract
- Chocolate shavings and hazelnuts for garnish
Instructions
- Prepare the Crust: In a bowl, mix the crushed graham crackers with melted butter until combined. Press the mixture into the bottom of a springform pan to form an even layer. Chill in the refrigerator for about 30 minutes.
- Make the Filling: In a large bowl, beat the cream cheese until smooth. Add Nutella, powdered sugar, and vanilla extract, mixing until well combined.
- Whip the Cream: In another bowl, whip the heavy cream until stiff peaks form. Gently fold the whipped cream into the Nutella mixture until fully incorporated.
- Assemble the Cheesecake: Pour the filling over the chilled crust, smoothing the top with a spatula. Cover and refrigerate for at least 4 hours, or overnight for best results.
- Garnish and Serve: Once set, remove the cheesecake from the springform pan. Top with chocolate shavings and hazelnuts before slicing and serving.
Wholesome No-Bake Energy Granola Bars

These no-bake energy granola bars are a fantastic way to satisfy your cravings while sticking to your clean eating goals. Packed with wholesome ingredients, they provide a perfect balance of nutrients and energy. The bars are loaded with oats, nuts, and dried fruits, making them a great snack for any time of the day.
Making these granola bars is super simple. You just mix everything together, press it into a pan, and let it chill. No baking required! They’re perfect for a quick breakfast or a midday pick-me-up. Plus, you can customize them with your favorite nuts and seeds.
Here’s how to whip up your own batch:
Ingredients
- 2 cups rolled oats
- 1 cup mixed nuts (like almonds, walnuts, and pecans)
- 1/2 cup honey or maple syrup
- 1/2 cup nut butter (like almond or peanut butter)
- 1/2 cup dried fruits (like cranberries or raisins)
- 1/4 cup chocolate chips (optional)
- 1/2 teaspoon vanilla extract
- Pinch of salt
Instructions
- Prepare the Mixture: In a large bowl, combine the oats, mixed nuts, dried fruits, and chocolate chips.
- Mix the Wet Ingredients: In a small saucepan over low heat, combine honey and nut butter. Stir until smooth. Remove from heat and add vanilla extract and salt.
- Combine: Pour the wet mixture over the dry ingredients. Stir until everything is well coated.
- Press into a Pan: Line an 8x8 inch baking dish with parchment paper. Press the mixture firmly into the dish, spreading it evenly.
- Chill: Place the dish in the refrigerator for at least 2 hours to set. Once firm, lift the bars out using the parchment paper and cut into squares or rectangles.
- Store: Keep the bars in an airtight container in the fridge for up to a week.
Fruity No-Bake Raspberry Coconut Bars
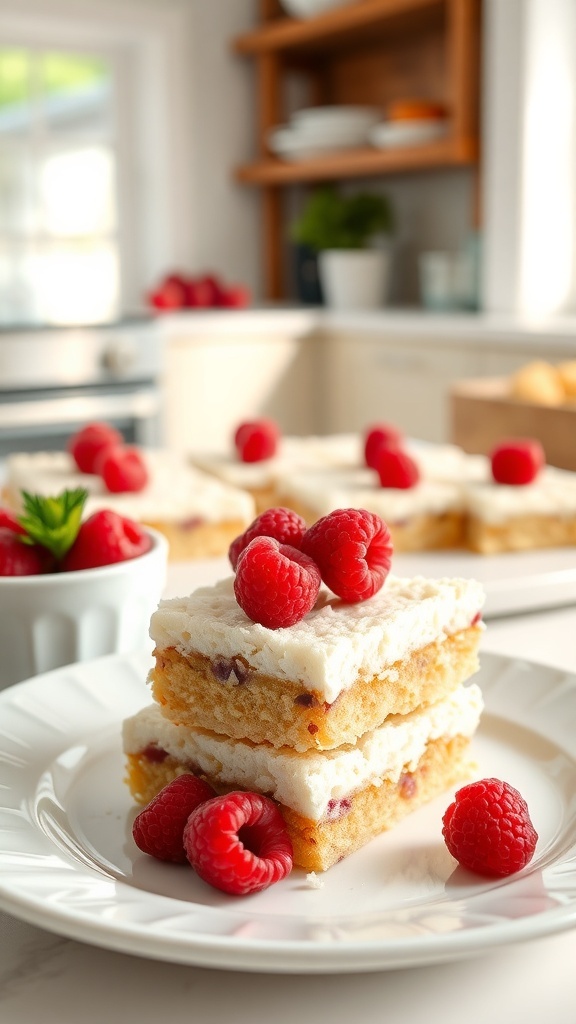
These Fruity No-Bake Raspberry Coconut Bars are a delightful treat that satisfies your sweet tooth without derailing your clean eating goals. The combination of fresh raspberries and creamy coconut creates a refreshing flavor that’s perfect for any occasion. Plus, they’re super easy to make!
Picture a stack of golden bars topped with a smooth coconut layer and garnished with vibrant raspberries. The bars are not only visually appealing but also packed with nutrients. They make for a great snack or dessert that feels indulgent without the guilt.
To whip these up, you’ll need a few simple ingredients. The base is made from oats and nuts, while the topping features coconut and a hint of sweetness. The best part? No baking required!
Ingredients
- 1 cup rolled oats
- 1/2 cup almonds or walnuts
- 1/4 cup honey or maple syrup
- 1/4 cup coconut oil, melted
- 1 cup fresh raspberries
- 1 cup shredded coconut
- 1/4 cup Greek yogurt (optional, for creaminess)
- Pinch of salt
Instructions
- Prepare the Base: In a food processor, blend the oats and nuts until finely ground. Add honey, melted coconut oil, and a pinch of salt. Pulse until combined.
- Press into a Pan: Line an 8x8 inch baking dish with parchment paper. Press the oat mixture firmly into the bottom of the dish to form an even layer.
- Add the Topping: In a bowl, mix together the shredded coconut, Greek yogurt, and half of the raspberries. Spread this mixture over the oat base.
- Chill: Top with the remaining raspberries and refrigerate for at least 2 hours to set.
- Slice and Serve: Once set, remove from the dish, slice into bars, and enjoy your fruity treat!
Gourmet No-Bake Mocha Tiramisu Cups
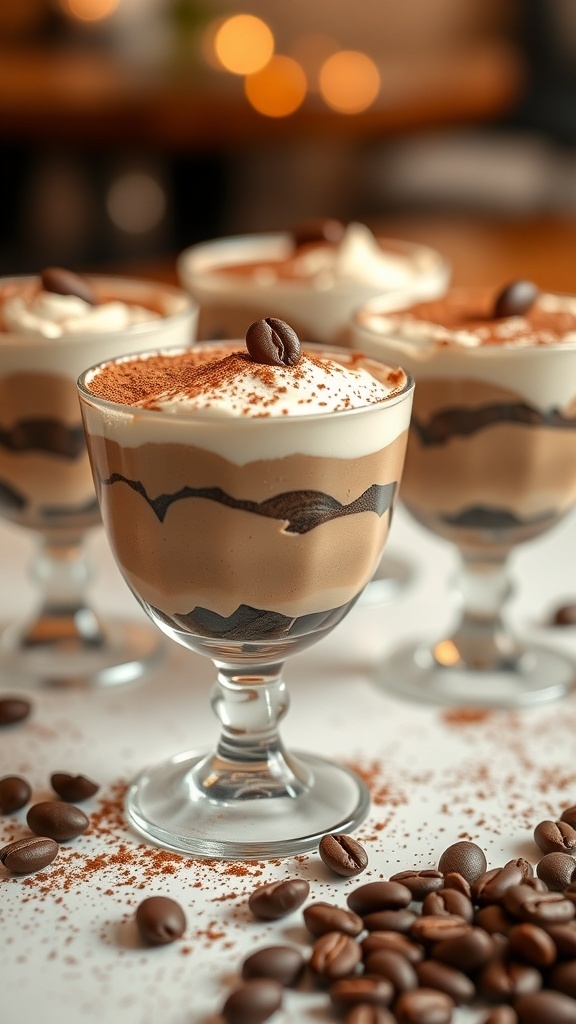
These Gourmet No-Bake Mocha Tiramisu Cups are a delightful twist on the classic dessert. They’re creamy, rich, and packed with coffee flavor, making them perfect for satisfying your sweet tooth without the fuss of baking. The layers of coffee-soaked cookies and smooth mascarpone cream create a treat that feels indulgent yet fits your clean eating goals.
In the image, you can see elegant cups filled with this luscious dessert, topped with a sprinkle of cocoa powder and a coffee bean for that extra touch. The warm tones and soft lighting make these cups look even more inviting, perfect for any occasion.
This dessert is not just about looks; it’s simple to prepare. You can whip these up in no time, making them a great option for gatherings or a cozy night in. Let’s get started on making these delicious cups!
Ingredients
- 1 cup strong brewed coffee, cooled
- 2 tablespoons coffee liqueur (optional)
- 1 cup mascarpone cheese
- 1 cup heavy cream
- 1/2 cup powdered sugar
- 1 teaspoon vanilla extract
- 12-15 ladyfingers
- Cocoa powder for dusting
- Chocolate shavings for garnish (optional)
Instructions
- Prepare Coffee: Brew a strong cup of coffee and let it cool. If using, mix in coffee liqueur.
- Make the Cream Mixture: In a mixing bowl, combine mascarpone cheese, heavy cream, powdered sugar, and vanilla extract. Whip until soft peaks form.
- Assemble the Cups: Quickly dip each ladyfinger into the cooled coffee mixture and layer them at the bottom of serving cups. Spoon a layer of the mascarpone mixture over the ladyfingers.
- Repeat Layers: Continue layering with more dipped ladyfingers and mascarpone mixture until the cups are filled, finishing with the mascarpone layer on top.
- Chill: Cover the cups with plastic wrap and refrigerate for at least 4 hours, or overnight for best results.
- Serve: Before serving, dust the tops with cocoa powder and garnish with chocolate shavings if desired.
Delectable No-Bake Peanut Butter Chocolate Swirl Bars
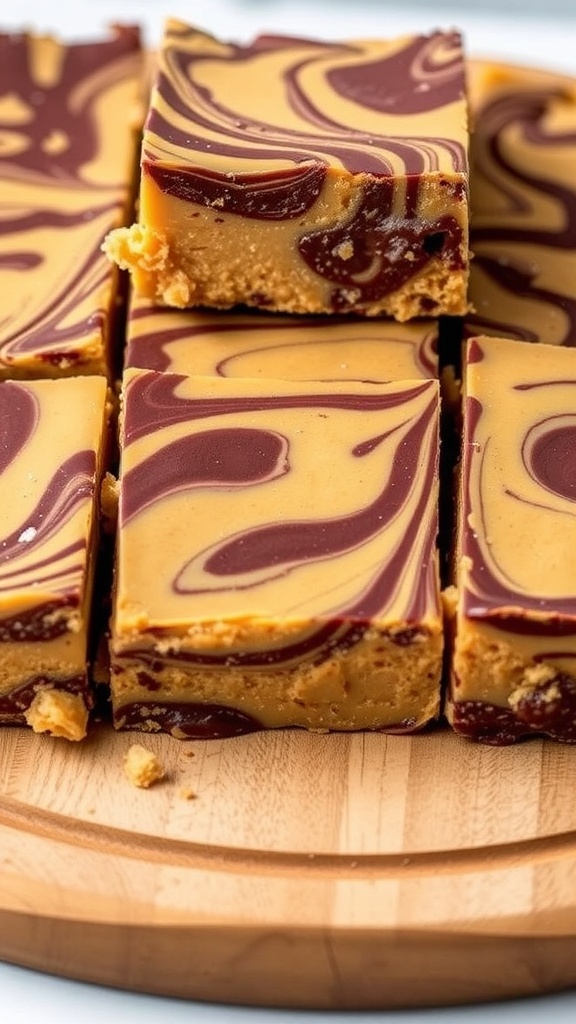
If you're craving something sweet but want to stick to your clean eating goals, these no-bake peanut butter chocolate swirl bars are a perfect choice. They combine the rich, creamy taste of peanut butter with the indulgent flavor of chocolate, all without the need for an oven. The beautiful swirls create an eye-catching treat that’s as fun to make as it is to eat.
This recipe is simple and requires just a few ingredients. You’ll love how easy it is to whip up a batch and satisfy your sweet tooth without any guilt. Plus, they’re perfect for sharing or enjoying as a personal treat.
Ingredients
- 1 cup natural peanut butter
- 1/2 cup honey or maple syrup
- 2 cups rolled oats
- 1/2 cup dark chocolate chips
- 1 tablespoon coconut oil
- 1 teaspoon vanilla extract
Instructions
- Prepare the Base: In a mixing bowl, combine peanut butter, honey, and vanilla extract. Stir until smooth.
- Add Oats: Gradually mix in the rolled oats until fully combined. The mixture should be thick and sticky.
- Press into Pan: Line an 8x8 inch baking dish with parchment paper. Press the peanut butter oat mixture evenly into the bottom of the dish.
- Melt Chocolate: In a small saucepan, melt dark chocolate chips and coconut oil over low heat, stirring until smooth.
- Swirl the Chocolate: Pour the melted chocolate over the peanut butter layer. Use a knife or skewer to create swirls.
- Chill: Refrigerate for at least 2 hours until firm. Once set, cut into bars and enjoy!
Sweet And Tangy No-Bake Blackberry Fool
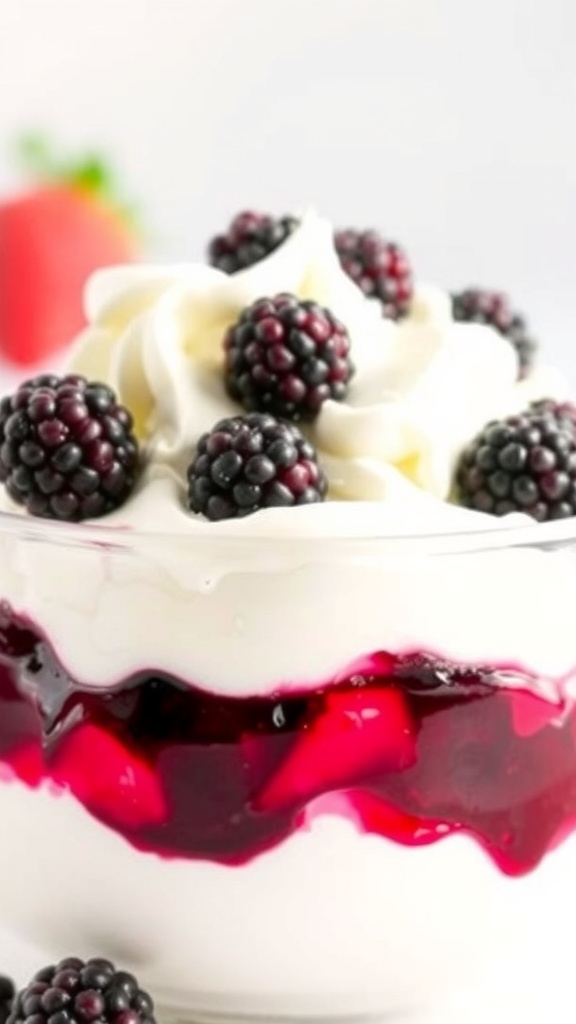
Blackberry Fool is a delightful dessert that combines the sweet and tangy flavors of fresh blackberries with creamy goodness. This no-bake treat is perfect for satisfying your cravings while keeping your clean eating goals intact. The layers of whipped cream and blackberry puree create a beautiful presentation that is sure to impress.
The image showcases a glass filled with luscious layers of whipped cream and vibrant blackberry puree, topped with fresh blackberries. It’s not just a feast for the eyes; it’s a treat for your taste buds too! The combination of flavors is refreshing and light, making it an ideal dessert for any occasion.
Making this dessert is simple and requires minimal ingredients. You can whip it up in no time, making it a go-to option for unexpected guests or a sweet ending to your day.
Ingredients
- 2 cups fresh blackberries
- 1/4 cup honey or maple syrup
- 1 cup heavy cream
- 1 teaspoon vanilla extract
- 1/2 cup Greek yogurt
- Fresh blackberries for topping
Instructions
- Prepare the Blackberry Puree: In a blender, combine fresh blackberries and honey (or maple syrup). Blend until smooth. If you prefer a smoother texture, strain the mixture to remove the seeds.
- Whip the Cream: In a mixing bowl, whip the heavy cream and vanilla extract until soft peaks form.
- Combine: Gently fold the Greek yogurt into the whipped cream until well combined.
- Layer: In serving glasses, alternate layers of blackberry puree and the whipped cream mixture. Start with blackberry puree, then add a layer of whipped cream, and repeat until the glasses are filled.
- Top: Finish with fresh blackberries on top for a beautiful presentation.
- Chill: Refrigerate for at least 30 minutes before serving to let the flavors meld together.


Comments
Post a Comment