14 Delicious Budget-Friendly Low Sugar Desserts You Need to Try
14 Delicious Budget-Friendly Low Sugar Desserts You Need to Try
Low sugar desserts can be delicious and easy on the wallet! In this collection, you'll find mouthwatering recipes that satisfy your sweet tooth without breaking the bank or overwhelming your sugar intake. Whether you're cooking for yourself or hosting a gathering, these budget-friendly treats are sure to impress while keeping things simple and healthy.
Refreshing Lemon Coconut Chia Pudding
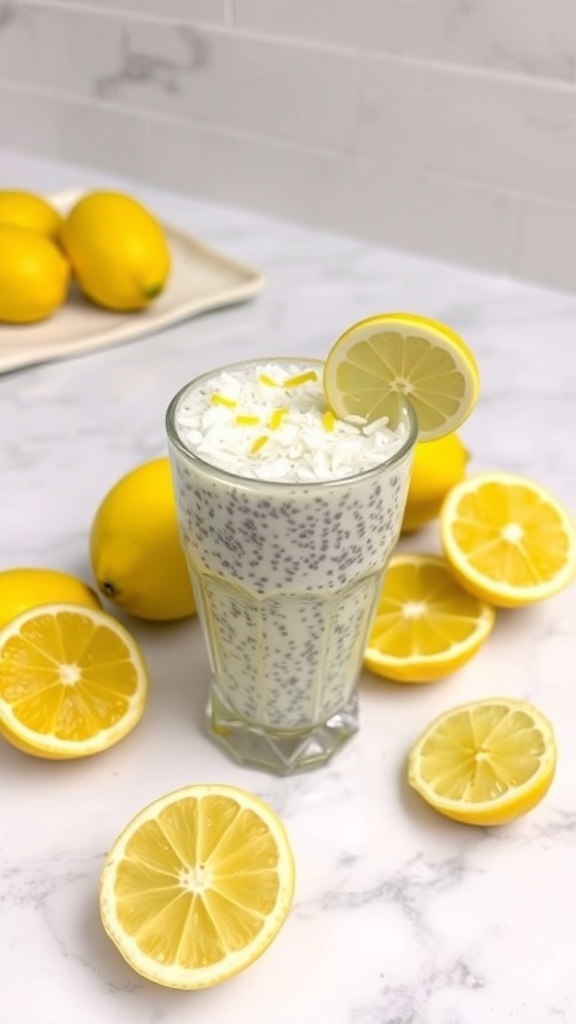
This Lemon Coconut Chia Pudding is a delightful treat that’s both refreshing and budget-friendly. The bright yellow of the lemons and the creamy texture of the pudding make it visually appealing and perfect for a warm day. Chia seeds are packed with nutrients, and when mixed with coconut milk and lemon juice, they create a deliciously tangy dessert.
The pudding is simple to prepare, requiring just a few ingredients. You can whip it up in no time, making it a great option for a quick dessert or a healthy snack. Plus, it’s low in sugar, so you can enjoy it without any guilt!
To make this tasty pudding, gather some fresh lemons, coconut milk, chia seeds, and a sweetener of your choice. The combination of flavors will leave your taste buds dancing. Serve it chilled, topped with a sprinkle of coconut and a slice of lemon for that extra zing!
Ingredients
- 1/2 cup chia seeds
- 2 cups coconut milk
- 1/4 cup fresh lemon juice
- 1 tablespoon lemon zest
- 2 tablespoons honey or maple syrup (optional)
- 1/4 teaspoon vanilla extract
- Shredded coconut for topping
- Fresh lemon slices for garnish
Instructions
- Combine the chia seeds, coconut milk, lemon juice, lemon zest, honey or maple syrup, and vanilla extract in a bowl. Stir well to combine.
- Let the mixture sit for about 10 minutes, then stir again to prevent clumping.
- Cover the bowl and refrigerate for at least 2 hours, or overnight for best results.
- Once the pudding has thickened, give it a good stir before serving.
- Serve in glasses, topped with shredded coconut and a slice of lemon.
Decadent Almond Flour Brownies
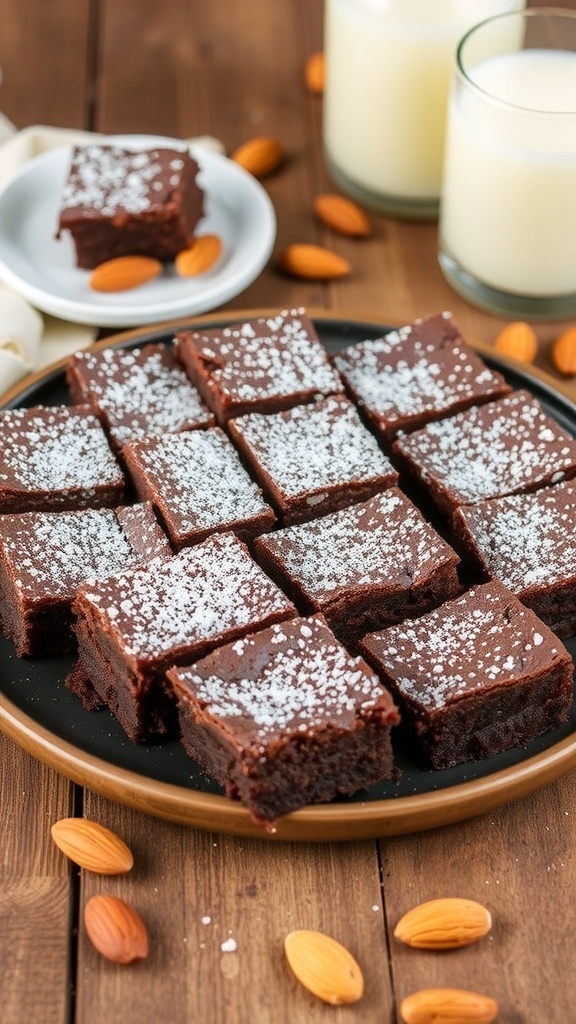
These almond flour brownies are a delightful treat that won’t break the bank or your diet. They are rich, fudgy, and perfect for satisfying that sweet tooth without the guilt. The image shows a beautifully arranged plate of brownies, dusted with a light sprinkle of powdered sugar, and surrounded by almonds and glasses of milk. It’s a cozy setup that invites you to grab a piece and enjoy.
Using almond flour instead of regular flour not only cuts down on carbs but also adds a lovely nutty flavor. These brownies are simple to make and require just a few ingredients, making them a great option for anyone looking to whip up a quick dessert.
Let’s get to the good stuff! Here’s how you can make these delicious brownies at home.
Ingredients
- 1 cup almond flour
- 1/2 cup unsweetened cocoa powder
- 1/2 cup granulated sweetener (like erythritol or stevia)
- 1/4 cup melted coconut oil
- 2 large eggs
- 1 teaspoon vanilla extract
- 1/2 teaspoon baking powder
- 1/4 teaspoon salt
- Optional: chopped nuts or sugar-free chocolate chips
Instructions
- Preheat the oven to 350°F (175°C) and grease an 8x8 inch baking dish.
- In a mixing bowl, combine almond flour, cocoa powder, sweetener, baking powder, and salt.
- Add melted coconut oil, eggs, and vanilla extract to the dry ingredients. Mix until well combined.
- If desired, fold in chopped nuts or chocolate chips for an extra treat.
- Pour the batter into the prepared baking dish and spread it evenly.
- Bake for 20-25 minutes, or until a toothpick inserted in the center comes out mostly clean.
- Let the brownies cool in the pan before cutting them into squares. Dust with powdered sugar if you like!
Creamy Greek Yogurt Parfait With Berries
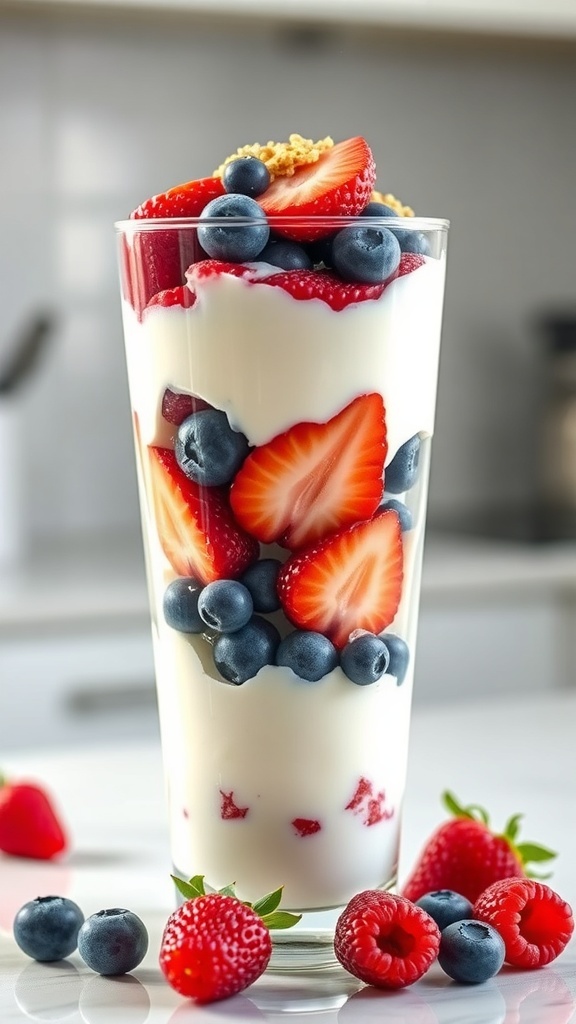
This creamy Greek yogurt parfait is a delightful treat that’s both budget-friendly and low in sugar. The layers of fresh berries and yogurt create a colorful and inviting dessert. It’s perfect for breakfast or a sweet snack. The combination of tangy yogurt and sweet berries makes it a hit for everyone.
Using Greek yogurt not only adds creaminess but also packs in protein, making this parfait a nutritious choice. You can customize it with your favorite fruits or even add a sprinkle of granola for some crunch. The vibrant colors of strawberries, blueberries, and raspberries make this dessert visually appealing and fun to eat.
Making this parfait is super simple. Just layer the ingredients in a glass, and you’re ready to enjoy a delicious dessert that won’t break the bank!
Ingredients
- 2 cups Greek yogurt
- 1 cup strawberries, sliced
- 1 cup blueberries
- 1 cup raspberries
- 2 tablespoons honey or maple syrup (optional)
- 1/4 cup granola (optional)
Instructions
- In a glass or bowl, start with a layer of Greek yogurt at the bottom.
- Add a layer of sliced strawberries, followed by a layer of blueberries and raspberries.
- Repeat the layers until the glass is filled, finishing with a layer of yogurt on top.
- If desired, drizzle honey or maple syrup over the top and sprinkle with granola for added texture.
- Serve immediately or refrigerate for a short while before enjoying.
Wholesome Oatmeal Cookies With Dark Chocolate

These oatmeal cookies are a delightful treat that combines the goodness of oats with the rich flavor of dark chocolate. They are perfect for satisfying your sweet tooth without the guilt. The image shows a batch of freshly baked cookies, golden brown and studded with dark chocolate chips. The cookies are placed on a cooling rack, surrounded by ingredients like oats and chocolate, hinting at their wholesome nature.
Making these cookies is simple and budget-friendly. You can whip them up in no time, and they make for a great snack or dessert. The combination of oats and dark chocolate not only tastes great but also provides some nutritional benefits. Oats are known for their fiber content, while dark chocolate adds a touch of indulgence.
Let’s get started with the recipe!
Ingredients
- 1 cup rolled oats
- 1 cup whole wheat flour
- 1/2 cup brown sugar
- 1/4 cup granulated sugar
- 1/2 cup unsalted butter, softened
- 1/2 teaspoon baking soda
- 1/2 teaspoon salt
- 1 teaspoon vanilla extract
- 1 large egg
- 1/2 cup dark chocolate chips
Instructions
- Preheat the oven to 350°F (175°C). Line a baking sheet with parchment paper.
- In a large bowl, cream together the softened butter, brown sugar, and granulated sugar until smooth.
- Add the egg and vanilla extract to the mixture, and mix well.
- In another bowl, combine the rolled oats, whole wheat flour, baking soda, and salt.
- Gradually add the dry ingredients to the wet mixture, stirring until combined.
- Fold in the dark chocolate chips.
- Drop spoonfuls of dough onto the prepared baking sheet, spacing them about 2 inches apart.
- Bake for 10-12 minutes or until the edges are lightly golden.
- Allow the cookies to cool on the baking sheet for a few minutes before transferring them to a wire rack to cool completely.
Classic Peanut Butter Cookies With A Low-Sugar Twist
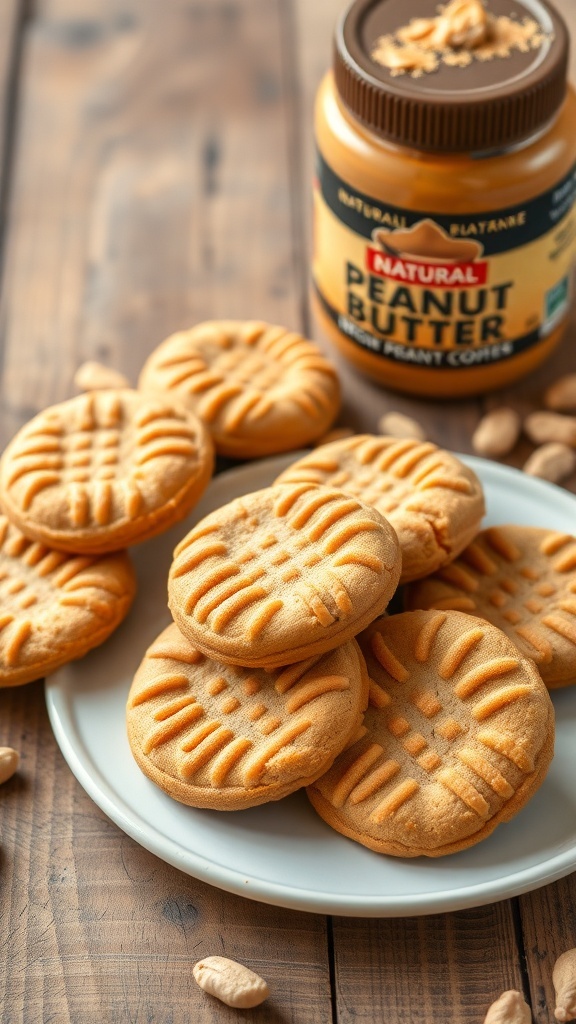
Peanut butter cookies are a timeless treat loved by many. They bring back memories of childhood and cozy kitchens. This version takes the classic recipe and gives it a low-sugar twist, making it a guilt-free indulgence.
The image shows a plate filled with golden-brown peanut butter cookies, perfectly shaped with a crisscross pattern on top. Nearby, jars of peanut butter hint at the rich flavor that defines these cookies. You can almost smell the nutty aroma wafting through the air!
These cookies are simple to make and require just a few ingredients. They are perfect for satisfying your sweet tooth without the extra sugar. Let’s get into how you can whip up a batch!
Ingredients
- 1 cup natural peanut butter
- 1/2 cup coconut sugar or a sugar substitute
- 1 large egg
- 1 teaspoon vanilla extract
- 1/2 teaspoon baking soda
- 1/4 teaspoon salt
Instructions
- Preheat your oven to 350°F (175°C) and line a baking sheet with parchment paper.
- In a mixing bowl, combine the peanut butter, coconut sugar, egg, vanilla extract, baking soda, and salt. Mix until smooth.
- Using a spoon, scoop out small portions of dough and roll them into balls. Place them on the prepared baking sheet, leaving space between each cookie.
- Flatten each ball with a fork, creating a crisscross pattern on top.
- Bake for 10-12 minutes, or until the edges are lightly golden. Let them cool on the baking sheet for a few minutes before transferring to a wire rack.
Enjoy these classic peanut butter cookies with a low-sugar twist. They’re perfect for a snack or a sweet treat after dinner!
Decadent No-Bake Cheesecake Bites

No-bake cheesecake bites are a fantastic way to satisfy your sweet tooth without breaking the bank. These little treats are creamy, rich, and topped with a bright cherry that adds a pop of color and flavor. Perfect for parties or just a cozy night in, they are sure to impress everyone.
These bites are made with simple ingredients. The crust is typically made from crushed graham crackers mixed with a bit of butter, while the filling combines cream cheese, yogurt, and a touch of sweetener. The best part? You don’t need to turn on the oven!
To make them, you’ll start by preparing the crust. Press the mixture into mini cupcake liners, then whip up the filling. Spoon it over the crust and chill until set. Finally, top each bite with a cherry for that classic cheesecake look.
Ingredients
- 1 cup graham cracker crumbs
- 1/4 cup unsalted butter, melted
- 8 oz cream cheese, softened
- 1/2 cup plain Greek yogurt
- 1/4 cup granulated sugar or sugar substitute
- 1 teaspoon vanilla extract
- 1 cup cherry pie filling
Instructions
- Prepare the Crust: In a bowl, mix graham cracker crumbs and melted butter until combined. Press the mixture into the bottom of mini cupcake liners.
- Make the Filling: In another bowl, beat together cream cheese, Greek yogurt, sugar, and vanilla until smooth and creamy.
- Assemble: Spoon the filling over the crust in each liner, smoothing the top.
- Chill: Place the cheesecake bites in the fridge for at least 2 hours to set.
- Top: Before serving, add a spoonful of cherry pie filling on top of each cheesecake bite.
Sugar-Free Pumpkin Spice Muffins
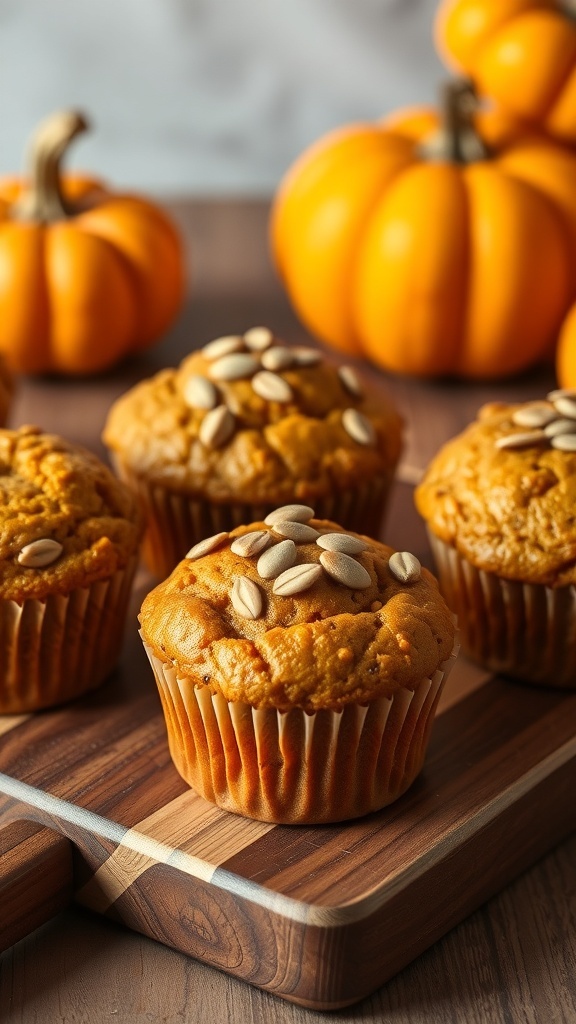
These Sugar-Free Pumpkin Spice Muffins are a delightful treat that fits perfectly into a budget-friendly dessert plan. The muffins are moist and flavorful, thanks to the pumpkin puree and warm spices. They are topped with pumpkin seeds, adding a nice crunch.
Making these muffins is simple and fun. You can whip them up quickly for breakfast or a snack. Plus, they are low in sugar, making them a healthier option for dessert lovers.
Here’s how to make your own batch of these delicious muffins:
Ingredients
- 1 cup pumpkin puree
- 1/2 cup unsweetened applesauce
- 1/4 cup almond milk
- 1 teaspoon vanilla extract
- 1 1/2 cups whole wheat flour
- 1 teaspoon baking soda
- 1 teaspoon baking powder
- 1 teaspoon pumpkin pie spice
- 1/2 teaspoon salt
- 1/4 cup pumpkin seeds (for topping)
Instructions
- Preheat your oven to 350°F (175°C) and line a muffin tin with paper liners.
- In a large bowl, mix together the pumpkin puree, applesauce, almond milk, and vanilla extract until smooth.
- In another bowl, combine the whole wheat flour, baking soda, baking powder, pumpkin pie spice, and salt.
- Gradually add the dry ingredients to the wet mixture, stirring until just combined.
- Fill each muffin cup about 2/3 full with the batter. Sprinkle pumpkin seeds on top.
- Bake for 20-25 minutes, or until a toothpick inserted into the center comes out clean.
- Let the muffins cool for a few minutes before transferring them to a wire rack.
Enjoy these tasty muffins with your favorite beverage!
Chocolate-Dipped Strawberries With A Healthy Twist

Chocolate-dipped strawberries are a classic treat that never goes out of style. They look fancy but are surprisingly easy to make. The vibrant red of the strawberries paired with rich chocolate creates a delightful contrast that’s hard to resist. Plus, they can be made healthier with a few simple tweaks!
To give these treats a healthy twist, consider using dark chocolate. It’s lower in sugar and packed with antioxidants. You can also drizzle a bit of white chocolate on top for a fun design. This adds a touch of sweetness without overwhelming the strawberries’ natural flavor.
These strawberries are perfect for any occasion, whether it’s a romantic dinner or a casual gathering with friends. They’re budget-friendly and can be made in just a few minutes. Plus, they’re a great way to satisfy your sweet tooth without going overboard on sugar.
Ingredients
- 1 pound fresh strawberries
- 8 ounces dark chocolate (at least 70% cocoa)
- 2 ounces white chocolate (optional, for drizzling)
- Wax paper or parchment paper
Instructions
- Wash and dry the strawberries thoroughly. Make sure they are completely dry for the chocolate to stick.
- Melt the dark chocolate in a microwave-safe bowl. Heat in 30-second intervals, stirring in between until smooth.
- Dip each strawberry into the melted chocolate, covering about two-thirds of the berry. Allow excess chocolate to drip off.
- Place the dipped strawberries on a sheet of wax or parchment paper to set.
- If using white chocolate, melt it in the same way and drizzle it over the dark chocolate-covered strawberries for a decorative touch.
- Let the chocolate harden at room temperature or in the fridge for about 30 minutes before serving.
Delicious Berry Almond Crumble
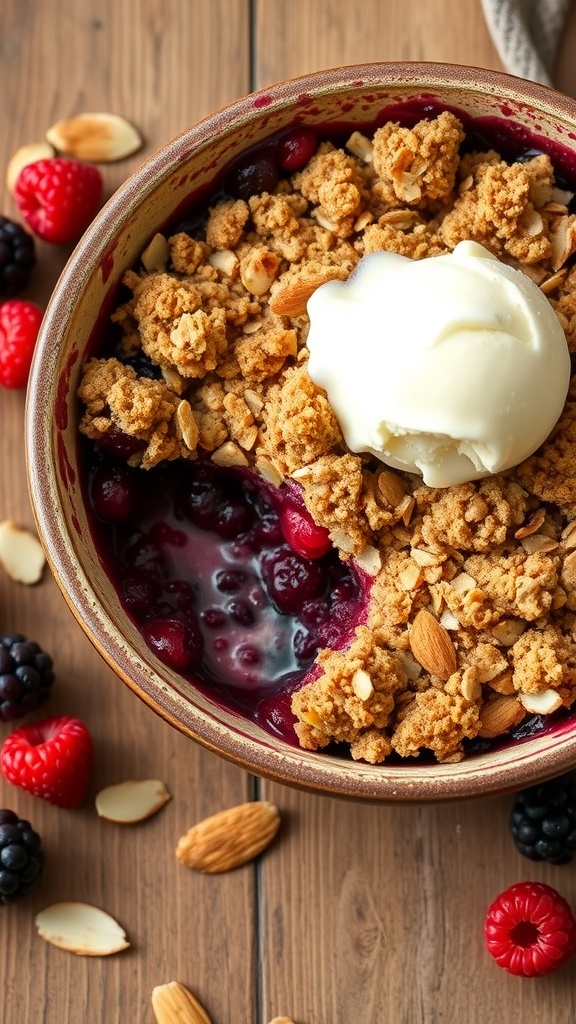
This Berry Almond Crumble is a delightful treat that’s both budget-friendly and low in sugar. The combination of fresh berries and a crunchy almond topping creates a satisfying dessert that feels indulgent without the guilt. The vibrant colors of the berries make it visually appealing, while the warm, crumbly texture is comforting and inviting.
Using simple ingredients, this recipe is perfect for anyone looking to whip up a quick dessert. The berries provide natural sweetness, while the almond topping adds a nice crunch. Serve it warm with a scoop of low-sugar vanilla ice cream for an extra touch of sweetness!
Ingredients
- 2 cups mixed berries (raspberries, blackberries, blueberries)
- 1 tablespoon honey or maple syrup
- 1 cup rolled oats
- 1/2 cup almond flour
- 1/4 cup coconut oil, melted
- 1/4 cup sliced almonds
- 1 teaspoon vanilla extract
- 1/2 teaspoon cinnamon
- Pinch of salt
Instructions
- Preheat your oven to 350°F (175°C).
- In a bowl, mix the berries with honey or maple syrup. Spread them evenly in a baking dish.
- In another bowl, combine rolled oats, almond flour, melted coconut oil, sliced almonds, vanilla extract, cinnamon, and salt. Mix until crumbly.
- Sprinkle the oat mixture over the berries, covering them evenly.
- Bake for 25-30 minutes, or until the topping is golden brown and the berries are bubbling.
- Let it cool slightly before serving. Enjoy warm, with or without ice cream!
Nutty Energy Bites For A Sweet Pick-Me-Up
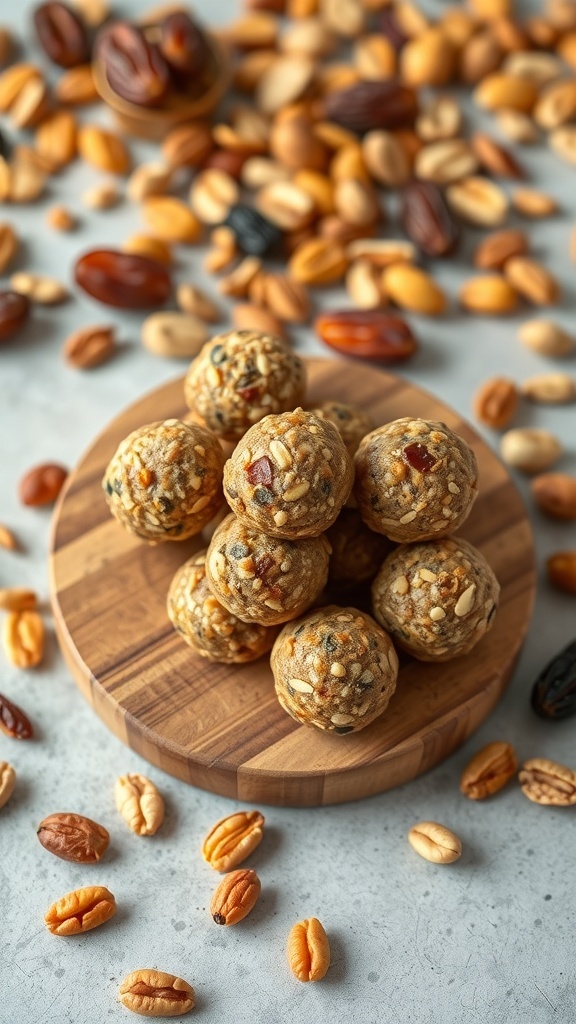
Nutty energy bites are a fantastic option for a quick snack or a sweet treat without the guilt. These little balls of goodness are packed with healthy ingredients like nuts and seeds, making them perfect for a mid-afternoon pick-me-up. The image showcases these delightful bites, sitting on a wooden board, surrounded by a variety of nuts. The natural colors and textures make them look inviting and delicious.
These energy bites are not only easy to make but also budget-friendly. You can whip them up in no time with just a few simple ingredients. They are low in sugar, making them a great choice for anyone watching their intake. Plus, they’re versatile! Feel free to mix and match your favorite nuts and seeds.
Ingredients
- 1 cup rolled oats
- 1/2 cup nut butter (like almond or peanut butter)
- 1/4 cup honey or maple syrup
- 1/2 cup mixed nuts (chopped)
- 1/4 cup chia seeds
- 1/4 cup dark chocolate chips (optional)
- 1 teaspoon vanilla extract
Instructions
- Mix Ingredients: In a large bowl, combine rolled oats, nut butter, honey, chopped nuts, chia seeds, chocolate chips, and vanilla extract. Stir until everything is well combined.
- Form Bites: Using your hands, roll the mixture into small balls, about 1 inch in diameter.
- Chill: Place the energy bites on a baking sheet lined with parchment paper. Refrigerate for at least 30 minutes to firm up.
- Store: Once chilled, transfer the bites to an airtight container. They can be stored in the fridge for up to a week.
Classic Baked Apples With Cinnamon And Nuts

Baked apples are a classic dessert that brings warmth and comfort. They are simple to make and perfect for any occasion. The image shows a beautifully baked apple, topped with nuts and a drizzle of syrup, surrounded by autumn leaves. This dessert is not only tasty but also budget-friendly and low in sugar.
To make these baked apples, you’ll need just a few ingredients. The combination of sweet apples, crunchy nuts, and warm cinnamon creates a delightful treat. Plus, it’s a great way to use up any apples you have lying around!
Here’s how to make them:
Ingredients
- 4 medium-sized apples
- 1/2 cup chopped nuts (walnuts or pecans work well)
- 1/4 cup oats
- 2 tablespoons honey or maple syrup
- 1 teaspoon ground cinnamon
- 1/4 teaspoon nutmeg
- 1 cup water
Instructions
- Preheat your oven to 350°F (175°C).
- Core the apples, making sure to leave the bottom intact.
- In a bowl, mix the chopped nuts, oats, honey, cinnamon, and nutmeg.
- Stuff the mixture into each apple, packing it down gently.
- Place the apples in a baking dish and pour water around them.
- Bake for about 25-30 minutes, or until the apples are tender.
- Serve warm, drizzled with extra honey or syrup if desired.
These baked apples are a delightful way to satisfy your sweet tooth without breaking the bank or loading up on sugar. Enjoy!
Sugar-Free Chocolate Chip Banana Bread
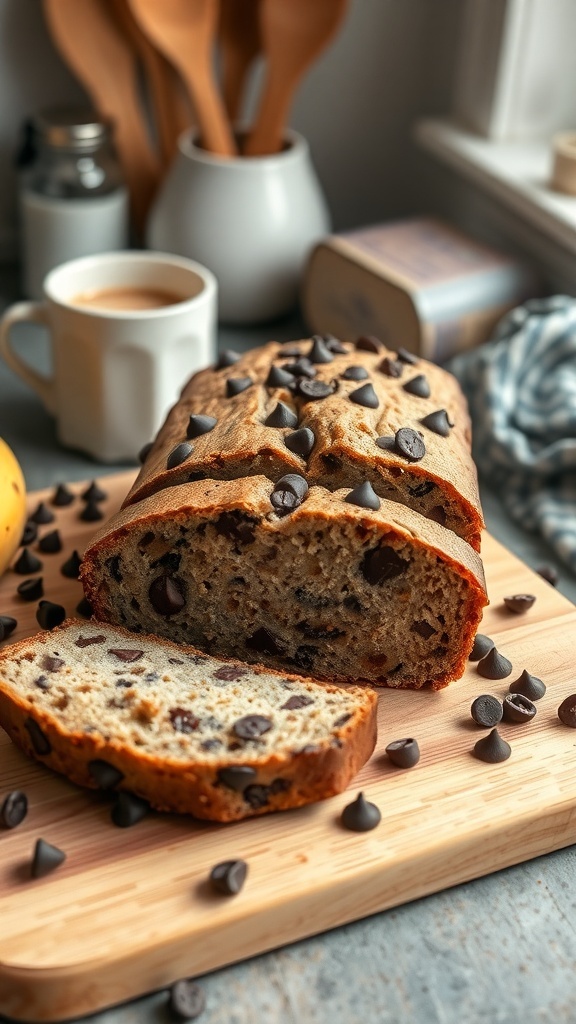
This Sugar-Free Chocolate Chip Banana Bread is a delightful treat that fits perfectly into a budget-friendly dessert category. The image shows a beautifully baked loaf, golden brown on the outside and studded with chocolate chips. The slices reveal a moist texture, promising a satisfying bite.
Banana bread is a classic favorite, and making it sugar-free doesn’t mean sacrificing flavor. The natural sweetness of ripe bananas shines through, complemented by the rich chocolate chips. This recipe is simple, making it a great option for both novice and experienced bakers.
Gather your ingredients and let’s get started on this deliciously healthy dessert!
Ingredients
- 3 ripe bananas, mashed
- 1/3 cup unsweetened applesauce
- 1/4 cup almond milk (or any milk of choice)
- 1 teaspoon vanilla extract
- 1 teaspoon baking soda
- 1/2 teaspoon baking powder
- 1/4 teaspoon salt
- 1 1/2 cups whole wheat flour
- 1/2 cup sugar-free chocolate chips
Instructions
- Preheat your oven to 350°F (175°C) and grease a loaf pan.
- In a large bowl, mix the mashed bananas, applesauce, almond milk, and vanilla extract until smooth.
- In another bowl, combine the baking soda, baking powder, salt, and flour. Gradually add this dry mixture to the wet ingredients, stirring until just combined.
- Fold in the sugar-free chocolate chips.
- Pour the batter into the prepared loaf pan and smooth the top.
- Bake for 50-60 minutes, or until a toothpick inserted in the center comes out clean.
- Let it cool in the pan for about 10 minutes before transferring it to a wire rack to cool completely.
This banana bread is perfect for breakfast, a snack, or even dessert. Enjoy it fresh or toasted with a bit of nut butter for an extra treat!
Irresistible Raspberry Chia Jam Tarts

These Raspberry Chia Jam Tarts are a delightful treat that won’t break the bank. The tarts feature a crisp, buttery crust filled with a vibrant raspberry chia jam. The bright red raspberries on top add a pop of color and freshness. Perfect for a sunny afternoon or a cozy dessert after dinner, these tarts are both low in sugar and budget-friendly.
The chia seeds not only thicken the jam but also add a nice crunch. Plus, they’re packed with nutrients! Making these tarts is simple and fun, making them a great option for baking with kids or for a casual gathering with friends.
Ingredients
- 1 cup fresh raspberries
- 2 tablespoons chia seeds
- 2 tablespoons honey or maple syrup
- 1 tablespoon lemon juice
- 1 pre-made tart shell (store-bought or homemade)
- Fresh raspberries for topping
- Mint leaves for garnish
Instructions
- Make the Chia Jam: In a small saucepan, combine raspberries, honey (or maple syrup), and lemon juice. Cook over medium heat until the raspberries break down, about 5 minutes.
- Add Chia Seeds: Stir in chia seeds and let the mixture simmer for another 2-3 minutes until it thickens. Remove from heat and let it cool.
- Assemble the Tarts: Spoon the chia jam into the tart shell, spreading it evenly. Top with fresh raspberries.
- Garnish: Add mint leaves for a refreshing touch.
- Chill: Place the tarts in the refrigerator for at least 30 minutes before serving to set the jam.
Guilt-Free Caramel Flan Made With Stevia
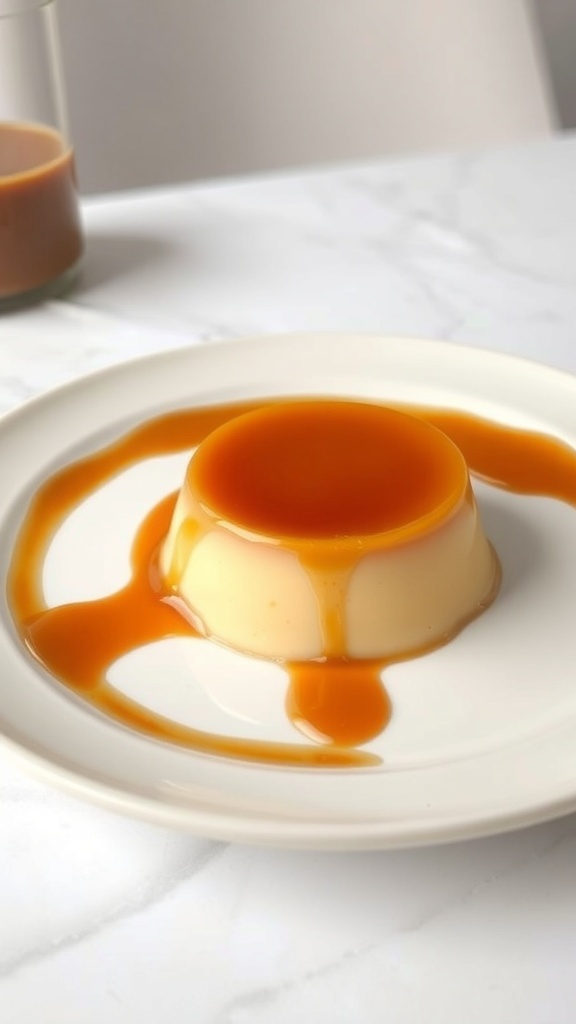
This Guilt-Free Caramel Flan is a delightful treat that satisfies your sweet tooth without the added sugar. The smooth, creamy texture of the flan pairs perfectly with the rich caramel sauce, making it a perfect dessert for any occasion. Using stevia as a sweetener keeps it low in calories, so you can enjoy it without any guilt.
The flan is beautifully presented on a simple white plate, showcasing its glossy caramel topping that drips enticingly down the sides. It’s a dessert that looks as good as it tastes, making it ideal for gatherings or a cozy night in.
Ingredients
- 1 cup water
- 1/2 cup stevia
- 1 can (14 oz) sweetened condensed milk
- 1 can (12 oz) evaporated milk
- 4 large eggs
- 1 teaspoon vanilla extract
Instructions
- Make the Caramel: In a saucepan, combine water and stevia. Heat over medium until the mixture turns a golden brown. Quickly pour the caramel into a flan mold, swirling to coat the bottom.
- Blend the Flan Mixture: In a blender, combine sweetened condensed milk, evaporated milk, eggs, and vanilla. Blend until smooth.
- Pour the Mixture: Carefully pour the flan mixture over the caramel in the mold.
- Bake: Preheat the oven to 350°F (175°C). Place the flan mold in a larger baking dish filled with water. Bake for about 50-60 minutes, or until set.
- Cool and Serve: Let the flan cool, then refrigerate for at least 4 hours. To serve, run a knife around the edges and invert onto a plate. Enjoy your guilt-free dessert!


Comments
Post a Comment