13 Delicious Low-Sugar Healthy Desserts to Satisfy Your Sweet Tooth
13 Delicious Low-Sugar Healthy Desserts to Satisfy Your Sweet Tooth
If you’re looking for sweet treats that satisfy your cravings without the sugar overload, you've come to the right place! These low-sugar healthy desserts offer all the deliciousness you desire, while keeping things light on the sugar front. Get ready to enjoy guilt-free indulgence that doesn’t compromise on flavor or fun!
Fruity Banana Oatmeal Cookies For Guilt-Free Snacking

These Fruity Banana Oatmeal Cookies are a delightful treat that satisfies your sweet tooth without the guilt. Bursting with banana flavor and packed with oats, they make for a perfect snack any time of the day. The addition of chocolate chips and walnuts adds a nice crunch, making each bite enjoyable.
In the image, you can see a plate full of these delicious cookies, with some bananas in the background and a glass of milk nearby. The cookies are golden brown and topped with chocolate chips, making them look irresistible. They’re not just tasty; they're also a healthier option for dessert lovers.
These cookies are easy to make and require simple ingredients. They are naturally sweetened with ripe bananas, so you can skip the refined sugars. Perfect for kids and adults alike, they are a great way to incorporate more fruits into your diet while still enjoying a sweet treat.
Ingredients
- 2 ripe bananas, mashed
- 1 cup rolled oats
- 1/2 cup whole wheat flour
- 1/4 cup honey or maple syrup
- 1/4 cup chocolate chips
- 1/4 cup chopped walnuts
- 1/2 teaspoon baking soda
- 1/2 teaspoon vanilla extract
- 1/4 teaspoon salt
Instructions
- Preheat the oven to 350°F (175°C) and line a baking sheet with parchment paper.
- In a large bowl, combine the mashed bananas, honey or maple syrup, and vanilla extract. Mix well.
- Add the rolled oats, whole wheat flour, baking soda, and salt to the banana mixture. Stir until combined.
- Fold in the chocolate chips and chopped walnuts.
- Drop spoonfuls of the cookie dough onto the prepared baking sheet, spacing them about 2 inches apart.
- Bake for 10-12 minutes or until the edges are golden brown.
- Let the cookies cool on the baking sheet for a few minutes before transferring them to a wire rack to cool completely.
Zesty Lemon Chia Seed Pudding For A Refreshing Treat
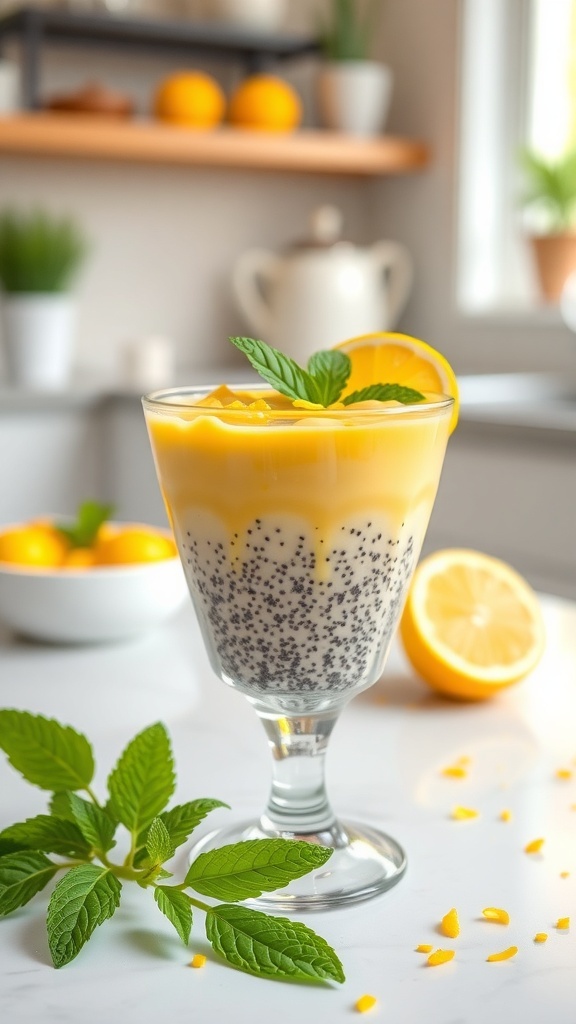
This zesty lemon chia seed pudding is a delightful way to satisfy your sweet tooth while keeping things healthy. The vibrant layers of lemony goodness and tiny chia seeds create a refreshing treat that’s perfect for any time of the day. The pudding is not only visually appealing but also packed with nutrients.
The chia seeds provide a great source of fiber and omega-3 fatty acids, making this dessert a smart choice. The bright lemon flavor adds a refreshing twist, making it a perfect summer snack or a light dessert after dinner.
To make this delicious pudding, you’ll need a few simple ingredients. The combination of creamy coconut milk and tangy lemon juice creates a smooth texture that pairs wonderfully with the crunch of chia seeds. Top it off with fresh mint for an extra pop of flavor.
Ingredients
- 1/2 cup chia seeds
- 2 cups coconut milk
- 1/4 cup honey or maple syrup
- 1/4 cup fresh lemon juice
- Zest of 1 lemon
- Fresh mint leaves for garnish
- Chopped mango or other fruit for topping (optional)
Instructions
- Mix Ingredients: In a bowl, combine chia seeds, coconut milk, honey or maple syrup, lemon juice, and lemon zest. Stir well to combine.
- Let It Sit: Allow the mixture to sit for about 10 minutes, then stir again to prevent clumping.
- Chill: Cover the bowl and refrigerate for at least 2 hours or overnight until it thickens.
- Serve: Once thickened, give the pudding a good stir and spoon it into serving glasses. Top with chopped mango or your favorite fruit and garnish with fresh mint leaves.
Decadent Sugar-Free Chocolate Bark For Chocolate Lovers

If you’re a chocolate lover looking for a guilt-free treat, sugar-free chocolate bark is the perfect solution. This delightful dessert is not only easy to make but also packed with flavor. The image shows a beautiful spread of chocolate bark topped with crunchy nuts and dried fruits, making it visually appealing and delicious.
The combination of rich chocolate and various toppings creates a satisfying snack that you can enjoy anytime. Whether you’re craving something sweet after dinner or need a quick pick-me-up during the day, this chocolate bark fits the bill. Plus, it’s a great way to satisfy your sweet tooth without the added sugar.
Making your own chocolate bark at home allows you to customize it to your liking. You can choose your favorite nuts, seeds, or dried fruits to create your unique blend. The possibilities are endless!
Ingredients
- 1 cup sugar-free dark chocolate chips
- 1/2 cup mixed nuts (like almonds, walnuts, and cashews)
- 1/4 cup dried cranberries or cherries
- 1 tablespoon coconut oil (optional, for smoothness)
Instructions
- Melt the Chocolate: In a microwave-safe bowl, combine the sugar-free dark chocolate chips and coconut oil. Microwave in 30-second intervals, stirring in between, until fully melted and smooth.
- Prepare the Toppings: While the chocolate melts, chop the mixed nuts and dried fruits into smaller pieces if needed.
- Spread the Chocolate: Line a baking sheet with parchment paper. Pour the melted chocolate onto the sheet and spread it evenly with a spatula.
- Add Toppings: Sprinkle the chopped nuts and dried fruits over the melted chocolate, pressing them down slightly to ensure they stick.
- Chill: Place the baking sheet in the refrigerator for about 30 minutes or until the chocolate is fully set.
- Break and Serve: Once set, break the chocolate bark into pieces and enjoy your homemade, sugar-free treat!
Creamy Greek Yogurt Parfaits With Fresh Berries
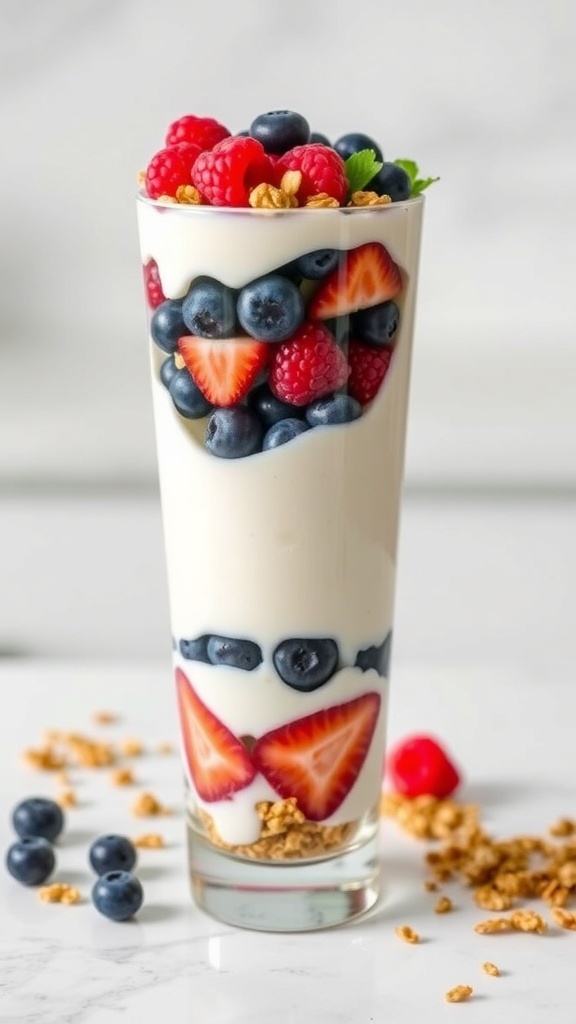
These creamy Greek yogurt parfaits are a delightful way to enjoy a healthy dessert. The layers of yogurt, fresh berries, and crunchy granola create a beautiful and tasty treat. You can see the vibrant colors of strawberries, blueberries, and raspberries peeking through the clear glass, making it as pleasing to the eye as it is to the palate.
Using Greek yogurt adds a creamy texture and a protein boost, making this dessert both satisfying and nutritious. The fresh berries provide natural sweetness and a burst of flavor, while the granola adds a satisfying crunch. This parfait is perfect for breakfast, a snack, or a light dessert.
Making these parfaits is simple and quick. Just layer the ingredients in a glass, and you’re ready to enjoy a guilt-free treat!
Ingredients
- 2 cups Greek yogurt
- 1 cup fresh strawberries, sliced
- 1 cup fresh blueberries
- 1 cup fresh raspberries
- 1 cup granola
- Honey or maple syrup (optional, for drizzling)
Instructions
- Start by preparing your ingredients. Wash the berries and slice the strawberries.
- In a glass or bowl, add a layer of Greek yogurt at the bottom.
- Next, add a layer of granola followed by a layer of mixed berries.
- Repeat the layers until you reach the top of the glass, finishing with a layer of berries.
- If desired, drizzle a little honey or maple syrup on top for added sweetness.
- Serve immediately and enjoy your healthy dessert!
Fruity Raspberry Chia Jam For A Sweet Spread
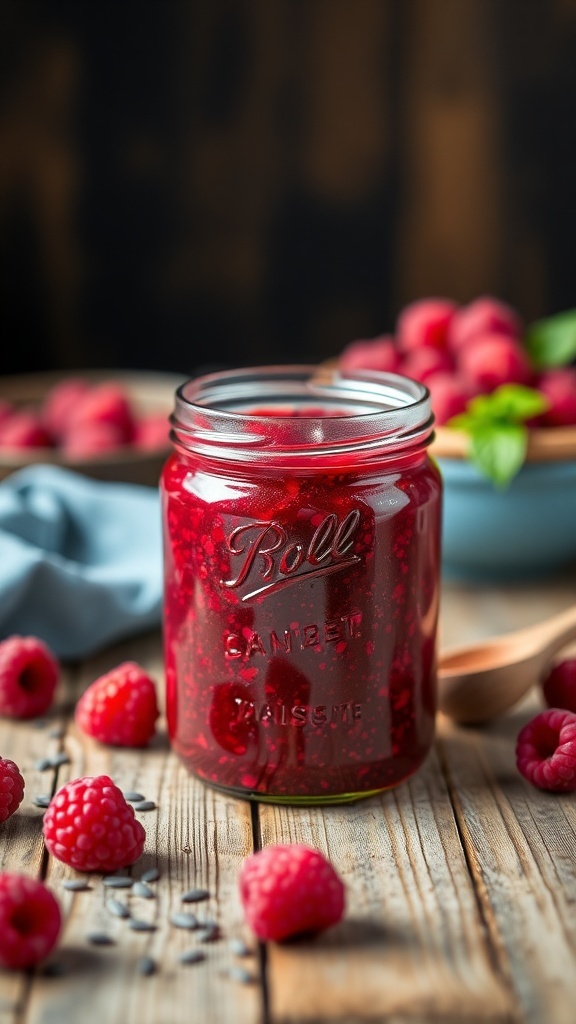
Raspberry chia jam is a fantastic way to enjoy a sweet treat without the guilt. This vibrant jam is packed with the natural sweetness of raspberries and the health benefits of chia seeds. The beautiful red color and thick texture make it perfect for spreading on toast or adding to yogurt.
Making this jam is simple and fun. You only need a few ingredients, and the process is quick. The chia seeds help thicken the jam while adding fiber and omega-3 fatty acids. Plus, it’s low in sugar, making it a great option for those looking to cut back on sweetness.
To make this delightful raspberry chia jam, gather your ingredients and follow the steps below. You’ll have a delicious spread ready in no time!
Ingredients
- 2 cups fresh raspberries
- 2 tablespoons honey or maple syrup (adjust to taste)
- 2 tablespoons chia seeds
- 1 tablespoon lemon juice
- Pinch of salt
Instructions
- In a medium saucepan, combine the raspberries, honey (or maple syrup), lemon juice, and salt. Cook over medium heat, stirring gently until the raspberries break down, about 5 minutes.
- Remove from heat and stir in the chia seeds. Mix well to combine.
- Let the mixture sit for about 10-15 minutes to thicken. Stir occasionally.
- Once thickened, transfer the jam to a clean jar and let it cool completely. Store in the refrigerator for up to two weeks.
Delicate Almond Joy Energy Bites For Anytime Cravings
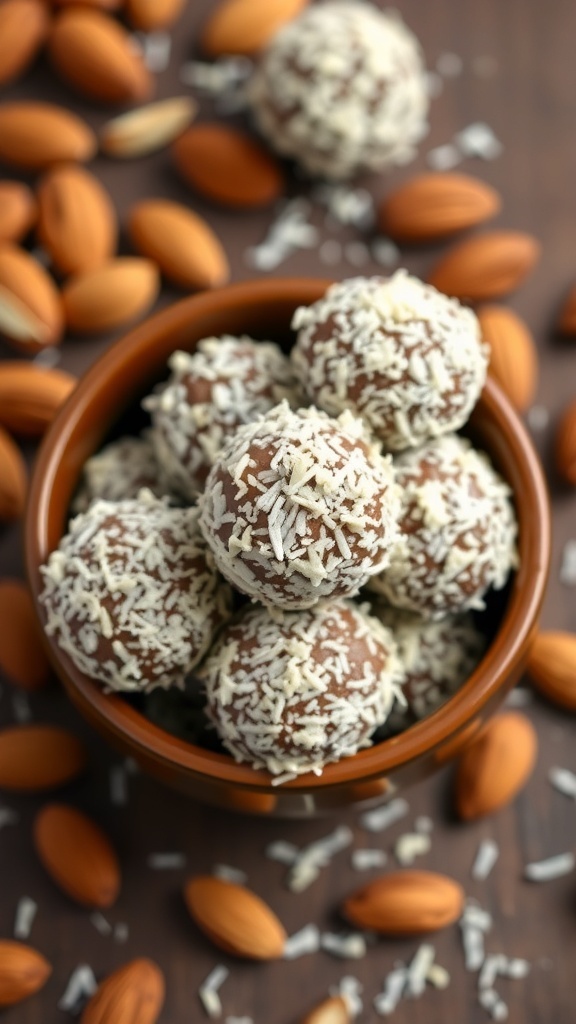
These Almond Joy Energy Bites are a delightful treat that satisfies your sweet tooth without the guilt. They are packed with healthy ingredients, making them perfect for any time of day. The image shows a bowl filled with these tasty bites, coated in shredded coconut and surrounded by whole almonds. This combination not only looks appealing but also hints at the delicious flavors waiting to be enjoyed.
These energy bites are simple to make and require no baking. They are great for a quick snack or a post-workout boost. With the rich taste of chocolate and the crunch of almonds, they are sure to become a favorite. Plus, they’re low in sugar, making them a smart choice for dessert lovers.
Ingredients
- 1 cup pitted dates
- 1/2 cup almond butter
- 1/4 cup unsweetened cocoa powder
- 1/2 cup shredded coconut
- 1/2 cup chopped almonds
- 1 teaspoon vanilla extract
- Pinch of salt
Instructions
- Blend the Dates: In a food processor, combine the pitted dates and almond butter. Blend until smooth.
- Add Dry Ingredients: Add cocoa powder, shredded coconut, chopped almonds, vanilla extract, and salt. Pulse until everything is well mixed.
- Form the Bites: Scoop out small portions of the mixture and roll them into balls. You can make them as big or small as you like.
- Coat the Bites: Roll each ball in additional shredded coconut for a nice finish.
- Chill: Place the energy bites in the fridge for about 30 minutes to firm up.
- Enjoy: Serve chilled or at room temperature. Store any leftovers in an airtight container in the fridge.
Refreshing Watermelon Sorbet For A Cool Down
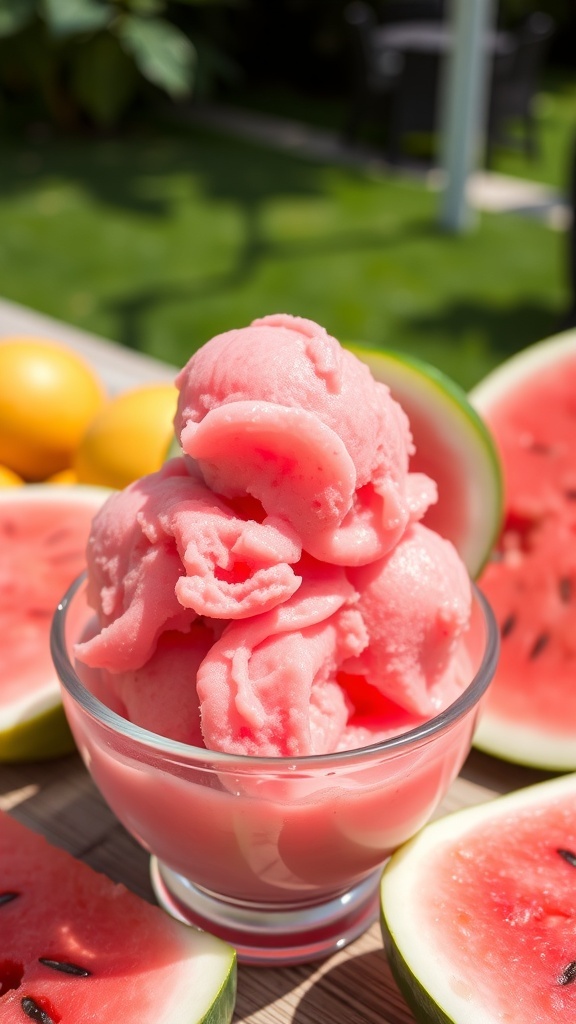
Watermelon sorbet is the perfect treat for hot days. This vibrant dessert not only looks refreshing but also tastes amazing. The bright pink color and smooth texture make it a hit for both kids and adults. Plus, it’s low in sugar, making it a guilt-free option for dessert lovers.
Making watermelon sorbet is simple and requires just a few ingredients. You can enjoy it on its own or pair it with fresh mint leaves for an extra burst of flavor. It’s a great way to cool down and satisfy your sweet tooth without the added sugars found in many store-bought desserts.
Here’s how to whip up this delightful sorbet at home!
Ingredients
- 4 cups watermelon, cubed and seedless
- 1 tablespoon lime juice
- 2 tablespoons honey or agave syrup (adjust to taste)
- Fresh mint leaves for garnish
Instructions
- Prepare the Watermelon: Start by cutting the watermelon into cubes. Make sure to remove any seeds if you’re using a seeded watermelon.
- Blend the Ingredients: In a blender, combine the watermelon cubes, lime juice, and honey. Blend until smooth.
- Freeze the Mixture: Pour the blended mixture into a shallow dish and place it in the freezer. Let it freeze for about 2-3 hours, stirring every 30 minutes to break up any ice crystals.
- Scoop and Serve: Once the sorbet is fully frozen and fluffy, scoop it into bowls. Garnish with fresh mint leaves for a refreshing touch.
Crispy Baked Apple Chips For A Crunchy Snack
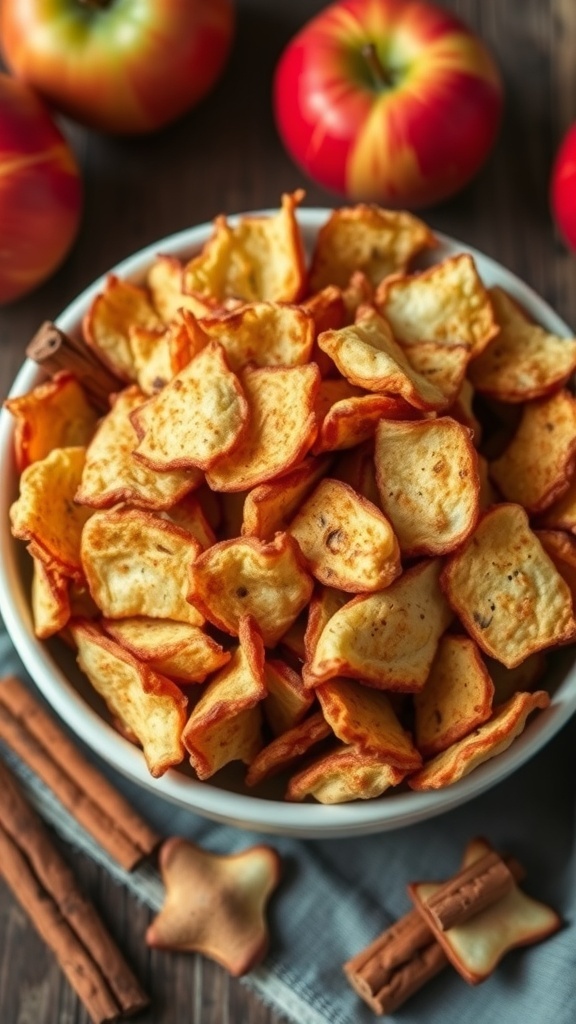
Crispy baked apple chips are a fantastic snack that combines health and crunch. These chips are made from fresh apples, sliced thin and baked until they reach the perfect crispness. They are a great alternative to traditional chips, offering a sweet and satisfying crunch without the added sugars.
The image shows a bowl filled with golden-brown apple chips, perfectly crisp and inviting. Surrounding the bowl are vibrant red apples and cinnamon sticks, hinting at the delicious flavors within. This snack is not only tasty but also visually appealing, making it perfect for sharing or enjoying on your own.
Making these apple chips is simple and requires minimal ingredients. You can enjoy them as a snack, add them to salads, or use them as a topping for yogurt. They’re versatile and can be flavored with spices like cinnamon or nutmeg for an extra kick.
Ingredients
- 4 medium apples (any variety)
- 1 teaspoon cinnamon (optional)
- 1 tablespoon lemon juice
- Pinch of salt
Instructions
- Preheat your oven to 225°F (110°C).
- Wash and core the apples. Slice them thinly, about 1/8 inch thick. A mandoline slicer works great for this.
- In a bowl, toss the apple slices with lemon juice, cinnamon, and a pinch of salt.
- Arrange the apple slices in a single layer on a baking sheet lined with parchment paper.
- Bake for 1.5 to 2 hours, flipping halfway through, until the chips are dry and crispy.
- Let them cool before serving. Enjoy your homemade crispy baked apple chips!
Sweet Cinnamon Pears For A Warm Dessert
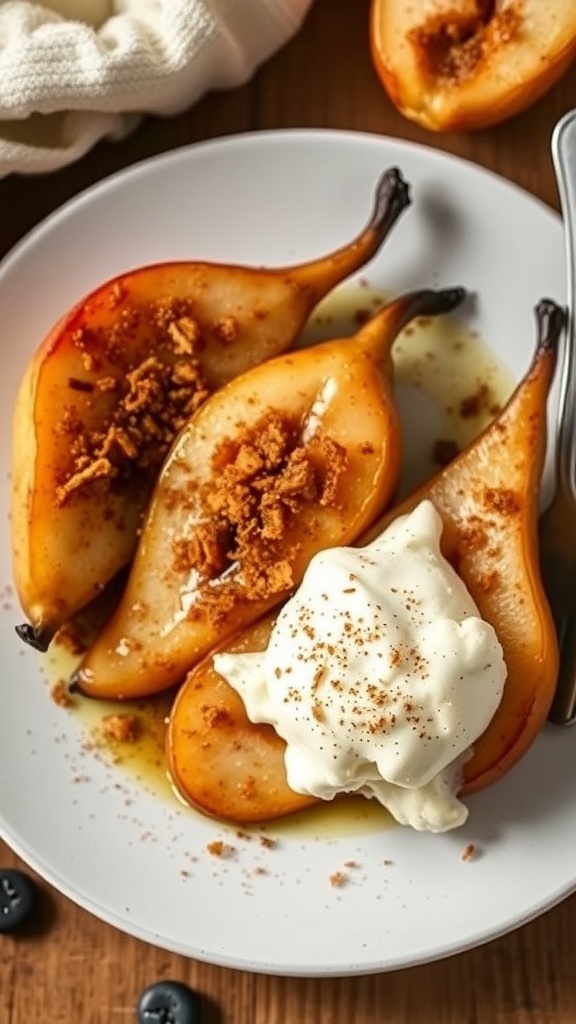
Sweet cinnamon pears are a delightful treat that brings warmth and comfort to any meal. This dessert is simple yet satisfying, showcasing the natural sweetness of pears enhanced by a sprinkle of cinnamon. The golden-brown color of the baked pears is inviting, and the aroma fills the kitchen with a cozy scent.
When you slice into these pears, you’ll find them tender and juicy, making them perfect for a warm dessert. Topped with a dollop of whipped cream or a scoop of vanilla ice cream, they become a delightful indulgence. The crunch of the cinnamon topping adds a nice texture, making each bite a little celebration.
Ingredients
- 4 ripe pears, halved and cored
- 2 tablespoons brown sugar
- 1 teaspoon ground cinnamon
- 1 tablespoon unsalted butter, melted
- 1/2 teaspoon vanilla extract
- Whipped cream or vanilla ice cream for serving
Instructions
- Preheat the oven to 350°F (175°C).
- In a small bowl, mix the brown sugar and cinnamon together.
- Place the pear halves in a baking dish, cut side up. Drizzle with melted butter and vanilla extract.
- Sprinkle the cinnamon-sugar mixture evenly over the pears.
- Bake in the preheated oven for 25-30 minutes, or until the pears are tender.
- Serve warm, topped with whipped cream or a scoop of vanilla ice cream.
Chocolate Avocado Truffles For Luxurious Indulgence
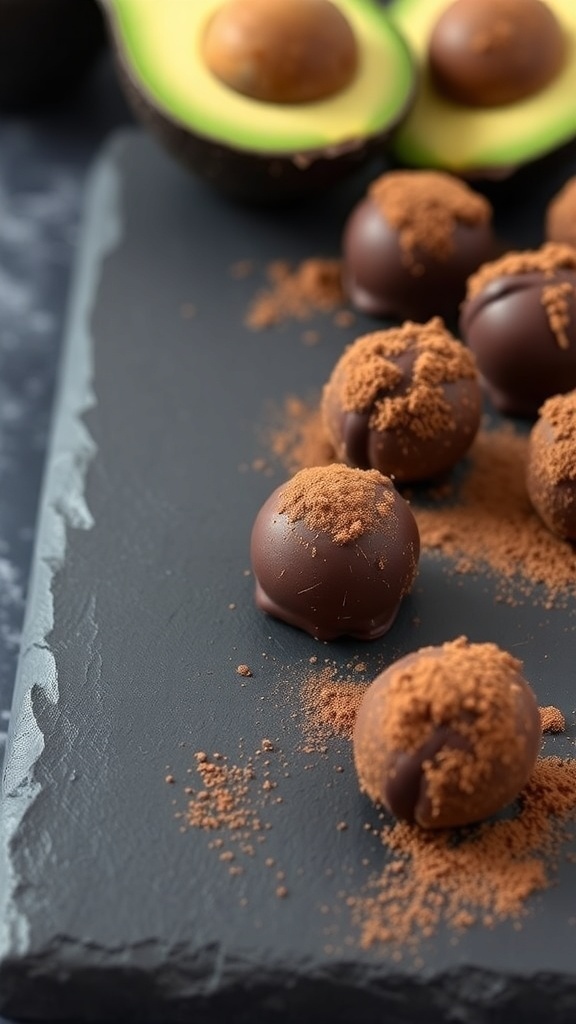
Chocolate avocado truffles are a delightful treat that combines rich chocolate with creamy avocado. These truffles are not just indulgent; they are also a healthier option for dessert lovers. The image showcases beautifully rolled truffles dusted with cocoa powder, sitting next to fresh avocados. The contrast between the dark chocolate and the vibrant green of the avocados makes for an eye-catching presentation.
Making these truffles is simple and fun. You can enjoy them as a sweet snack or serve them at a gathering. They are perfect for satisfying your chocolate cravings without the guilt!
Ingredients
- 1 ripe avocado
- 1 cup dark chocolate chips
- 2 tablespoons honey or maple syrup
- 1 teaspoon vanilla extract
- Cocoa powder for dusting
Instructions
- Prepare the Avocado: Cut the avocado in half, remove the pit, and scoop the flesh into a bowl.
- Melt the Chocolate: In a microwave-safe bowl, melt the dark chocolate chips in 30-second intervals, stirring in between until smooth.
- Mix Ingredients: Add the melted chocolate, honey (or maple syrup), and vanilla extract to the bowl with the avocado. Blend until smooth and creamy.
- Chill the Mixture: Place the mixture in the refrigerator for about 30 minutes to firm up.
- Form the Truffles: Once chilled, use a spoon or your hands to scoop out small amounts of the mixture and roll them into balls.
- Dust with Cocoa: Roll each truffle in cocoa powder to coat them evenly.
- Serve: Enjoy immediately or store in the fridge for later!
Creamy Coconut Pudding For A Tropical Escape
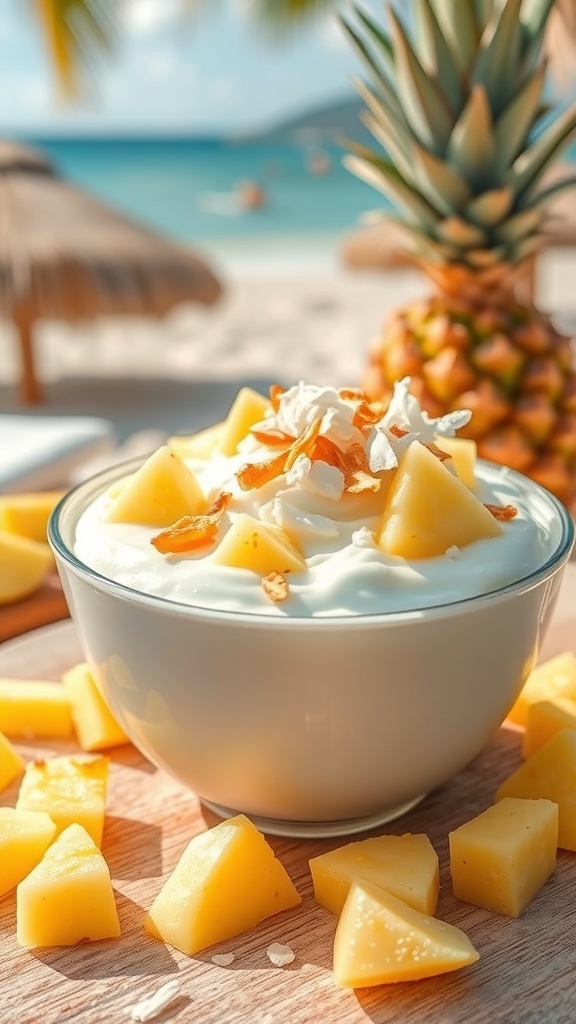
Imagine a bowl of creamy coconut pudding, topped with fresh pineapple and sprinkled with toasted coconut. This dessert not only looks inviting but also tastes like a tropical getaway. The smooth texture of the pudding pairs perfectly with the sweet, juicy pineapple, creating a delightful contrast. It’s a low-sugar treat that satisfies your sweet tooth without the guilt.
Making this pudding is simple and requires just a few ingredients. You can whip it up in no time, making it a perfect choice for a quick dessert or a special occasion. The combination of coconut and pineapple brings a refreshing taste that transports you to a sunny beach, even if you’re just at home.
Let’s get into the recipe so you can enjoy this delicious dessert!
Ingredients
- 1 can (13.5 oz) coconut milk
- 1/4 cup unsweetened almond milk
- 1/4 cup chia seeds
- 2 tablespoons honey or maple syrup
- 1 teaspoon vanilla extract
- 1 cup fresh pineapple, diced
- 2 tablespoons toasted coconut flakes
Instructions
- Combine coconut milk, almond milk, chia seeds, honey, and vanilla extract in a bowl. Mix well.
- Let the mixture sit for about 10 minutes, then stir again to prevent clumping.
- Cover and refrigerate for at least 2 hours, or until the pudding thickens.
- Once set, serve the pudding in bowls topped with diced pineapple and toasted coconut flakes.
- Enjoy your creamy coconut pudding as a refreshing dessert!
Nutty Peanut Butter Banana Ice Cream For A Sweet Treat
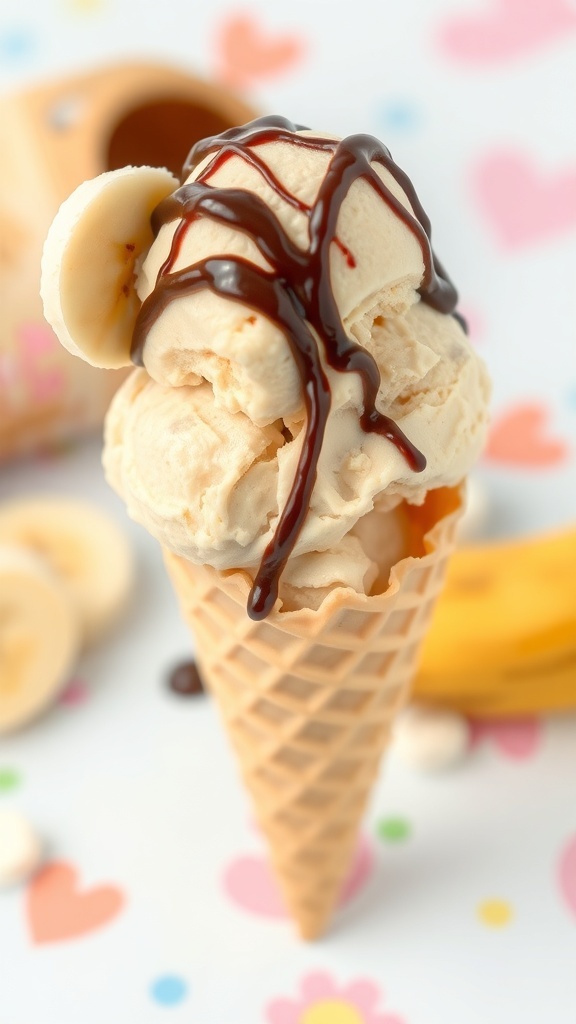
This Nutty Peanut Butter Banana Ice Cream is a delightful way to satisfy your sweet tooth without the guilt. The creamy texture and rich flavor make it a perfect treat for any occasion. Plus, it’s super easy to whip up!
Imagine a cone filled with smooth, homemade ice cream, drizzled with chocolate sauce and topped with banana slices. It’s a visual treat that’s just as delicious as it looks. The combination of peanut butter and banana is a classic that never fails to impress.
To make this tasty dessert, you’ll need ripe bananas, creamy peanut butter, and a few other simple ingredients. It’s a great way to use up those overripe bananas sitting on your counter!
Ingredients
- 4 ripe bananas
- 1/2 cup creamy peanut butter
- 1/4 cup honey or maple syrup
- 1 teaspoon vanilla extract
- 1/2 cup milk (dairy or non-dairy)
- Chocolate sauce for drizzling (optional)
Instructions
- Prepare the Bananas: Peel the bananas and slice them into chunks. Place them in a blender or food processor.
- Add Ingredients: Add the peanut butter, honey or maple syrup, vanilla extract, and milk to the blender with the bananas.
- Blend Until Smooth: Blend the mixture until it’s completely smooth and creamy. You may need to scrape down the sides a few times.
- Freeze: Pour the mixture into a container and freeze for about 2-3 hours, or until firm.
- Serve: Scoop the ice cream into cones or bowls. Drizzle with chocolate sauce and add banana slices on top if desired. Enjoy!
Moist Zucchini Bread Muffins For A Healthy Breakfast
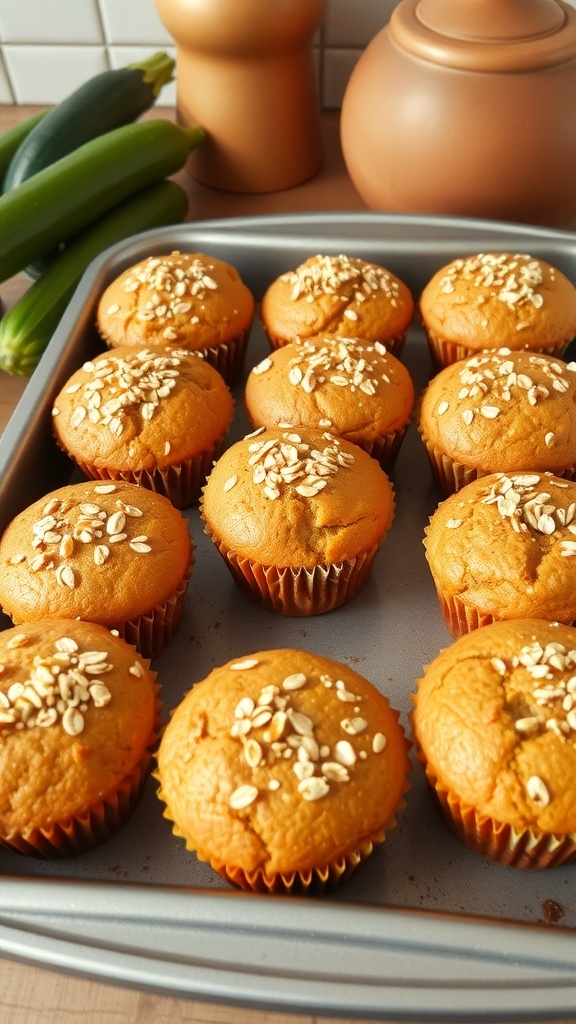
These moist zucchini bread muffins are a fantastic way to kickstart your day. Packed with nutrients and low in sugar, they make for a healthy breakfast option that doesn’t compromise on taste. The muffins are fluffy, with a lovely golden hue and a sprinkle of oats on top for that perfect crunch.
Using zucchini in your baking not only adds moisture but also boosts the nutritional value. These muffins are a great way to sneak in some veggies, especially for those who might be hesitant about eating them. The combination of spices and the natural sweetness from the zucchini creates a delightful flavor that everyone will enjoy.
These muffins are easy to make and can be stored for a quick grab-and-go breakfast during busy mornings. Just pop them in the toaster or enjoy them as they are. Let’s get to the recipe!
Ingredients
- 1 cup grated zucchini (about 1 medium zucchini)
- 1 cup whole wheat flour
- 1/2 cup rolled oats
- 1/4 cup honey or maple syrup
- 1/4 cup unsweetened applesauce
- 1/2 teaspoon baking soda
- 1 teaspoon baking powder
- 1 teaspoon ground cinnamon
- 1/4 teaspoon salt
- 1 large egg
- 1 teaspoon vanilla extract
Instructions
- Preheat your oven to 350°F (175°C) and line a muffin tin with paper liners.
- In a large bowl, mix the grated zucchini, honey (or maple syrup), applesauce, egg, and vanilla extract until well combined.
- In another bowl, whisk together the whole wheat flour, rolled oats, baking soda, baking powder, cinnamon, and salt.
- Gradually add the dry ingredients to the wet mixture, stirring until just combined. Be careful not to overmix.
- Divide the batter evenly among the muffin cups and sprinkle a few extra oats on top for garnish.
- Bake for 18-20 minutes or until a toothpick inserted into the center comes out clean.
- Let the muffins cool in the pan for a few minutes before transferring them to a wire rack to cool completely.


Comments
Post a Comment