17 Delicious No Bake Desserts Under 200 Calories for Weight Loss
17 Delicious No Bake Desserts Under 200 Calories for Weight Loss
No bake desserts can be both delicious and satisfying while keeping your calorie count in check. In this collection, you'll find a variety of tasty treats that each come in under 200 calories, making it easier than ever to enjoy a sweet bite without the guilt. Perfect for those who love desserts but want to maintain a healthier lifestyle, these recipes are quick, easy, and require minimal effort!
Refreshing Berry Bliss Cups For A Guilt-Free Treat
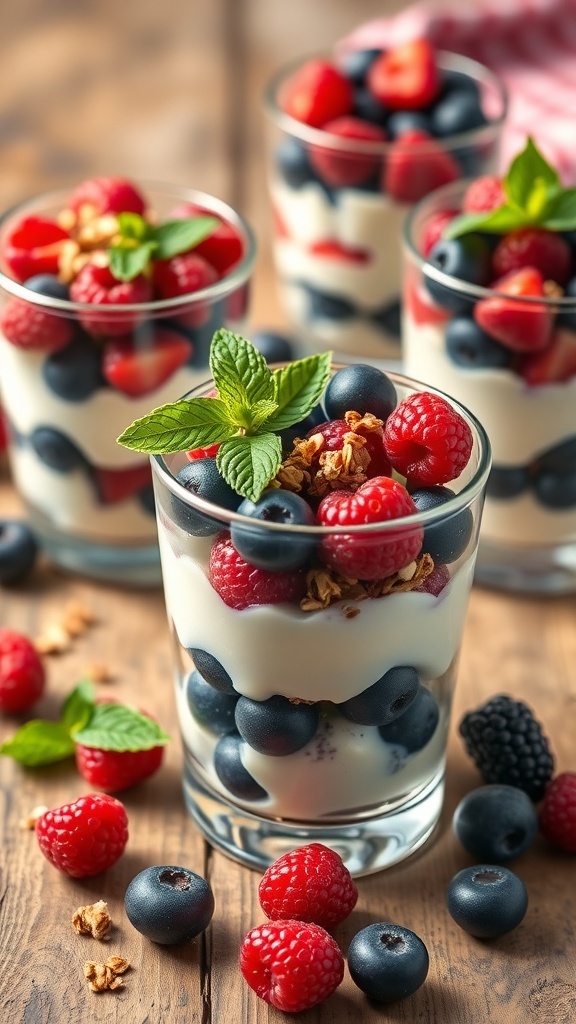
Berry Bliss Cups are a delightful way to satisfy your sweet tooth without the guilt. These cups are layered with creamy yogurt, fresh berries, and a sprinkle of granola. They look vibrant and inviting, perfect for a light dessert or snack. The combination of blueberries, raspberries, and a hint of mint makes them not only tasty but also refreshing.
Making these cups is simple and quick. You can whip them up in no time, making them a great choice for busy days. Plus, they are under 200 calories, so you can enjoy them without worrying about your diet. Just grab some clear cups to showcase those beautiful layers!
Ingredients
- 1 cup Greek yogurt (plain or flavored)
- 1 cup mixed berries (blueberries, raspberries, strawberries)
- 1/4 cup granola
- Fresh mint leaves for garnish
Instructions
- Start by layering a few spoonfuls of Greek yogurt at the bottom of each cup.
- Add a layer of mixed berries on top of the yogurt.
- Sprinkle a layer of granola over the berries.
- Repeat the layers until the cups are filled, finishing with a layer of berries on top.
- Garnish with fresh mint leaves for a pop of color and flavor.
- Serve immediately or chill in the fridge for a refreshing treat later!
Zesty Lemon Coconut Energy Bites For A Sweet Boost
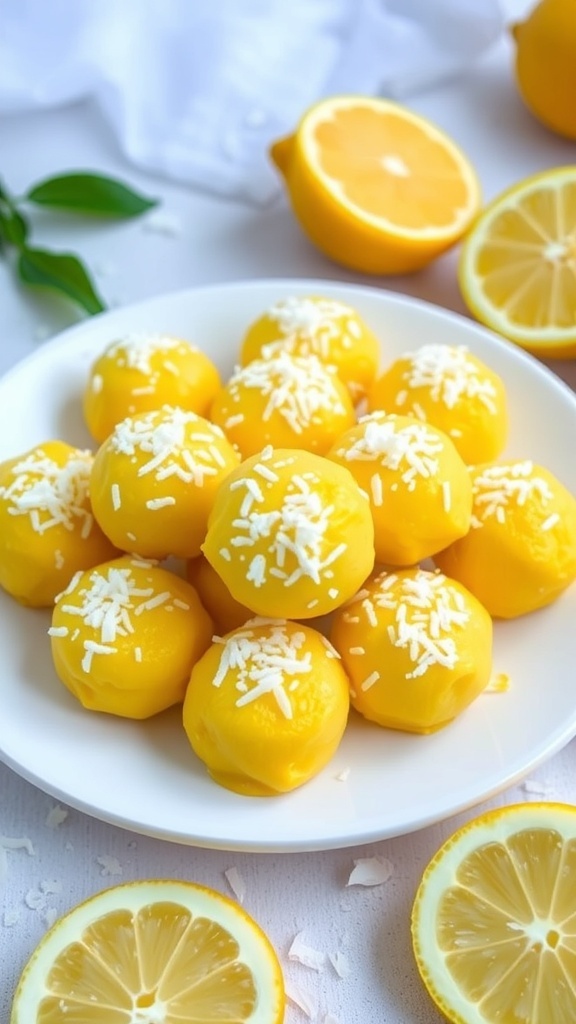
If you’re looking for a quick and healthy treat, these Zesty Lemon Coconut Energy Bites are perfect! They’re bright, cheerful, and packed with flavor. The vibrant yellow color comes from fresh lemon juice and zest, making them a refreshing snack. Each bite is coated with shredded coconut, adding a delightful texture.
These energy bites are not only tasty but also easy to make. They are great for a post-workout boost or a midday snack. Plus, they are under 200 calories, making them a guilt-free indulgence. You can whip them up in no time, and they require no baking!
Ingredients
- 1 cup rolled oats
- 1/2 cup almond butter
- 1/4 cup honey or maple syrup
- 1/4 cup fresh lemon juice
- Zest of 1 lemon
- 1/2 cup shredded coconut
- 1/4 teaspoon salt
- 1/2 teaspoon vanilla extract
Instructions
- In a large bowl, mix together the rolled oats, almond butter, honey or maple syrup, lemon juice, lemon zest, shredded coconut, salt, and vanilla extract.
- Stir until all ingredients are well combined. The mixture should be sticky and hold together.
- Using your hands, roll the mixture into small balls, about 1 inch in diameter.
- Place the energy bites on a baking sheet lined with parchment paper.
- Refrigerate for at least 30 minutes to firm up.
- Once set, enjoy your zesty lemon coconut energy bites! Store leftovers in an airtight container in the fridge.
Chilled Banana Oatmeal Cups: A Breakfast Dessert Combo
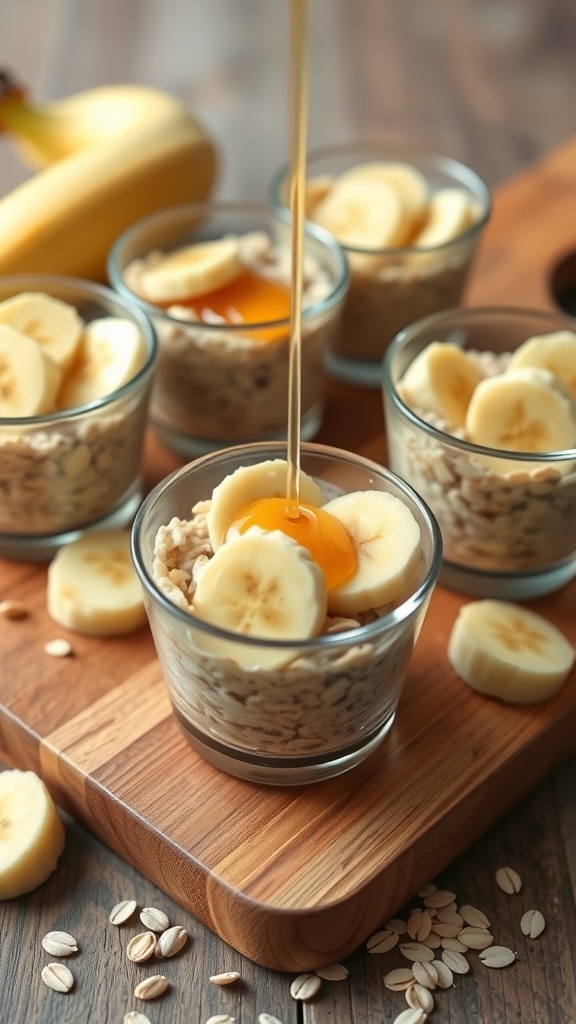
Chilled Banana Oatmeal Cups are a delightful way to enjoy breakfast and dessert in one. These little cups are packed with flavor and nutrition, making them a perfect choice for anyone looking to keep their calorie count low while still satisfying their sweet tooth.
In the image, you can see several small glasses filled with layers of oats, banana slices, and a drizzle of honey. The bananas add natural sweetness, while the oats provide a hearty base. This combination not only tastes great but also keeps you feeling full longer.
Making these cups is super easy. You can prepare them in advance and store them in the fridge. They’re great for busy mornings or a quick snack. Just grab a cup and enjoy!
Ingredients
- 1 cup rolled oats
- 2 cups almond milk (or any milk of your choice)
- 2 ripe bananas, sliced
- 2 tablespoons honey or maple syrup
- 1 teaspoon vanilla extract
- 1/2 teaspoon cinnamon
- Pinch of salt
Instructions
- In a bowl, mix the rolled oats, almond milk, honey, vanilla extract, cinnamon, and salt. Stir well to combine.
- Layer the mixture into small glasses or cups. Start with a layer of the oat mixture, followed by a layer of banana slices.
- Repeat the layers until the glasses are filled, finishing with a layer of banana on top.
- Cover the cups and refrigerate for at least 2 hours, or overnight for best results.
- Serve chilled and enjoy your delicious Chilled Banana Oatmeal Cups!
Decadent Peanut Butter Chocolate Bars: A No-Bake Delight
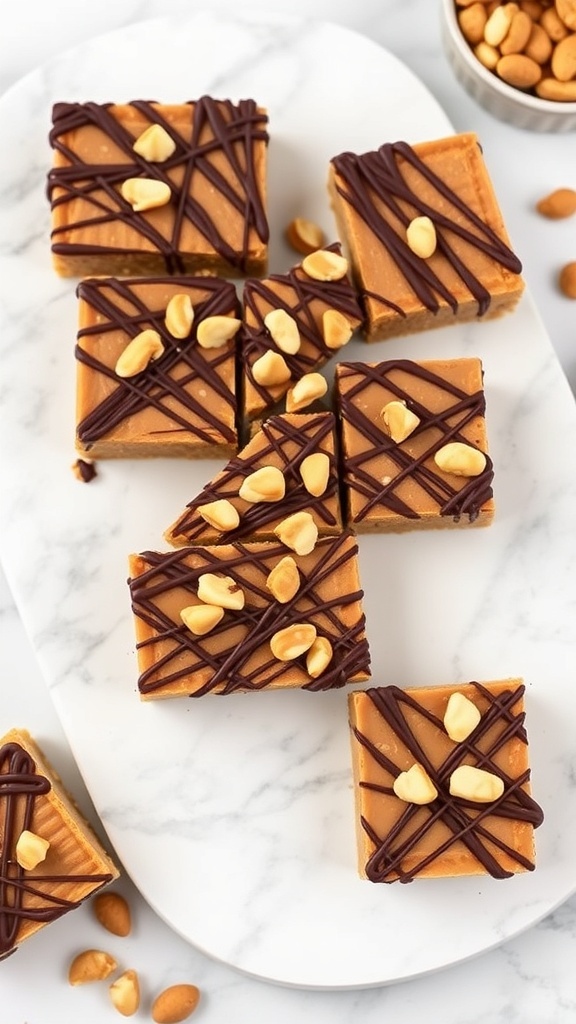
These peanut butter chocolate bars are a treat that feels indulgent without the guilt. Perfect for satisfying your sweet tooth, they are easy to make and require no baking. Just look at those layers of creamy peanut butter topped with rich chocolate drizzle. They’re not only delicious but also light enough to keep your calorie count in check.
With a few simple ingredients, you can whip up these bars in no time. They’re great for meal prep or a quick snack. Plus, they’re under 200 calories each, making them a smart choice for anyone watching their weight.
Let’s get to the recipe so you can enjoy these delightful bars!
Ingredients
- 1 cup natural peanut butter
- 1/4 cup honey or maple syrup
- 1 cup rolled oats
- 1/2 cup dark chocolate chips
- 1 tablespoon coconut oil
- 1/4 cup chopped peanuts (for topping)
Instructions
- Mix the Base: In a large bowl, combine peanut butter and honey until smooth. Stir in rolled oats until fully incorporated.
- Prepare the Pan: Line an 8x8 inch baking dish with parchment paper. Press the peanut butter mixture evenly into the bottom of the dish.
- Melt the Chocolate: In a microwave-safe bowl, combine dark chocolate chips and coconut oil. Heat in 30-second intervals, stirring until melted and smooth.
- Top with Chocolate: Pour the melted chocolate over the peanut butter base. Use a spatula to spread it evenly.
- Add Peanuts: Sprinkle chopped peanuts on top of the chocolate layer for added crunch.
- Chill: Refrigerate for at least 1 hour to set. Once firm, cut into squares and enjoy!
Nutty Almond Joy Energy Balls For A Satisfying Snack
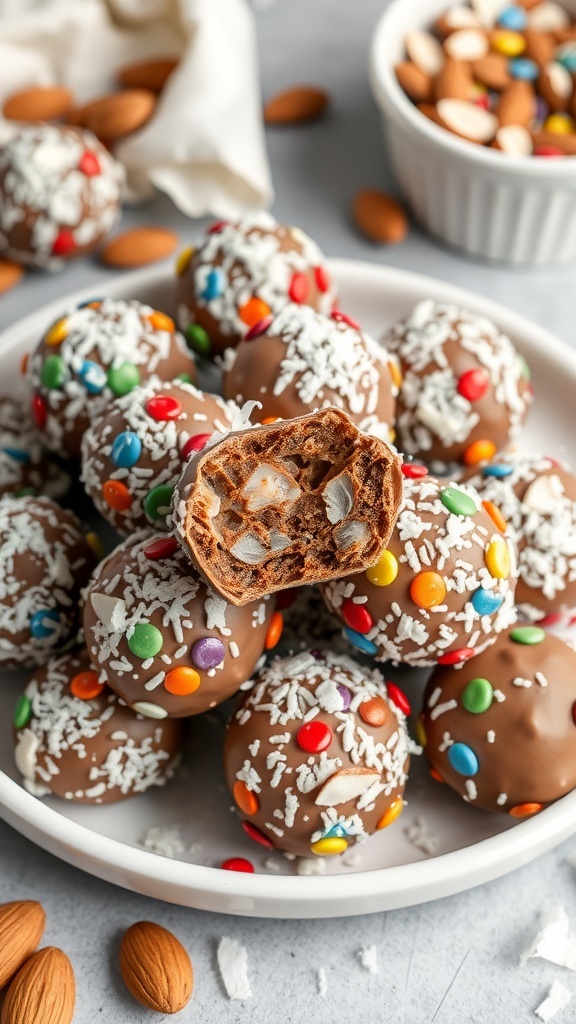
These Nutty Almond Joy Energy Balls are a fantastic treat when you're looking for something sweet yet healthy. They combine the rich flavors of chocolate and coconut with the crunch of almonds, making them a delightful snack. Each bite is packed with energy and flavor, perfect for a quick pick-me-up.
To make these energy balls, you'll need a few simple ingredients. The base is made from oats and almond butter, which provide a good source of protein and healthy fats. The addition of shredded coconut and mini chocolate chips gives them that classic Almond Joy taste. Plus, they’re easy to prepare and require no baking!
These energy balls are not only delicious but also under 200 calories each, making them a great option for weight loss. You can enjoy them as a snack between meals or even as a post-workout treat. They’re also perfect for meal prep, so you can have a healthy snack ready whenever you need it.
Ingredients
- 1 cup rolled oats
- 1/2 cup almond butter
- 1/4 cup honey or maple syrup
- 1/4 cup shredded coconut
- 1/4 cup mini chocolate chips
- 1/4 cup chopped almonds
- 1 teaspoon vanilla extract
Instructions
- In a large bowl, mix together the rolled oats, almond butter, honey or maple syrup, shredded coconut, mini chocolate chips, chopped almonds, and vanilla extract until well combined.
- Once mixed, use your hands to form the mixture into small balls, about 1 inch in diameter.
- Place the energy balls on a baking sheet lined with parchment paper.
- Refrigerate for at least 30 minutes to firm up.
- Store in an airtight container in the fridge for up to a week.
Savory And Sweet Yogurt Parfaits With Seasonal Fruits
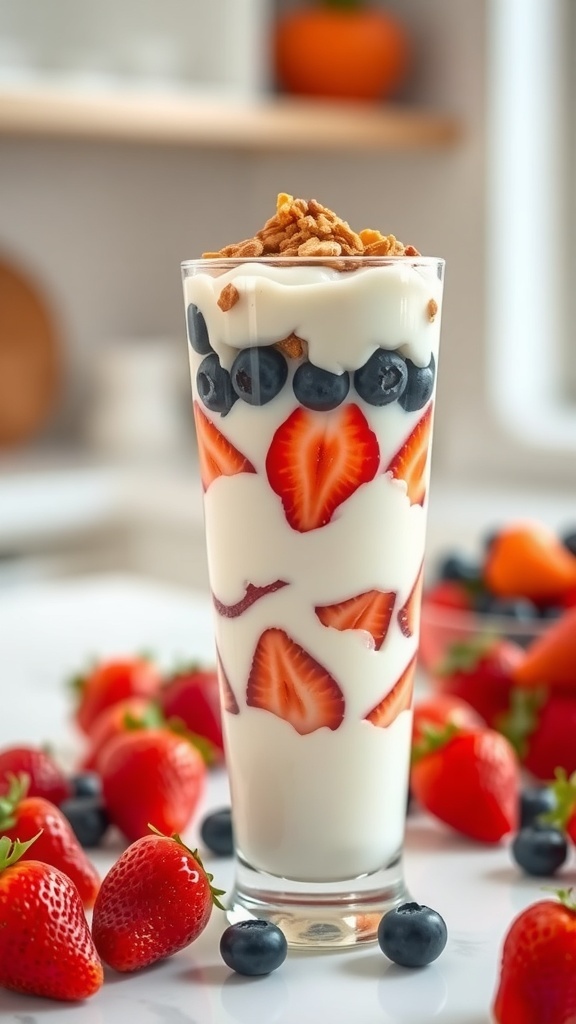
Yogurt parfaits are a delightful way to enjoy both savory and sweet flavors while keeping your calorie count low. This image showcases a beautiful parfait layered with creamy yogurt, fresh strawberries, and blueberries. The vibrant colors of the fruits make it visually appealing, and the crunch of granola on top adds a satisfying texture.
These parfaits are perfect for breakfast, a snack, or even a light dessert. They are easy to prepare and can be customized with your favorite fruits and toppings. Plus, they are packed with protein from the yogurt and nutrients from the fruits, making them a great choice for weight loss.
To make your own yogurt parfait, you’ll need just a few simple ingredients. Feel free to mix and match fruits based on what’s in season or what you have on hand. The combination of flavors will keep your taste buds happy without exceeding 200 calories!
Ingredients
- 1 cup plain Greek yogurt
- 1/2 cup fresh strawberries, sliced
- 1/2 cup fresh blueberries
- 1/4 cup granola
- 1 tablespoon honey or maple syrup (optional)
Instructions
- In a glass or bowl, start by adding a layer of Greek yogurt at the bottom.
- Add a layer of sliced strawberries followed by a layer of blueberries.
- Repeat the layers until you reach the top of the glass.
- Sprinkle granola on top for added crunch.
- If desired, drizzle honey or maple syrup over the parfait for extra sweetness.
- Serve immediately and enjoy your delicious, healthy treat!
Rich And Creamy No-Bake Cheesecake Bites: Perfectly Portion-Controlled
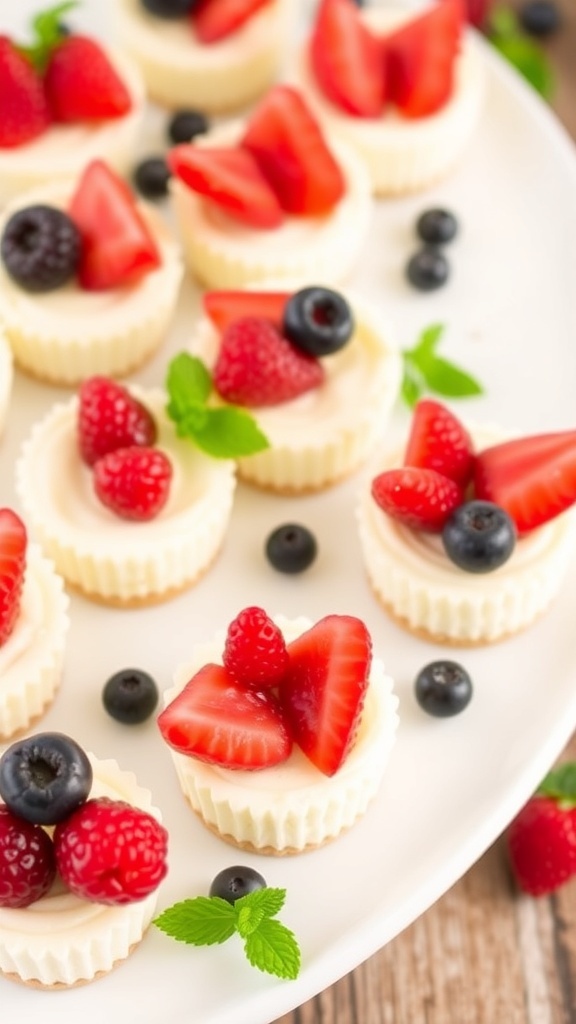
These no-bake cheesecake bites are a delightful treat that fits perfectly into a weight-loss plan. Each bite is rich and creamy, making it easy to enjoy dessert without the guilt. They are portion-controlled, so you can satisfy your sweet tooth without going overboard on calories.
The image showcases these adorable cheesecake bites topped with fresh berries and mint leaves. The vibrant colors of the strawberries, blueberries, and raspberries make them visually appealing. The creamy texture of the cheesecake contrasts beautifully with the crunchy graham cracker crust, creating a perfect balance of flavors.
Making these bites is simple and requires no baking. Just mix the ingredients, pour them into molds, and let them chill. They are great for parties or as a quick snack when you need something sweet.
Ingredients
- 1 cup graham cracker crumbs
- 2 tablespoons unsalted butter, melted
- 1 cup cream cheese, softened
- 1/2 cup powdered sugar
- 1 teaspoon vanilla extract
- 1 cup whipped topping
- Fresh berries for topping
Instructions
- Prepare the Crust: In a bowl, mix graham cracker crumbs and melted butter until combined. Press the mixture into the bottom of mini muffin tins or silicone molds.
- Make the Filling: In another bowl, beat the cream cheese until smooth. Gradually add powdered sugar and vanilla extract, mixing until well combined. Fold in the whipped topping gently.
- Fill the Molds: Spoon the cheesecake mixture over the crust in the molds, smoothing the tops with a spatula.
- Chill: Place the molds in the refrigerator for at least 2 hours or until set.
- Serve: Once set, remove the cheesecake bites from the molds and top with fresh berries and mint leaves before serving.
Tropical Mango Coconut Pudding: A Taste Of Paradise
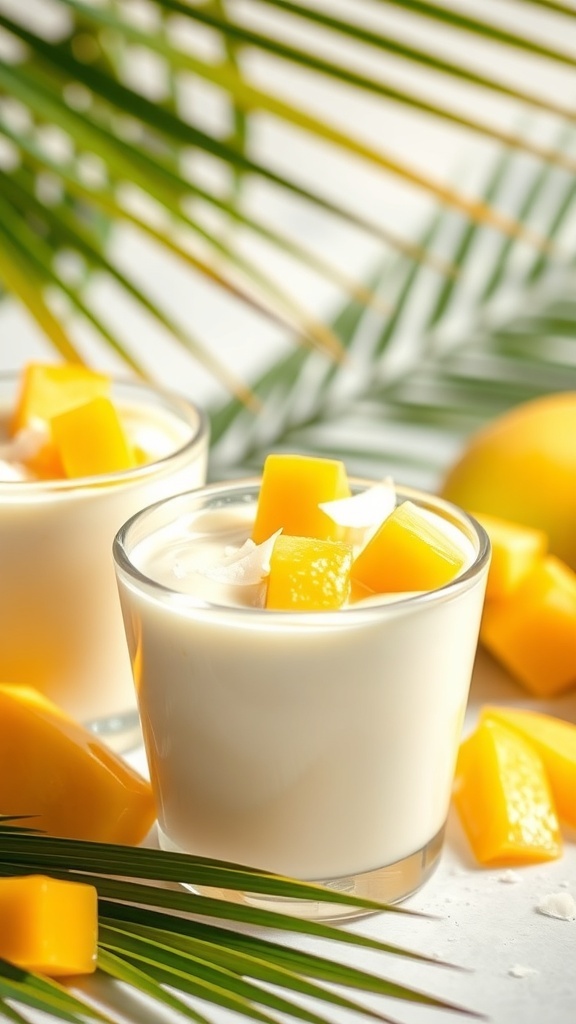
Imagine a creamy, dreamy dessert that transports you straight to a tropical beach. That’s what this Tropical Mango Coconut Pudding is all about! With its luscious layers of coconut and fresh mango, it’s not just a treat for your taste buds but also a feast for the eyes.
The pudding is light and airy, making it a perfect choice for those watching their calorie intake. Each serving is under 200 calories, so you can enjoy a guilt-free dessert that feels indulgent. The vibrant yellow mango chunks add a pop of color and a burst of flavor, while the coconut brings a hint of sweetness and creaminess.
This dessert is not only delicious but also incredibly easy to make. No baking required! Just mix, chill, and serve. It’s perfect for warm days or whenever you need a refreshing treat. Let’s get to the recipe so you can whip this up in no time!
Ingredients
- 1 cup coconut milk
- 1/2 cup Greek yogurt
- 1/4 cup honey or maple syrup
- 1 tablespoon cornstarch
- 1 teaspoon vanilla extract
- 1 ripe mango, diced
- Shredded coconut for garnish (optional)
Instructions
- In a saucepan, combine coconut milk, Greek yogurt, honey, cornstarch, and vanilla extract. Whisk until smooth.
- Heat the mixture over medium heat, stirring constantly until it thickens, about 5-7 minutes.
- Remove from heat and let it cool for a few minutes. Then, pour the pudding into serving glasses.
- Chill in the refrigerator for at least 2 hours to set.
- Before serving, top with diced mango and a sprinkle of shredded coconut if desired.
Delightful Chia Seed Pudding: A Nutrient-Packed Dessert
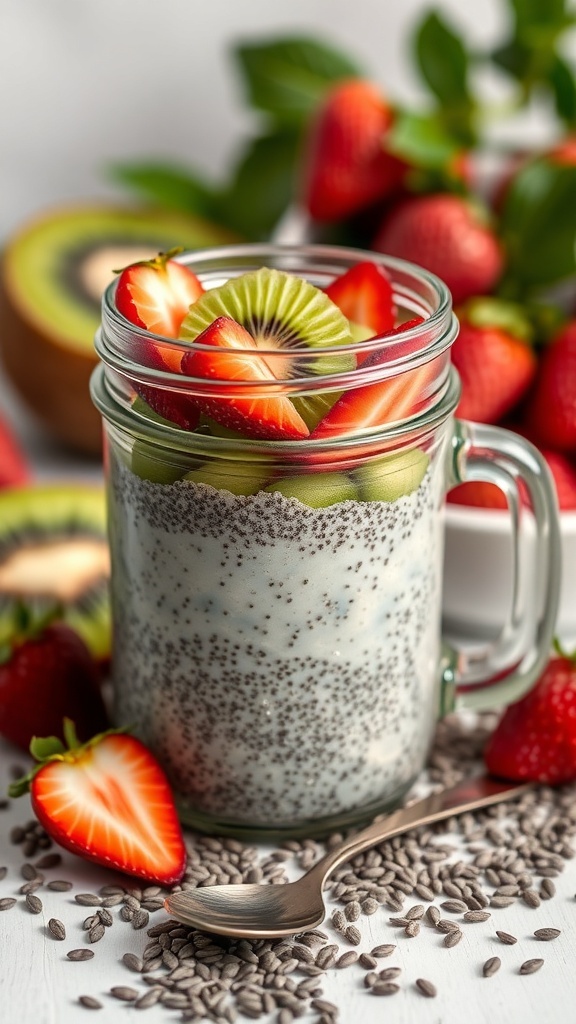
Chia seed pudding is a fantastic choice for a light dessert that’s both satisfying and nutritious. This pudding is not only creamy and delicious, but it also packs a punch with fiber, protein, and omega-3 fatty acids. The image showcases a beautiful jar of chia seed pudding topped with fresh strawberries and kiwi, making it visually appealing and inviting.
To make this delightful treat, you’ll need just a few simple ingredients. The chia seeds expand and create a pudding-like texture when mixed with liquid. You can use almond milk, coconut milk, or any milk of your choice. The toppings can be customized based on your preferences, but fresh fruits add a refreshing touch.
This dessert is perfect for weight loss, as it’s under 200 calories per serving. It’s easy to prepare and can be made ahead of time, making it a great option for busy days. Enjoy it as a snack or a light dessert after meals!
Ingredients
- 1/2 cup chia seeds
- 2 cups almond milk (or any milk of choice)
- 2 tablespoons honey or maple syrup (adjust to taste)
- 1 teaspoon vanilla extract
- 1 cup mixed berries (strawberries, blueberries, raspberries)
Instructions
- Combine Ingredients: In a mixing bowl, whisk together chia seeds, almond milk, honey or maple syrup, and vanilla extract until well combined.
- Refrigerate: Cover the bowl and refrigerate for at least 4 hours or overnight, allowing the chia seeds to absorb the liquid and thicken.
- Add Berries: Before serving, gently fold in the mixed berries into the pudding.
- Serve: Spoon the chia seed pudding into bowls or jars, and garnish with additional berries and mint leaves if desired.
Spiced Pumpkin Pie Cups For A Seasonal Treat
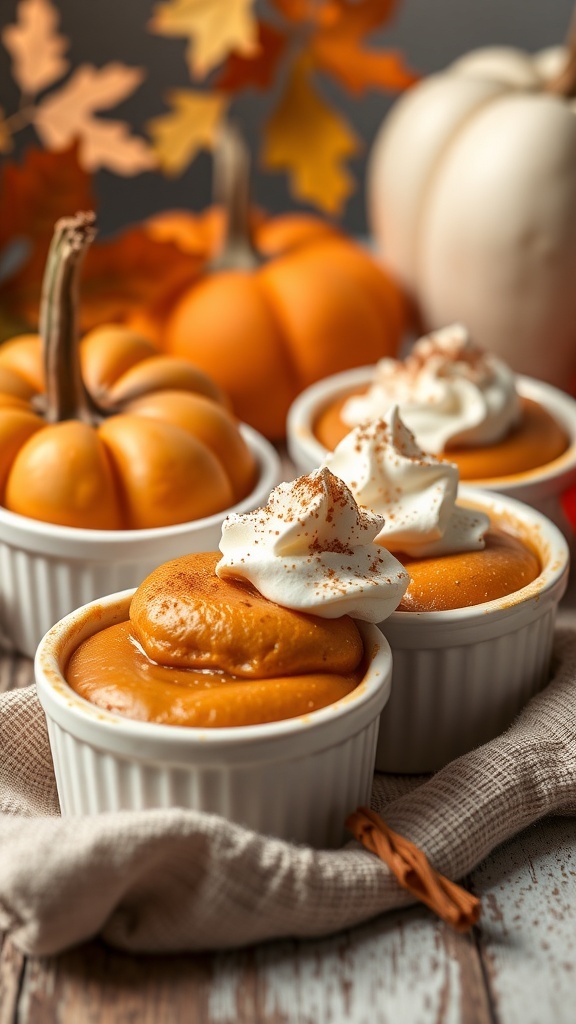
These spiced pumpkin pie cups are a delightful way to celebrate the flavors of fall without the guilt. Each cup is creamy, rich, and packed with that classic pumpkin spice taste. They’re perfect for satisfying your sweet tooth while keeping your calorie count in check.
Imagine a cozy evening with these little treats in hand. The warm spices, like cinnamon and nutmeg, create a comforting aroma that fills the air. Topped with a dollop of whipped cream and a sprinkle of cinnamon, these cups are not just tasty but also visually appealing.
Making these pumpkin pie cups is a breeze. You don’t need to bake anything, which means less mess and more time to enjoy your treat. They’re great for gatherings or just a quiet night in.
Ingredients
- 1 cup pumpkin puree
- 1/2 cup Greek yogurt
- 1/4 cup honey or maple syrup
- 1 teaspoon vanilla extract
- 1 teaspoon ground cinnamon
- 1/2 teaspoon ground nutmeg
- 1/4 teaspoon ground ginger
- 1/4 teaspoon salt
- Whipped cream for topping
Instructions
- In a mixing bowl, combine pumpkin puree, Greek yogurt, honey or maple syrup, and vanilla extract. Mix until smooth.
- Add the cinnamon, nutmeg, ginger, and salt. Stir until all ingredients are well combined.
- Divide the mixture into small cups or ramekins.
- Chill in the refrigerator for at least 30 minutes to set.
- Before serving, top with whipped cream and a sprinkle of cinnamon.
Chocolate-Dipped Frozen Banana Bites: A Cool Indulgence
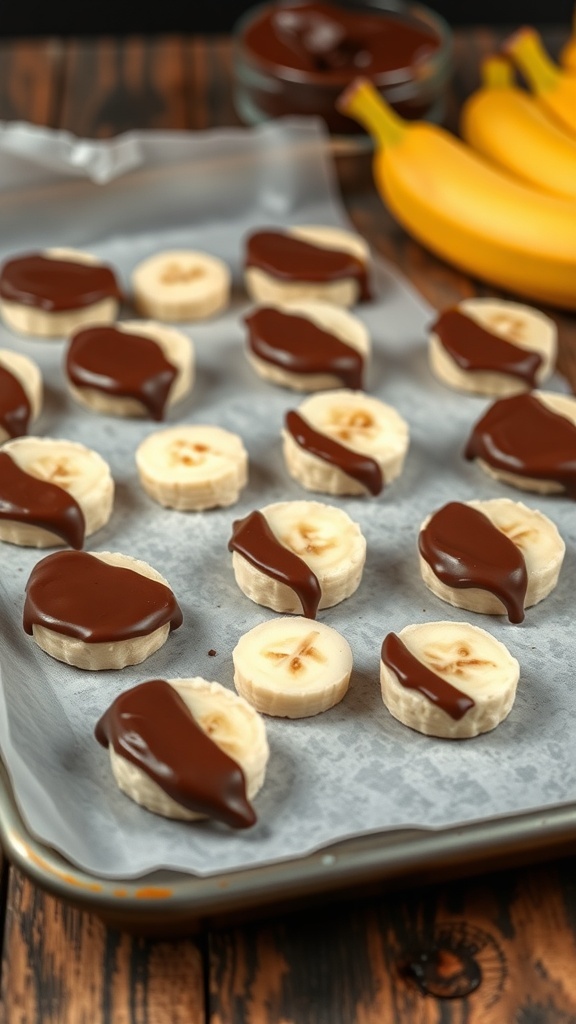
Chocolate-dipped frozen banana bites are a delightful treat that feels indulgent without the guilt. These little snacks are perfect for satisfying your sweet tooth while keeping your calorie count low. The image shows perfectly sliced bananas, some dipped in rich chocolate, all laid out on parchment paper. The contrast of the creamy banana and the glossy chocolate makes for a tempting visual.
Making these bites is super easy! Just slice bananas, dip them in melted chocolate, and freeze. They’re great for a quick snack or as a dessert after dinner. Plus, they’re under 200 calories, making them a fantastic choice for anyone watching their weight.
Ingredients
- 2 ripe bananas
- 1 cup dark chocolate chips
- 1 tablespoon coconut oil (optional)
- Parchment paper
Instructions
- Prepare the Bananas: Peel the bananas and slice them into 1/2-inch thick rounds.
- Melt the Chocolate: In a microwave-safe bowl, combine the chocolate chips and coconut oil. Microwave in 30-second intervals, stirring in between, until smooth.
- Dip the Bananas: Using a fork, dip each banana slice into the melted chocolate, coating it evenly. Let the excess chocolate drip off.
- Set on Parchment: Place the chocolate-dipped bananas on a baking sheet lined with parchment paper.
- Freeze: Put the baking sheet in the freezer for about 1-2 hours, or until the chocolate is firm.
- Enjoy: Once frozen, enjoy your delicious chocolate-dipped banana bites right away or store them in an airtight container in the freezer for later!
Nutty Dark Chocolate Bark: A Simple And Satisfying Snack
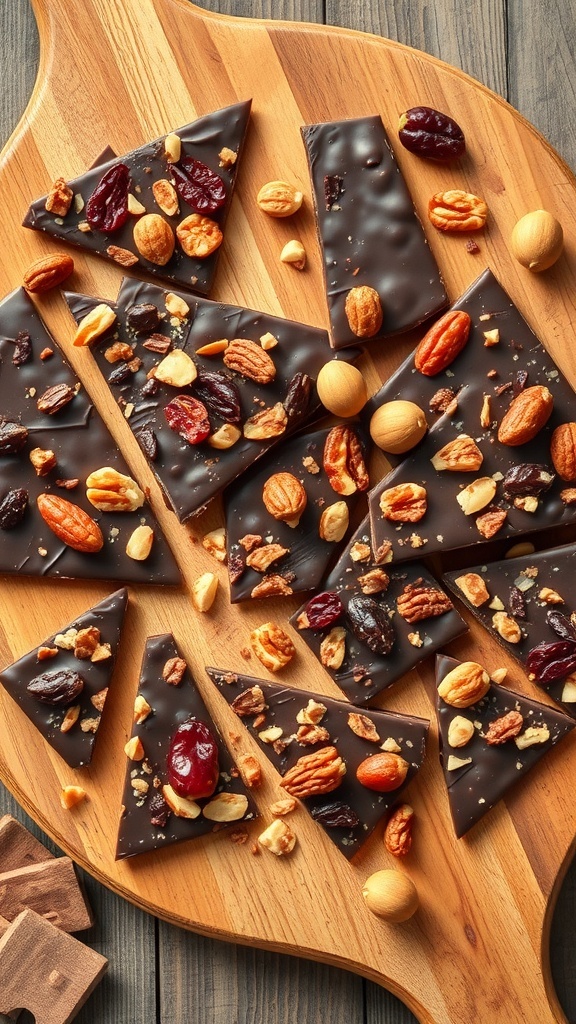
Nutty dark chocolate bark is a delightful treat that satisfies your sweet tooth without the guilt. This snack is not only easy to make but also packed with nutrients. The combination of rich dark chocolate and crunchy nuts creates a perfect balance of flavors and textures.
In the image, you can see beautifully arranged pieces of dark chocolate bark scattered with an assortment of nuts and dried fruits. The glossy chocolate contrasts nicely with the earthy tones of the nuts, making it visually appealing. This snack is perfect for those looking to indulge without exceeding 200 calories.
Making this bark is a breeze. You just melt the chocolate, mix in your favorite nuts, and let it set. It’s a great option for a quick snack or a healthy dessert. Plus, you can customize it with different nuts or dried fruits according to your preference!
Ingredients
- 8 ounces dark chocolate (70% cocoa or higher)
- 1/2 cup mixed nuts (almonds, pecans, walnuts)
- 1/4 cup dried cranberries or cherries
- 1 tablespoon sea salt (optional)
Instructions
- Melt the Chocolate: In a microwave-safe bowl, melt the dark chocolate in 30-second intervals, stirring in between until smooth.
- Add Nuts and Fruits: Once melted, stir in the mixed nuts and dried fruits until evenly coated.
- Spread the Mixture: Pour the chocolate mixture onto a parchment-lined baking sheet. Spread it out evenly to about 1/4 inch thick.
- Sprinkle Sea Salt: If desired, sprinkle sea salt over the top for an extra flavor kick.
- Chill: Place the baking sheet in the refrigerator for about 30 minutes or until the chocolate is set.
- Break into Pieces: Once set, break the bark into pieces and store in an airtight container.
Vanilla Almond Milk Pudding: A Creamy Classic
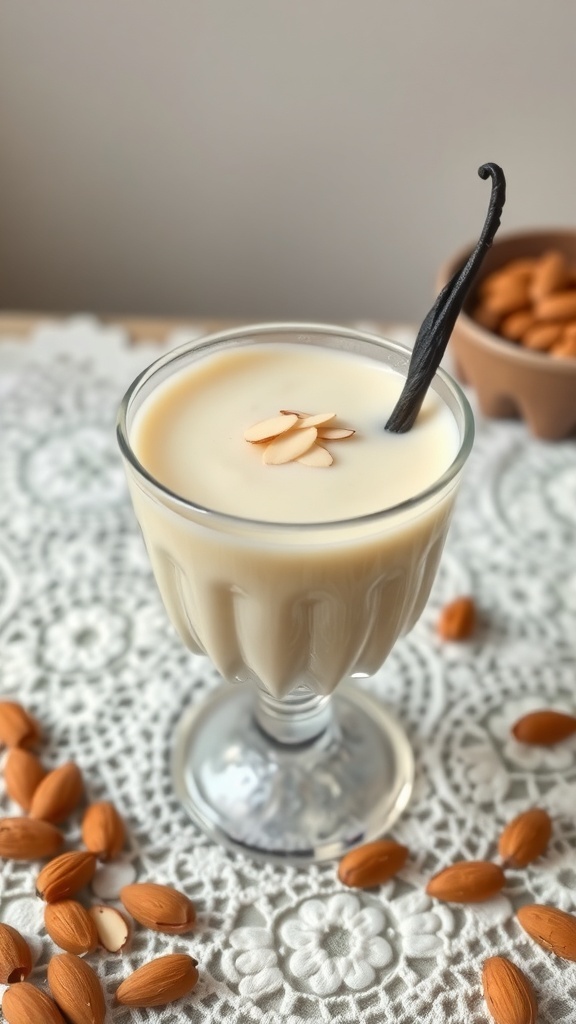
Vanilla almond milk pudding is a delightful treat that’s both creamy and satisfying. This dessert is perfect for those looking to enjoy something sweet without the guilt. Made with simple ingredients, it brings a comforting flavor that many love.
The image shows a beautifully presented cup of vanilla almond milk pudding, topped with a few almond slices and a vanilla bean. The pudding has a smooth texture and a light color, making it visually appealing. Surrounding the cup are scattered almonds, adding a rustic touch to the scene.
This pudding is not only delicious but also under 200 calories, making it a great choice for weight loss. It’s easy to whip up and requires no baking, which is a bonus for busy days. Let’s get into the ingredients and steps to create this creamy classic!
Ingredients
- 2 cups unsweetened almond milk
- 1/4 cup granulated sugar
- 1/4 cup cornstarch
- 1 teaspoon vanilla extract
- 1/4 teaspoon salt
- Optional toppings: sliced almonds, whipped cream, or fresh fruit
Instructions
- Combine Ingredients: In a medium saucepan, whisk together the almond milk, sugar, cornstarch, salt, and vanilla extract until smooth.
- Heat the Mixture: Place the saucepan over medium heat and cook, stirring constantly, until the mixture thickens and starts to bubble (about 5-7 minutes).
- Cool the Pudding: Once thickened, remove from heat and pour the pudding into serving dishes. Allow it to cool at room temperature for a few minutes, then refrigerate for at least 2 hours until set.
- Serve: Once chilled, serve the pudding topped with sliced almonds, whipped cream, or fresh fruit if desired.
Fruity Coconut Lime Sorbet: A Refreshing Summer Dessert
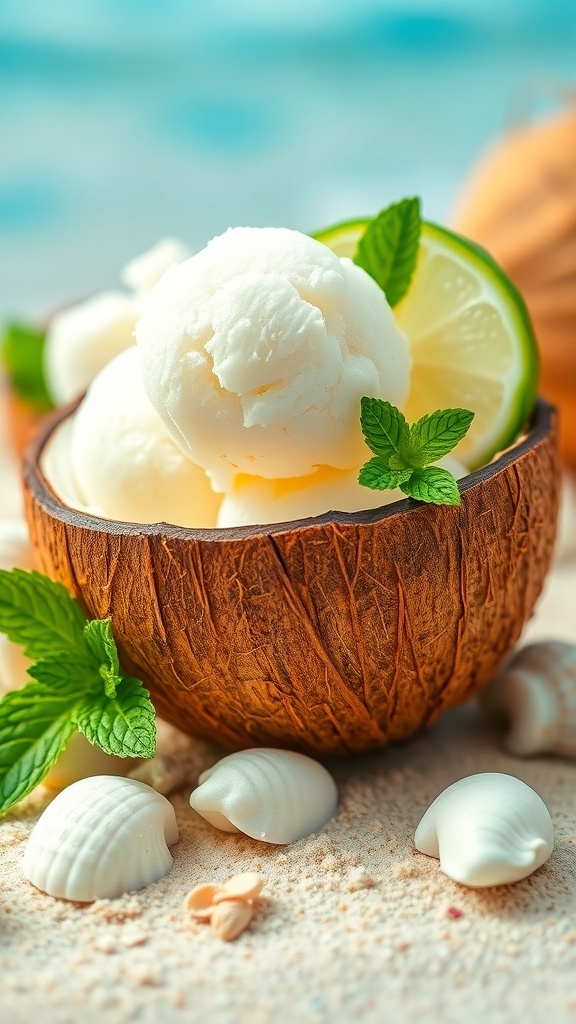
When summer hits, nothing beats a cool treat. This Fruity Coconut Lime Sorbet is not just refreshing; it’s also light and perfect for those watching their calorie intake. The image showcases a beautiful serving of sorbet nestled in a coconut shell, surrounded by fresh lime slices and mint leaves. It’s a feast for the eyes and the taste buds!
This dessert is incredibly easy to make and requires no baking. Just blend a few simple ingredients, freeze, and enjoy. The combination of coconut and lime gives it a tropical twist that feels like a mini-vacation in every bite. Plus, it’s under 200 calories, making it a guilt-free indulgence!
Ingredients
- 2 cups coconut milk
- 1/2 cup fresh lime juice
- 1/4 cup honey or agave syrup
- 1 teaspoon lime zest
- 1/4 cup shredded coconut (unsweetened)
- Fresh mint leaves for garnish
Instructions
- Blend Ingredients: In a blender, combine coconut milk, lime juice, honey, lime zest, and shredded coconut. Blend until smooth.
- Freeze: Pour the mixture into a shallow dish and freeze for about 2 hours, or until it starts to set.
- Scrape and Whip: Using a fork, scrape the mixture to create a fluffy texture. Return to the freezer for another hour.
- Serve: Scoop the sorbet into bowls or coconut shells. Garnish with fresh mint leaves and lime slices before serving.
Easy Strawberry Shortcake Cups: A No-Bake Wonder
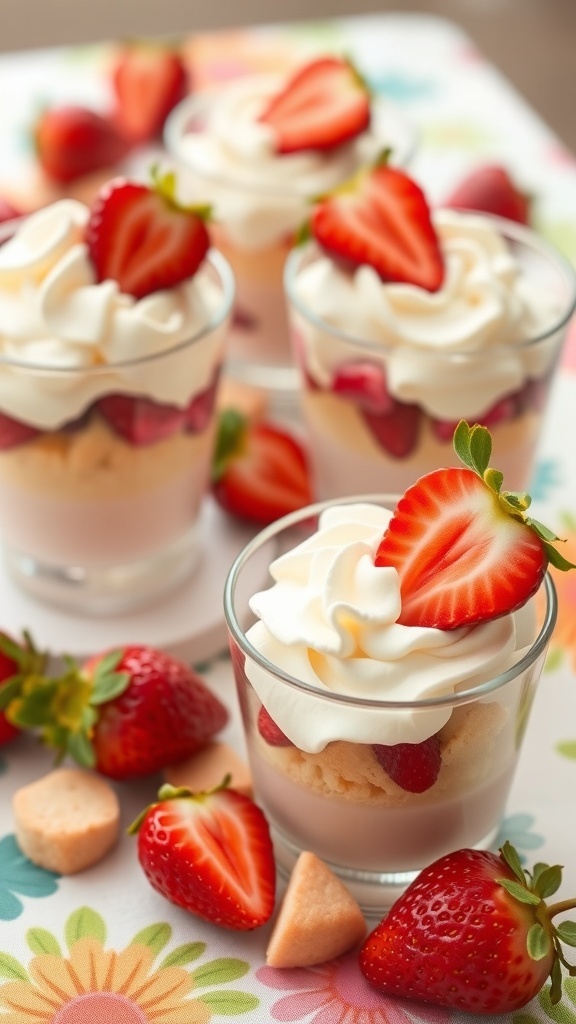
These Easy Strawberry Shortcake Cups are a delightful treat that feels indulgent while keeping calories in check. Perfect for a warm day, these no-bake desserts are light and refreshing, making them a great choice for anyone looking to satisfy their sweet tooth without the guilt.
Each cup is layered with fluffy whipped cream, fresh strawberries, and a light sponge cake, creating a beautiful presentation. The vibrant red strawberries pop against the creamy white layers, making these cups not just tasty but also visually appealing.
To make these cups, you’ll need a few simple ingredients that come together quickly. The best part? You don’t even need to turn on the oven!
Ingredients
- 2 cups fresh strawberries, sliced
- 1 cup whipped cream (light or regular)
- 1 cup sponge cake, cubed
- 1 tablespoon sugar (optional)
- Mint leaves for garnish (optional)
Instructions
- Prepare the Strawberries: If desired, toss the sliced strawberries with sugar and let them sit for about 10 minutes to release their juices.
- Layer the Ingredients: In small cups or glasses, start with a layer of sponge cake cubes at the bottom.
- Add Strawberries: Spoon a layer of the sliced strawberries over the cake.
- Add Whipped Cream: Top the strawberries with a generous dollop of whipped cream.
- Repeat Layers: Repeat the layers until the cups are filled, finishing with whipped cream on top.
- Garnish: Add a slice of strawberry and a mint leaf on top for a pretty finish.
- Chill: Refrigerate for about 30 minutes before serving to let the flavors meld.
Peanut Butter And Jelly Yogurt Parfaits: A Childhood Favorite
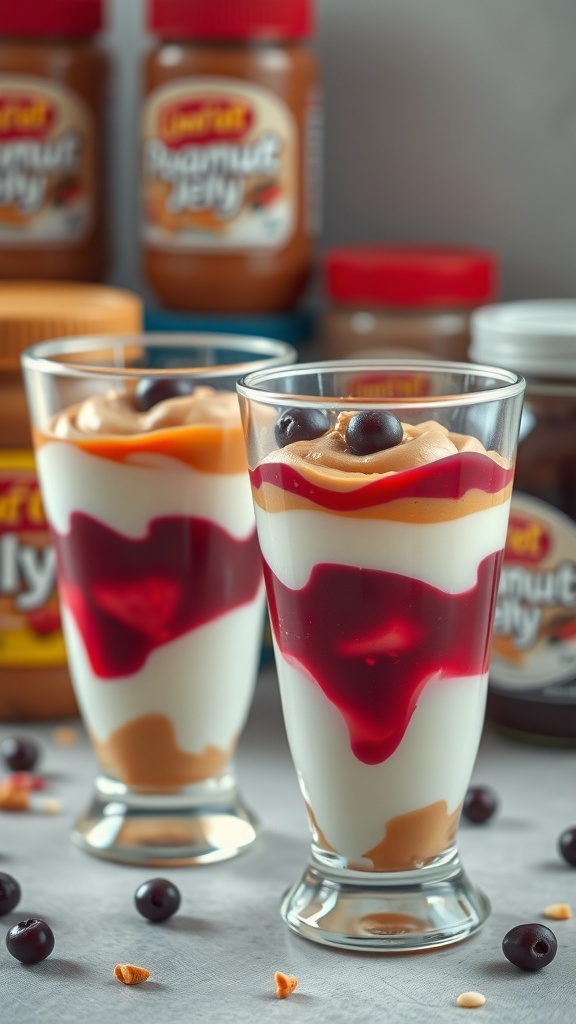
Peanut Butter and Jelly Yogurt Parfaits bring back sweet memories of childhood lunches. These delightful treats combine creamy yogurt, rich peanut butter, and fruity jelly, all layered beautifully in a glass. They are not only tasty but also light, making them perfect for a weight-loss-friendly dessert under 200 calories.
The parfaits are visually appealing, with vibrant layers of jelly and smooth peanut butter. You can see the rich texture of the yogurt, which adds a refreshing element to the dish. The combination of flavors is a nostalgic nod to the classic PB&J sandwich, but in a healthier form.
Making these parfaits is simple and quick. You can enjoy them as a snack or a dessert, and they are great for meal prep. Just grab your favorite yogurt, peanut butter, and jelly, and you’re ready to go!
Ingredients
- 1 cup plain Greek yogurt
- 2 tablespoons peanut butter
- 1/4 cup fruit jelly (your choice)
- 1 tablespoon honey (optional)
- Granola or crushed nuts for topping (optional)
Instructions
- In a bowl, mix the Greek yogurt with honey if you want some extra sweetness.
- In a glass, layer the yogurt, followed by a layer of peanut butter.
- Add a layer of jelly on top of the peanut butter.
- Repeat the layers until the glass is full, finishing with a layer of jelly.
- If desired, sprinkle granola or crushed nuts on top for added crunch.
- Serve immediately or refrigerate for later enjoyment.
Satisfying Fruit And Nut Bars: The Perfect On-The-Go Snack
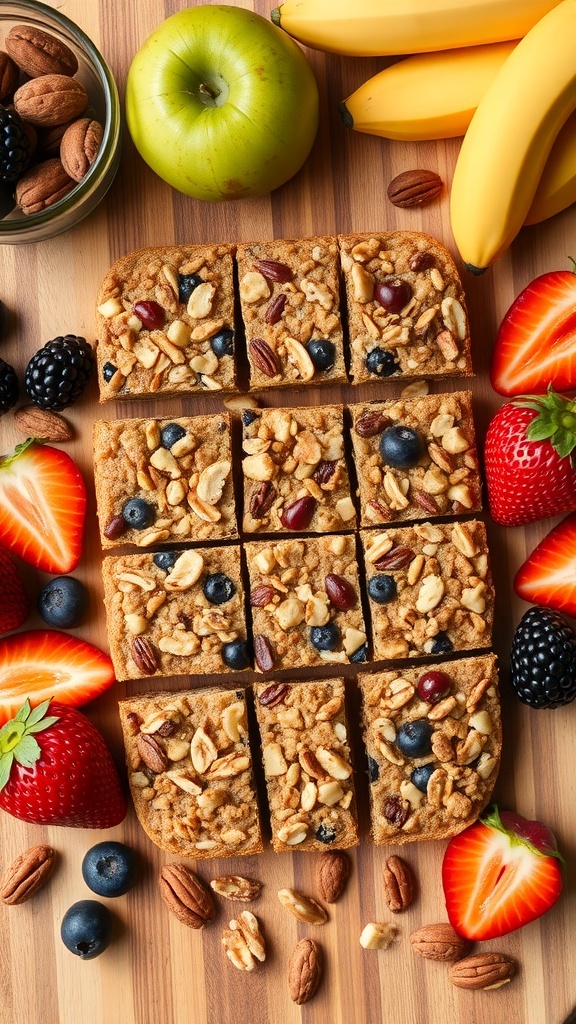
Fruit and nut bars are a fantastic choice for those looking to satisfy their sweet tooth while keeping their calorie count in check. These bars are packed with wholesome ingredients like oats, nuts, and dried fruits, making them a great snack for busy days. They are easy to make and can be customized to fit your taste preferences.
The image showcases a delicious batch of fruit and nut bars, beautifully arranged with fresh fruits like strawberries, blueberries, and bananas. The vibrant colors of the fruits not only make the bars visually appealing but also hint at the natural sweetness and flavor packed inside. With a crunchy texture from the nuts and a chewy base from the oats, these bars are sure to keep you energized throughout the day.
Making these bars is simple and requires no baking, which is perfect for those hot days when you want to avoid turning on the oven. Just mix your ingredients, press them into a pan, and let them chill. They are perfect for a quick breakfast, a midday snack, or even a post-workout treat.
Ingredients
- 2 cups rolled oats
- 1 cup mixed nuts (almonds, walnuts, pecans)
- 1/2 cup honey or maple syrup
- 1/2 cup nut butter (peanut, almond, or cashew)
- 1 cup dried fruits (raisins, cranberries, or apricots)
- 1/4 teaspoon salt
- 1 teaspoon vanilla extract
Instructions
- Prepare the Base: In a large bowl, combine rolled oats, mixed nuts, dried fruits, and salt.
- Mix Wet Ingredients: In a small saucepan, heat honey and nut butter over low heat until melted. Stir in vanilla extract.
- Combine: Pour the wet mixture over the dry ingredients and mix well until everything is coated.
- Press Into Pan: Line an 8x8 inch baking dish with parchment paper. Press the mixture firmly into the pan.
- Chill: Refrigerate for at least 2 hours to set. Once firm, cut into bars.
- Store: Keep the bars in an airtight container in the fridge for up to a week.


Comments
Post a Comment