11 Delicious Make-Ahead Dessert Recipes for Stress-Free Holidays and Parties
11 Delicious Make-Ahead Dessert Recipes for Stress-Free Holidays and Parties
Get ready for stress-free celebrations with these make-ahead dessert recipes that let you enjoy the holidays and parties without the rush. Perfect for gatherings, these easy-to-follow treats can be prepared in advance, so you can focus on making memories instead of scrambling to whip up dessert at the last minute. Dive in and discover sweet solutions that will impress your guests and keep your stress levels in check!
Chilled Strawberry Shortcake Jars For A Refreshing Treat

Chilled strawberry shortcake jars are a delightful way to enjoy a classic dessert with a twist. These jars are not only visually appealing but also incredibly easy to prepare ahead of time. Perfect for holiday gatherings or parties, they offer a refreshing treat that everyone will love.
Imagine layers of fluffy whipped cream, sweet strawberries, and soft cake all beautifully presented in a jar. Each spoonful is a mix of textures and flavors that will brighten up any dessert table. Plus, they can be made a day in advance, saving you time when hosting.
To make these jars, you’ll need fresh strawberries, whipped cream, and your favorite cake, whether it’s sponge cake or pound cake. The process is simple: layer the ingredients in jars, starting with cake, followed by strawberries, and then whipped cream. Repeat until the jars are full, and top with a few whole strawberries and a sprig of mint for that extra touch.
Ingredients
- 2 cups fresh strawberries, hulled and sliced
- 1 cup heavy whipping cream
- 2 tablespoons powdered sugar
- 1 teaspoon vanilla extract
- 2 cups cake, crumbled (sponge or pound cake works well)
- Mint leaves for garnish
Instructions
- Prepare the Strawberries: In a bowl, mix the sliced strawberries with a tablespoon of sugar and let them sit for about 10 minutes to release their juices.
- Make the Whipped Cream: In a separate bowl, whip the heavy cream, powdered sugar, and vanilla extract until soft peaks form.
- Layer the Ingredients: In mason jars, start with a layer of crumbled cake, followed by a layer of strawberries, and then a layer of whipped cream. Repeat the layers until the jars are full.
- Chill: Cover the jars and refrigerate for at least 2 hours before serving to let the flavors meld.
- Serve: Top with a fresh strawberry and a mint leaf before serving for a beautiful presentation.
Decadent No-Bake Cheesecake Squares For Easy Serving
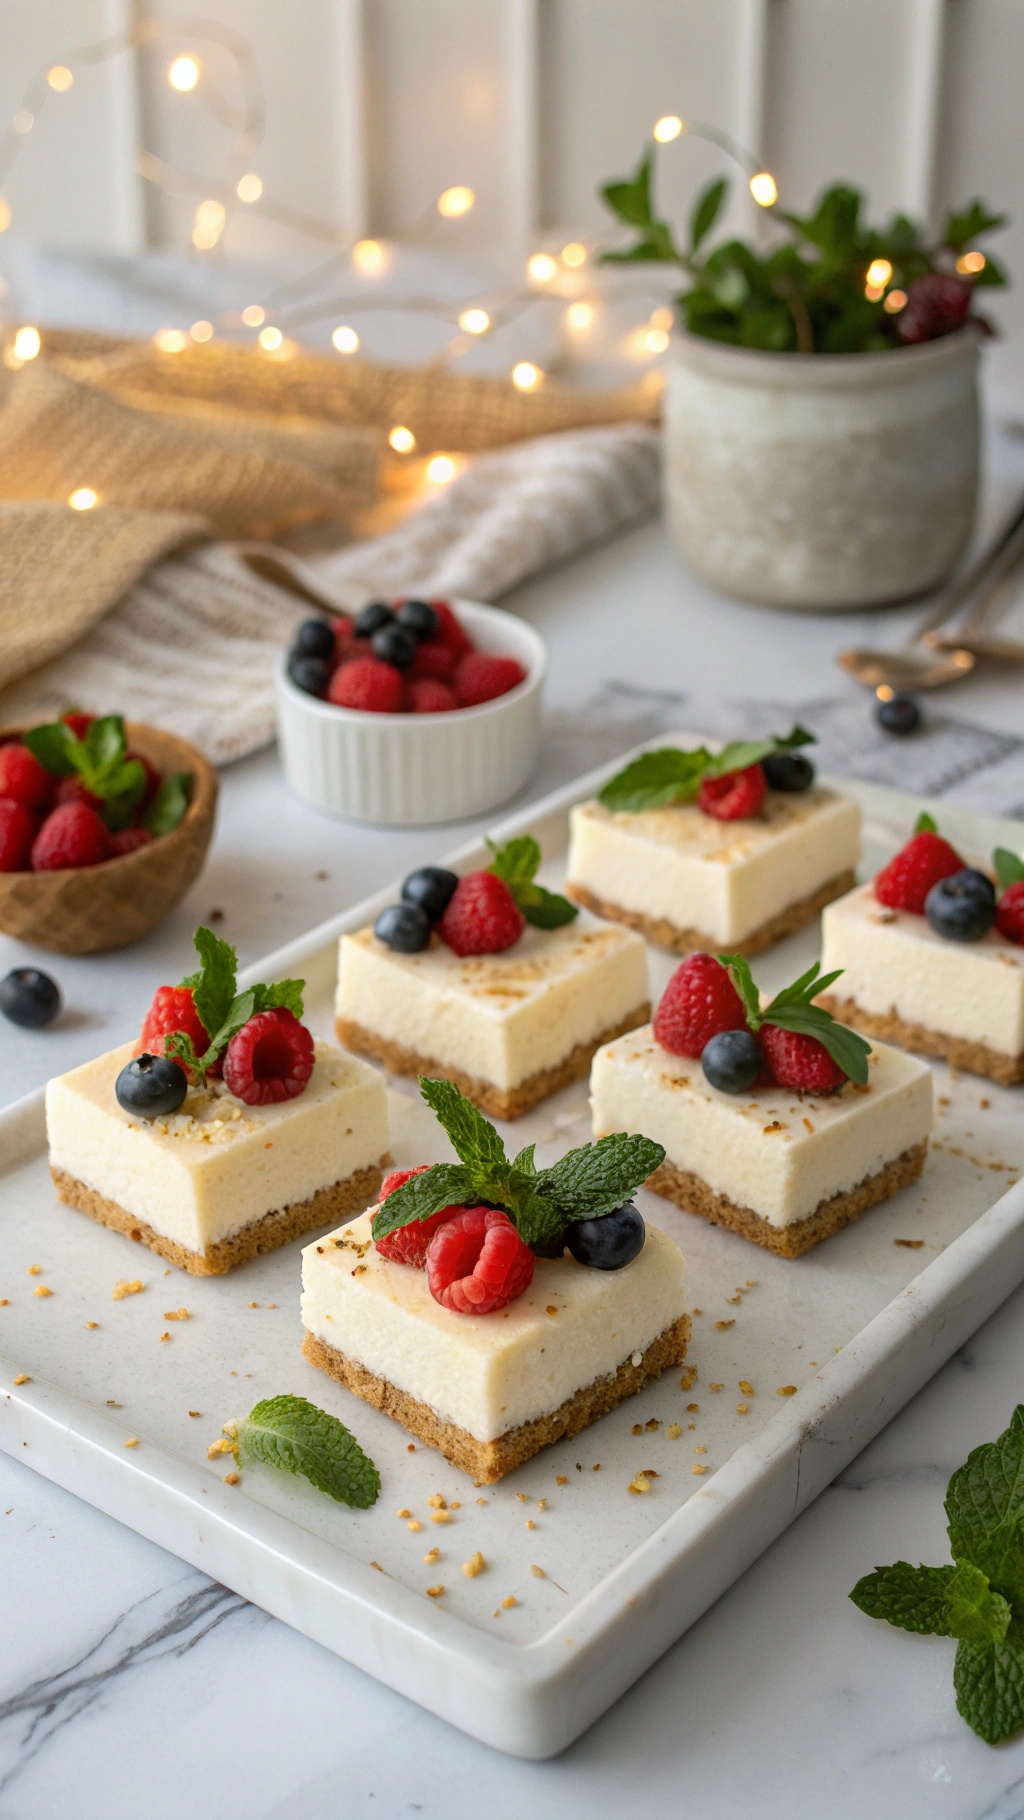
These no-bake cheesecake squares are a perfect treat for any holiday gathering or party. They look stunning on a platter, topped with fresh berries and mint leaves. The creamy filling sits on a crunchy graham cracker crust, making them a delightful dessert that's easy to serve and even easier to enjoy.
With the holiday season approaching, having a make-ahead dessert like this is a lifesaver. You can prepare them a day or two in advance, freeing up your time for other party preparations. Plus, who doesn’t love a dessert that requires no baking?
Each square is a bite-sized piece of heaven, combining smooth cheesecake with a hint of sweetness. The fresh raspberries and blueberries not only add a pop of color but also a refreshing taste that balances the richness of the cheesecake.
Ingredients
- 1 ½ cups graham cracker crumbs
- ½ cup unsalted butter, melted
- 2 cups cream cheese, softened
- 1 cup powdered sugar
- 1 teaspoon vanilla extract
- 1 cup heavy whipping cream
- Fresh raspberries and blueberries for topping
- Mint leaves for garnish
Instructions
- Prepare the Crust: In a bowl, mix graham cracker crumbs and melted butter until combined. Press the mixture firmly into the bottom of a lined 9x9 inch baking dish.
- Make the Filling: In a large bowl, beat the cream cheese until smooth. Gradually add powdered sugar and vanilla extract, mixing until well combined.
- Whip the Cream: In another bowl, whip the heavy cream until stiff peaks form. Gently fold the whipped cream into the cream cheese mixture until fully incorporated.
- Combine: Spread the cheesecake filling over the crust in the baking dish, smoothing the top with a spatula.
- Chill: Cover and refrigerate for at least 4 hours, or overnight, until set.
- Serve: Once set, cut into squares and top with fresh raspberries, blueberries, and mint leaves before serving.
Classic Make-Ahead Tiramisu To Impress Your Guests

Tiramisu is a classic dessert that never fails to impress. This Italian treat layers coffee-soaked ladyfingers with a rich mascarpone mixture, creating a delightful balance of flavors and textures. The image captures a beautifully presented tiramisu, topped with cocoa powder and coffee beans, making it look as good as it tastes. It’s perfect for holiday gatherings or parties, allowing you to prepare it ahead of time and serve it chilled.
Making tiramisu is simple and requires just a few ingredients. You can whip it up the day before your event, letting the flavors meld beautifully overnight. Your guests will be thrilled to dig into this creamy, coffee-flavored delight!
Ingredients
- 1 cup strong brewed coffee, cooled
- 3 tablespoons coffee liqueur (optional)
- 3 large eggs, separated
- 1/2 cup granulated sugar
- 1 cup mascarpone cheese
- 1 cup heavy cream
- 24 ladyfingers
- Cocoa powder for dusting
- Chocolate shavings or coffee beans for garnish (optional)
Instructions
- Prepare the Coffee Mixture: In a shallow dish, combine the brewed coffee and coffee liqueur. Set aside.
- Make the Cream Mixture: In a bowl, whisk the egg yolks and sugar until pale and creamy. Gently fold in the mascarpone cheese until smooth.
- Whip the Cream: In another bowl, whip the heavy cream until stiff peaks form. Carefully fold the whipped cream into the mascarpone mixture.
- Assemble the Tiramisu: Quickly dip each ladyfinger into the coffee mixture, ensuring they are soaked but not soggy. Layer half of the soaked ladyfingers in the bottom of a serving dish. Spread half of the mascarpone mixture over the ladyfingers.
- Add Another Layer: Repeat the process with the remaining ladyfingers and mascarpone mixture.
- Chill: Cover the dish and refrigerate for at least 4 hours, or overnight for best results.
- Serve: Before serving, dust the top with cocoa powder and garnish with chocolate shavings or coffee beans if desired.
Coconut Macaroons: A Tropical Delight For The Holidays
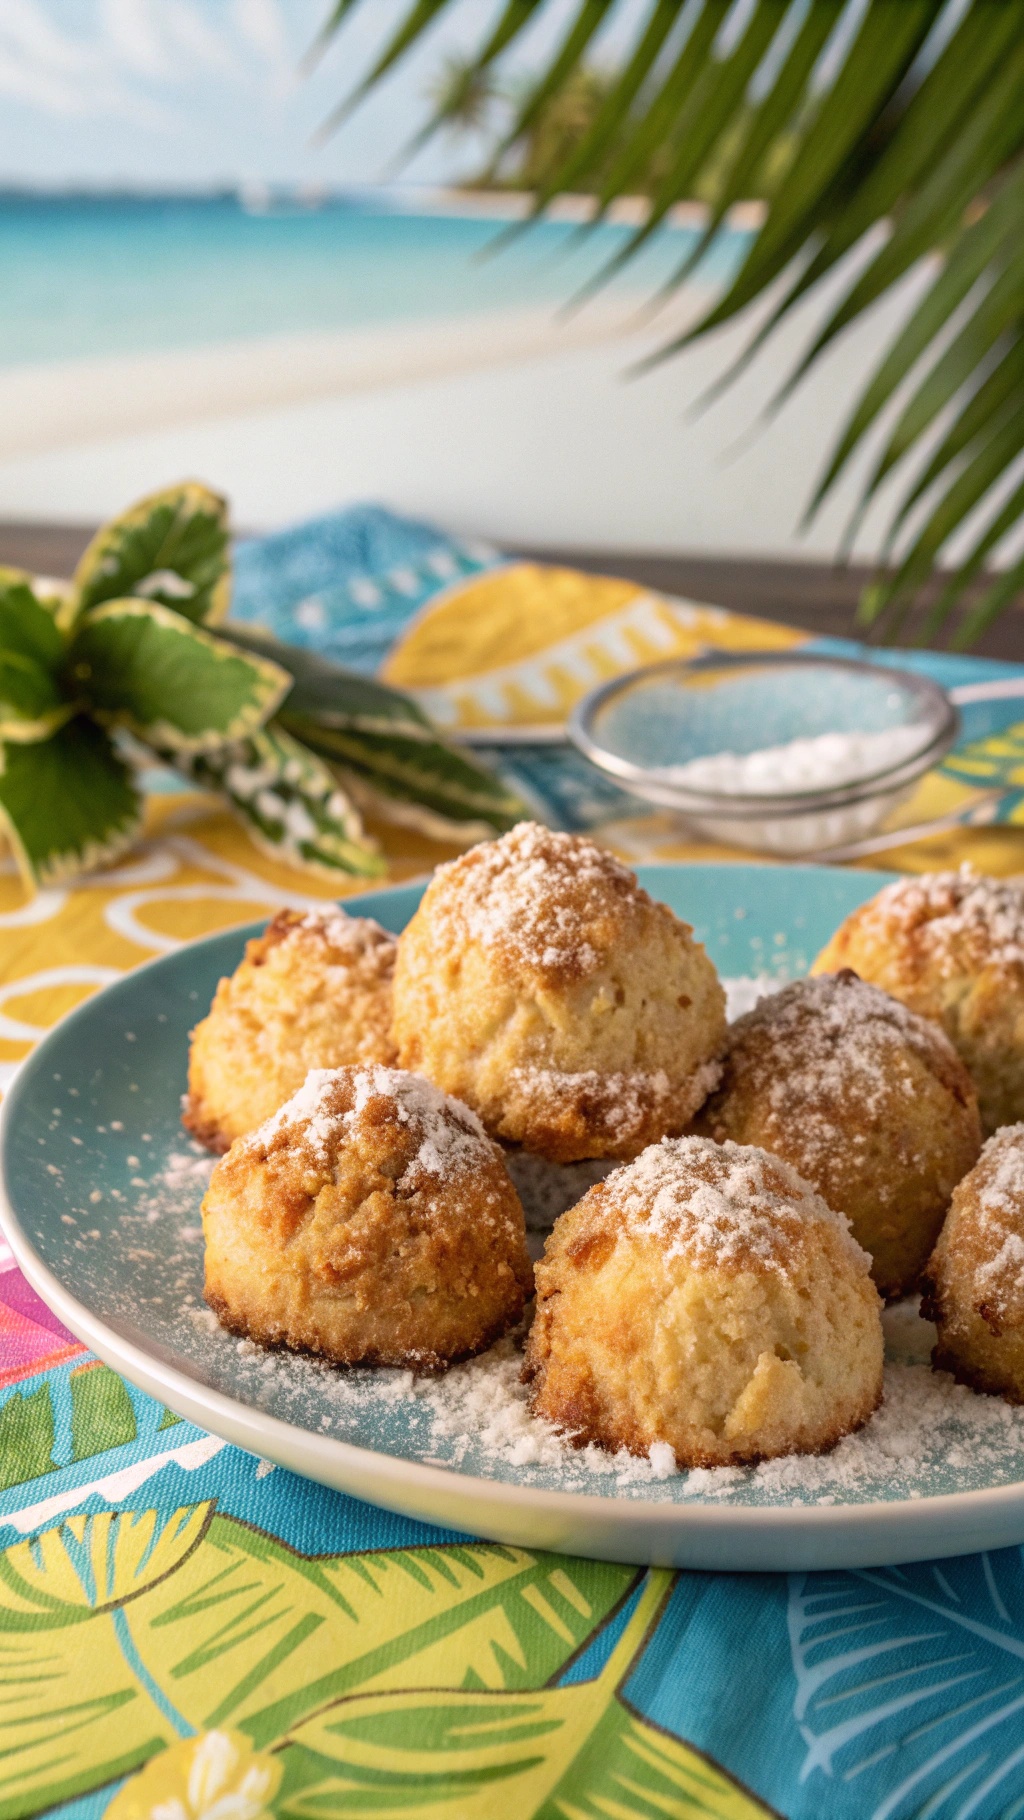
Coconut macaroons are a delightful treat that brings a taste of the tropics to your holiday gatherings. These sweet, chewy cookies are made with shredded coconut, egg whites, and sugar, creating a perfect balance of flavors and textures. They are simple to make and can be prepared ahead of time, making them an ideal dessert for busy holiday schedules.
The image captures a plate of golden-brown macaroons dusted with powdered sugar, sitting on a vibrant, tropical-themed tablecloth. The backdrop features a serene beach scene, enhancing the tropical vibe of these delicious cookies. The macaroons look inviting and are sure to be a hit at any holiday party.
These treats are not only tasty but also gluten-free, making them a great option for various dietary needs. You can serve them plain or dip them in chocolate for an extra touch of indulgence. They store well, so you can make them a few days in advance and enjoy them fresh whenever you need a sweet bite.
Ingredients
- 14 ounces sweetened shredded coconut
- 14 ounces sweetened condensed milk
- 1 teaspoon vanilla extract
- 2 large egg whites
- 1/4 teaspoon salt
- 1/2 cup semi-sweet chocolate chips (optional for drizzling)
Instructions
- Preheat the Oven: Preheat your oven to 325°F (163°C) and line a baking sheet with parchment paper.
- Mix Ingredients: In a large bowl, combine the shredded coconut, sweetened condensed milk, vanilla extract, egg whites, and salt. Stir until well combined.
- Form Macaroons: Using a small cookie scoop or your hands, form the mixture into small mounds and place them on the prepared baking sheet, spacing them about 1 inch apart.
- Bake: Bake in the preheated oven for 20-25 minutes, or until the macaroons are golden brown on top.
- Cool: Remove from the oven and allow them to cool on the baking sheet for a few minutes before transferring to a wire rack to cool completely.
- Optional Chocolate Drizzle: If desired, melt the chocolate chips in a microwave-safe bowl and drizzle over the cooled macaroons.
Layered Pumpkin Spice Trifle For Festive Gatherings

This Layered Pumpkin Spice Trifle is a showstopper for any holiday gathering. The beautiful layers of creamy pumpkin filling and spiced cookies create a delightful treat that everyone will love. The trifle is not only visually appealing but also incredibly easy to make ahead of time, allowing you to enjoy your festivities without the stress of last-minute baking.
Imagine a glass dish filled with rich pumpkin spice flavors, creamy layers, and crunchy cookie crumbles. This dessert captures the essence of fall and is perfect for Thanksgiving or any festive occasion. Plus, it’s a great way to use up any leftover pumpkin puree!
Ingredients
- 1 cup pumpkin puree
- 1 cup heavy cream
- 1/2 cup powdered sugar
- 1 teaspoon vanilla extract
- 1 teaspoon pumpkin spice
- 1 package ginger snap cookies
- 1/2 cup cream cheese, softened
- 1/4 cup brown sugar
- 1/2 teaspoon cinnamon
Instructions
- In a mixing bowl, beat the heavy cream with powdered sugar and vanilla until soft peaks form. Set aside.
- In another bowl, combine pumpkin puree, cream cheese, brown sugar, and pumpkin spice. Mix until smooth.
- Fold the whipped cream into the pumpkin mixture until well combined.
- In a trifle dish or individual cups, layer the ginger snap cookies, followed by the pumpkin mixture. Repeat the layers until all ingredients are used, finishing with whipped cream on top.
- Sprinkle additional crushed cookies and a dash of cinnamon on top for garnish.
- Chill in the refrigerator for at least 2 hours before serving.
This trifle is sure to impress your guests and make your holiday gatherings even sweeter. Enjoy!
Freezer-Friendly Berry Crumble For Easy Enjoyment

Berry crumble is a delightful dessert that combines the sweetness of mixed berries with a crunchy topping. This dish is perfect for holiday gatherings or parties, as it can be made ahead of time and stored in the freezer. When you're ready to serve, just pop it in the oven for a warm, comforting treat.
The image shows a beautifully baked berry crumble, topped with a scoop of vanilla ice cream. The colors of the berries—red raspberries, dark blueberries, and blackberries—create an inviting look. The golden-brown crumble topping adds a nice contrast, making it visually appealing and mouthwatering.
This recipe is not only easy to prepare, but it also allows you to enjoy the flavors of summer berries any time of year. With just a few simple ingredients, you can whip up a batch that will impress your guests and keep you stress-free during the busy holiday season.
Ingredients
- 2 cups mixed berries (fresh or frozen, such as blueberries, raspberries, and strawberries)
- 1 cup rolled oats
- 1/2 cup all-purpose flour
- 1/2 cup brown sugar
- 1/2 teaspoon cinnamon
- 1/4 teaspoon salt
- 1/2 cup unsalted butter, melted
- 1 tablespoon lemon juice (optional)
Instructions
- Preheat the Oven: Preheat your oven to 350°F (175°C).
- Prepare the Berries: If using fresh berries, wash and slice them as needed. If using frozen, allow them to thaw slightly. In a bowl, toss the berries with lemon juice if desired.
- Make the Crumble Topping: In a separate bowl, combine the oats, flour, brown sugar, cinnamon, and salt. Pour in the melted butter and stir until the mixture is crumbly.
- Assemble the Crumble: In a baking dish, spread the berries evenly and then sprinkle the crumble topping over the berries.
- Bake: Bake in the preheated oven for 25-30 minutes, or until the topping is golden brown and the berries are bubbly.
- Cool and Serve: Allow to cool slightly before serving. Enjoy warm or let it cool completely, then store in the freezer for later enjoyment.
Fruit-Filled Hand Pies For A Nostalgic Treat

Fruit-filled hand pies are a delightful way to bring back memories of childhood. These little pastries are not only cute but also packed with flavor. They are perfect for any gathering, especially during the holidays. Imagine biting into a warm, flaky crust filled with sweet fruit. It’s comfort food at its best!
The image showcases a plate of golden-brown hand pies, glistening with a fruit glaze. Surrounding them are fresh berries and peaches, adding a vibrant touch. The rustic setting enhances the nostalgic feel, making these treats even more inviting.
Making these hand pies ahead of time is a breeze. You can fill them with your favorite fruits, whether it’s berries, apples, or peaches. They freeze well, so you can prepare them in advance and bake them fresh when needed. This way, you can enjoy more time with your guests and less time in the kitchen!
Ingredients
- 2 cups all-purpose flour
- 1/2 teaspoon salt
- 1 cup unsalted butter, chilled and cubed
- 1/4 cup granulated sugar
- 1/4 cup cold water
- 1 cup mixed berries (raspberries, blueberries, etc.)
- 1/2 cup peach filling or jam
- 1 egg, beaten (for egg wash)
Instructions
- Make the Dough: In a bowl, mix flour and salt. Cut in the butter until the mixture resembles coarse crumbs. Stir in sugar. Add cold water gradually until the dough comes together. Wrap in plastic and chill for at least 30 minutes.
- Prepare the Filling: In a separate bowl, mix the berries and peach filling. You can add a bit of sugar if you like it sweeter.
- Roll Out the Dough: On a floured surface, roll out the dough to about 1/8 inch thick. Cut into circles using a cookie cutter or a glass.
- Fill the Pies: Place a tablespoon of filling on one half of each circle. Fold over and seal the edges with a fork. Brush the tops with beaten egg for a nice golden color.
- Bake: Preheat the oven to 375°F (190°C). Place the hand pies on a baking sheet lined with parchment paper. Bake for 20-25 minutes or until golden brown.
- Cool and Serve: Let them cool slightly before serving. Enjoy these delicious hand pies warm or at room temperature!
Peanut Butter Chocolate Swirl Bars For A Sweet Indulgence

Peanut Butter Chocolate Swirl Bars are the perfect treat for any holiday gathering or party. These bars combine rich chocolate and creamy peanut butter in a delightful way. The layers create a beautiful swirl that is as pleasing to the eye as it is to the palate. Each bite offers a satisfying crunch from the peanuts on top, making them irresistible.
These bars are not only delicious but also easy to prepare ahead of time. You can bake them a day or two in advance, allowing you to focus on other party preparations. Serve them with a glass of milk for a classic pairing that everyone will love.
Ingredients
- 1 cup unsalted butter, softened
- 1 cup creamy peanut butter
- 1 cup granulated sugar
- 1 cup brown sugar, packed
- 4 large eggs
- 2 teaspoons vanilla extract
- 2 cups all-purpose flour
- 1 teaspoon baking powder
- 1/2 teaspoon salt
- 1 cup semi-sweet chocolate chips
- 1/2 cup chopped peanuts
Instructions
- Preheat your oven to 350°F (175°C). Grease a 9x13 inch baking pan.
- In a large bowl, cream together the softened butter, peanut butter, granulated sugar, and brown sugar until smooth.
- Add the eggs one at a time, mixing well after each addition. Stir in the vanilla extract.
- In another bowl, whisk together the flour, baking powder, and salt. Gradually add this dry mixture to the peanut butter mixture, mixing until just combined.
- Spread half of the batter into the prepared baking pan. Melt the chocolate chips in the microwave or on the stove, then swirl them into the remaining batter.
- Spread the chocolate batter over the first layer in the pan. Use a knife to create swirls in the batter.
- Sprinkle the chopped peanuts on top.
- Bake for 25-30 minutes, or until a toothpick inserted in the center comes out clean.
- Let the bars cool in the pan before cutting into squares. Enjoy!
Classic Rice Pudding With A Creamy Texture

Rice pudding is a timeless dessert that brings comfort and warmth, especially during the holidays. The creamy texture and sweet flavor make it a favorite among many. In the image, you can see a beautifully presented bowl of rice pudding, topped with a sprinkle of cinnamon and a few raisins. The rustic wooden background adds to the cozy feel, making it perfect for gatherings.
This dish is not only delicious but also easy to prepare ahead of time. You can make a big batch and store it in the fridge, ready to serve when guests arrive. It’s a simple way to save time while still impressing everyone with a classic treat.
Ingredients
- 1 cup Arborio rice
- 4 cups whole milk
- 1/2 cup granulated sugar
- 1/4 teaspoon salt
- 1 teaspoon vanilla extract
- 1/2 teaspoon ground cinnamon
- 1/2 cup raisins (optional)
- Ground cinnamon for garnish
Instructions
- Combine Ingredients: In a medium saucepan, combine the rice, milk, sugar, and salt. Stir well.
- Cook: Bring the mixture to a gentle boil over medium heat. Reduce the heat to low and simmer, stirring frequently, for about 25-30 minutes until the rice is tender and the mixture thickens.
- Add Flavor: Remove from heat and stir in the vanilla extract and ground cinnamon. If using, fold in the raisins.
- Cool: Let the pudding cool slightly before transferring it to serving bowls. Cover and refrigerate if making ahead.
- Serve: Before serving, sprinkle with additional ground cinnamon for a lovely finish.
Charming Mini Fruit Tarts For A Colorful Display

Mini fruit tarts are a delightful treat that brings both color and flavor to any gathering. These little desserts are not only visually appealing but also easy to make ahead of time. Picture a beautiful display of golden pastry shells filled with creamy custard and topped with a variety of fresh fruits. The vibrant colors of strawberries, blueberries, and kiwi create a feast for the eyes, making them perfect for holidays and parties.
These tarts are versatile too! You can mix and match fruits based on what’s in season or what you love most. They are a great way to impress your guests without spending hours in the kitchen. Plus, they can be made a day in advance, allowing you to enjoy more time with your friends and family.
Ingredients
- 1 ½ cups all-purpose flour
- ½ cup unsalted butter, softened
- ¼ cup granulated sugar
- 1 large egg yolk
- 2 tablespoons cold water
- 1 cup heavy cream
- ¼ cup powdered sugar
- 1 teaspoon vanilla extract
- 1 cup mixed fresh fruits (strawberries, blueberries, kiwi, etc.)
- 1 tablespoon lemon juice
Instructions
- Make the Tart Shells: Preheat your oven to 350°F (175°C). In a bowl, mix flour, butter, and sugar until crumbly. Add the egg yolk and cold water, mixing until a dough forms. Roll out the dough and cut into circles to fit your tart pans. Press the dough into the pans and bake for 15-20 minutes until golden. Let cool.
- Prepare the Cream: In a mixing bowl, whip the heavy cream until soft peaks form. Gradually add powdered sugar and vanilla, continuing to whip until stiff peaks form.
- Assemble the Tarts: Once the tart shells are cool, fill each with whipped cream. Top with your choice of fresh fruits and drizzle with lemon juice to enhance the flavors.
- Chill and Serve: Refrigerate the tarts for at least an hour before serving. This will help the flavors meld together and keep the cream firm.
Easy S'Mores Dip For A Fun Dessert Experience

Nothing says cozy like a warm s'mores dip, especially during the holidays. This dessert is not only easy to make but also brings everyone together for a fun experience. Picture a creamy, gooey blend of chocolate and marshmallows, perfect for dipping with graham crackers. It’s a sweet treat that captures the essence of campfire nights, right in your kitchen!
To make this delightful dip, you’ll need a few simple ingredients. Gather some chocolate chips, marshmallows, and cream cheese. You’ll also want graham crackers on hand for dipping. The combination of flavors is sure to impress your guests and keep them coming back for more.
Start by mixing the cream cheese with chocolate chips and marshmallows in a skillet. Bake it until it’s bubbly and golden. Serve it warm with graham crackers for dipping. This easy s'mores dip is a great make-ahead dessert that saves you time during busy holiday gatherings.
Ingredients
- 1 cup cream cheese, softened
- 1 cup chocolate chips
- 1 cup mini marshmallows
- 1/2 teaspoon vanilla extract
- Graham crackers for dipping
Instructions
- Preheat your oven to 350°F (175°C).
- In a mixing bowl, combine softened cream cheese, chocolate chips, mini marshmallows, and vanilla extract. Mix until well blended.
- Transfer the mixture to a cast-iron skillet or an oven-safe dish.
- Bake for 15-20 minutes, or until the top is golden and bubbly.
- Remove from the oven and let it cool slightly before serving.
- Serve warm with graham crackers for dipping. Enjoy!


Comments
Post a Comment