13 Delicious Plant-Based Christmas Desserts You Can Make Easily
13 Delicious Plant-Based Christmas Desserts You Can Make Easily
Plant-based Christmas desserts offer a delightful and guilt-free way to celebrate the season with sweetness. Whether you're vegan or just looking to try something new, these easy recipes are perfect for spreading holiday cheer without compromising on taste. Get ready to whip up some festive treats that everyone will love!
Cinnamon-Spiced Sweet Potato Pie
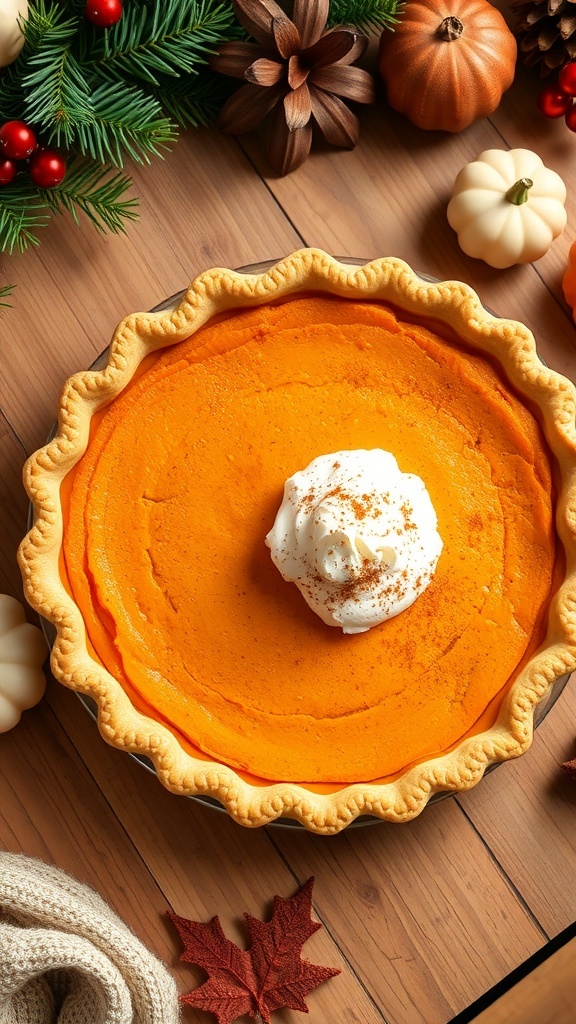
This Cinnamon-Spiced Sweet Potato Pie is a delightful twist on a classic dessert. The vibrant orange filling, made from sweet potatoes, is rich and creamy, offering a warm hug in every bite. Topped with a dollop of whipped cream and a sprinkle of cinnamon, it’s perfect for holiday gatherings.
The pie sits in a beautifully crimped crust, surrounded by festive decorations like pinecones and mini pumpkins. This scene captures the essence of a cozy Christmas celebration, making it an inviting centerpiece for your dessert table.
Making this pie is simple and rewarding. You’ll love how the sweet potatoes blend with cinnamon and nutmeg, creating a comforting flavor that everyone will enjoy.
Ingredients
- 2 cups mashed sweet potatoes (about 2 medium sweet potatoes)
- 1 cup coconut milk
- 3/4 cup brown sugar
- 1/4 cup maple syrup
- 2 teaspoons ground cinnamon
- 1/2 teaspoon ground nutmeg
- 1/4 teaspoon salt
- 1 teaspoon vanilla extract
- 1 pre-made pie crust
- Whipped cream for topping
Instructions
- Preheat your oven to 350°F (175°C).
- Peel and boil the sweet potatoes until tender. Drain and mash them until smooth.
- In a large bowl, combine the mashed sweet potatoes, coconut milk, brown sugar, maple syrup, cinnamon, nutmeg, salt, and vanilla. Mix until well combined.
- Pour the sweet potato mixture into the pie crust, smoothing the top with a spatula.
- Bake for 45-50 minutes, or until the filling is set and slightly puffed.
- Let the pie cool before serving. Top with whipped cream and a sprinkle of cinnamon if desired.
Classic Vegan Gingerbread Cookies

Gingerbread cookies are a holiday favorite, and making them vegan is easier than you think! These cookies are not only delicious but also bring a festive spirit to your kitchen. Picture a cozy setting with a plate of beautifully decorated gingerbread men, a warm cup of coffee, and a cheerful red plaid tablecloth. The aroma of ginger, cinnamon, and molasses fills the air, making it hard to resist.
These classic vegan gingerbread cookies are perfect for sharing with family and friends. You can decorate them with colorful icing and sprinkles, adding a personal touch to each cookie. Whether you’re hosting a holiday gathering or just enjoying a quiet evening at home, these cookies are sure to bring joy.
Ingredients
- 3 cups all-purpose flour
- 1 teaspoon baking soda
- 1 tablespoon ground ginger
- 1 tablespoon ground cinnamon
- 1/2 teaspoon ground nutmeg
- 1/2 teaspoon salt
- 1/2 cup coconut oil, melted
- 1/2 cup brown sugar, packed
- 1/2 cup molasses
- 1/4 cup almond milk
- 1 teaspoon vanilla extract
Instructions
- Mix Dry Ingredients: In a large bowl, whisk together the flour, baking soda, ginger, cinnamon, nutmeg, and salt.
- Combine Wet Ingredients: In another bowl, mix the melted coconut oil, brown sugar, molasses, almond milk, and vanilla extract until smooth.
- Combine Mixtures: Gradually add the wet ingredients to the dry ingredients, stirring until a dough forms. If the dough is too sticky, add a little more flour.
- Chill the Dough: Wrap the dough in plastic wrap and refrigerate for at least 1 hour.
- Preheat Oven: Preheat your oven to 350°F (175°C) and line a baking sheet with parchment paper.
- Roll and Cut: Roll out the chilled dough on a floured surface to about 1/4 inch thick. Use cookie cutters to cut out shapes and place them on the prepared baking sheet.
- Bake: Bake for 8-10 minutes, or until the edges are firm. Let them cool on the baking sheet for a few minutes before transferring to a wire rack.
- Decorate: Once cooled, feel free to decorate with vegan icing and sprinkles!
No-Bake Vegan Pumpkin Cheesecake
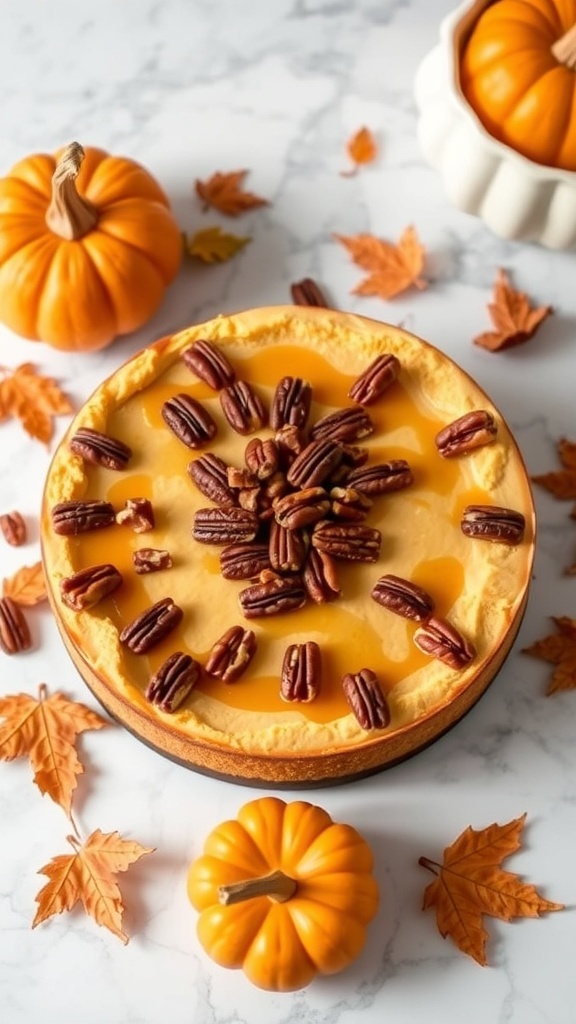
This no-bake vegan pumpkin cheesecake is a delightful treat for the holiday season. It’s creamy, rich, and packed with pumpkin flavor, making it a perfect dessert for Christmas gatherings. The cheesecake is topped with crunchy pecans and a drizzle of caramel, adding a lovely texture and sweetness.
To make this dessert, you’ll need a few simple ingredients. The crust is made from dates and nuts, providing a healthy base. The filling combines pumpkin puree, cashews, coconut cream, and spices, creating a smooth and flavorful cheesecake.
This dessert is not only easy to prepare but also a crowd-pleaser. It requires no baking, so you can whip it up quickly and chill it while you focus on other holiday preparations. Serve it at your Christmas dinner, and watch everyone enjoy this plant-based delight!
Ingredients
- 1 cup raw cashews (soaked for 4 hours)
- 1 cup pumpkin puree
- 1/2 cup coconut cream
- 1/4 cup maple syrup
- 1 teaspoon vanilla extract
- 1 teaspoon pumpkin spice
- 1 cup dates (pitted)
- 1 cup walnuts (or almonds)
- 1/4 cup coconut oil (melted)
- Pecans for topping
- Caramel sauce for drizzling (optional)
Instructions
- Prepare the Crust: In a food processor, combine dates and walnuts. Blend until the mixture is crumbly and sticks together. Press this mixture into the bottom of a springform pan to form the crust.
- Make the Filling: Drain the soaked cashews and add them to the food processor. Add pumpkin puree, coconut cream, maple syrup, vanilla extract, and pumpkin spice. Blend until smooth and creamy.
- Assemble: Pour the filling over the crust in the springform pan. Smooth the top with a spatula.
- Chill: Place the cheesecake in the refrigerator for at least 4 hours, or until set.
- Serve: Once set, remove from the pan. Top with pecans and drizzle with caramel sauce if desired. Slice and enjoy!
Coconut Macaroons With Dark Chocolate Drizzle

Coconut macaroons are a delightful treat that perfectly captures the spirit of the holidays. These little bites are chewy on the inside and crispy on the outside, making them a favorite among many. Topped with a rich dark chocolate drizzle, they add a touch of elegance to any dessert table.
The image showcases a beautiful plate of coconut macaroons, each one drizzled with dark chocolate. The contrast of the golden coconut and the glossy chocolate creates an inviting look that’s hard to resist. Surrounded by festive decorations, these treats are not just tasty but also visually appealing, making them a perfect addition to your Christmas celebrations.
Making these macaroons is simple and requires just a few ingredients. They are naturally gluten-free and can be enjoyed by everyone, including those on a plant-based diet. Let’s get into the recipe so you can whip up a batch for your holiday gatherings!
Ingredients
- 2 3/4 cups sweetened shredded coconut
- 2/3 cup sweetened condensed milk
- 1 teaspoon vanilla extract
- 2 large egg whites
- 1/4 teaspoon salt
- 4 ounces dark chocolate, chopped
Instructions
- Preheat the Oven: Preheat your oven to 325°F (160°C) and line a baking sheet with parchment paper.
- Mix Ingredients: In a large bowl, combine the shredded coconut, sweetened condensed milk, vanilla extract, egg whites, and salt. Mix until well combined.
- Shape the Macaroons: Using a tablespoon or a small cookie scoop, drop mounds of the coconut mixture onto the prepared baking sheet, spacing them about 1 inch apart.
- Bake: Bake in the preheated oven for 20-25 minutes, or until the edges are golden brown. Remove from the oven and let them cool on the baking sheet for a few minutes before transferring to a wire rack.
- Melt the Chocolate: While the macaroons cool, melt the dark chocolate in a microwave-safe bowl or over a double boiler until smooth.
- Drizzle Chocolate: Once the macaroons are completely cooled, drizzle the melted dark chocolate over the tops using a fork or a piping bag.
- Serve: Allow the chocolate to set before serving. Enjoy your delicious coconut macaroons!
Rich Chocolate Chip Cookie Dough Truffles

These Rich Chocolate Chip Cookie Dough Truffles are a delightful treat for the holiday season. They look like little bites of joy, perfectly round and sprinkled with a hint of cinnamon. The chocolate chips peeking out give them a fun and inviting appearance. With twinkling lights in the background, they capture that cozy Christmas vibe.
Making these truffles is simple and fun. You can enjoy them as a sweet snack or share them with friends and family during festive gatherings. They are a great way to satisfy your sweet tooth without the fuss of baking traditional cookies.
Ingredients
- 1 cup almond flour
- 1/4 cup maple syrup
- 1/4 cup nut butter (like almond or peanut butter)
- 1/2 teaspoon vanilla extract
- 1/4 teaspoon salt
- 1/2 cup dairy-free chocolate chips
- Cinnamon for dusting
Instructions
- Mix the Base: In a bowl, combine almond flour, maple syrup, nut butter, vanilla extract, and salt. Stir until you have a smooth dough.
- Add Chocolate Chips: Fold in the dairy-free chocolate chips until evenly distributed.
- Shape the Truffles: Scoop out small portions of the dough and roll them into balls. Place them on a parchment-lined tray.
- Chill: Refrigerate the truffles for about 30 minutes to firm up.
- Dust with Cinnamon: Once chilled, sprinkle a little cinnamon on top for a festive touch.
- Serve: Enjoy your truffles right away or store them in an airtight container in the fridge for later.
Layered Berry And Coconut Parfaits
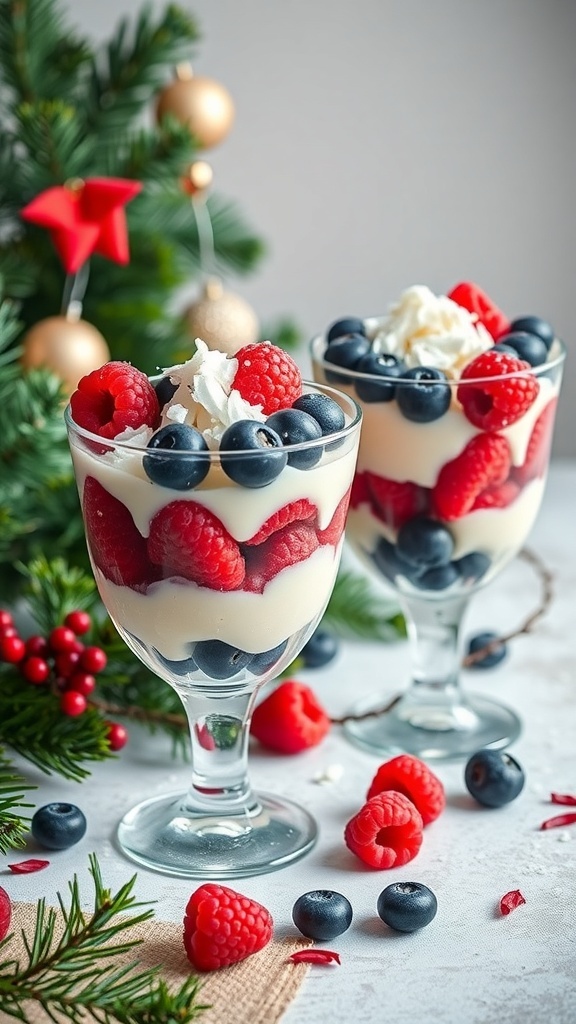
Layered Berry and Coconut Parfaits are a delightful treat for the holiday season. These parfaits are not only visually appealing but also bursting with flavor. The combination of fresh berries and creamy coconut layers creates a refreshing dessert that everyone will love.
In the image, you can see beautiful glasses filled with vibrant layers of raspberries, blueberries, and a creamy coconut mixture. Topped with a dollop of whipped cream and a sprinkle of coconut, they are perfect for festive gatherings. The colors of the berries add a cheerful touch, making them a great addition to your holiday table.
This dessert is easy to make and can be prepared in advance, allowing you to enjoy more time with family and friends. Each spoonful offers a mix of sweetness and tartness, making it a satisfying end to any meal.
Ingredients
- 2 cups coconut yogurt
- 1 cup fresh raspberries
- 1 cup fresh blueberries
- 1/4 cup shredded coconut
- 2 tablespoons maple syrup (optional)
- Whipped coconut cream for topping
Instructions
- In a bowl, mix the coconut yogurt with maple syrup if you prefer a sweeter taste.
- In serving glasses, layer the yogurt mixture, followed by a layer of raspberries, then blueberries.
- Repeat the layers until the glasses are filled, finishing with a layer of yogurt on top.
- Sprinkle shredded coconut over the top and add a dollop of whipped coconut cream.
- Chill in the refrigerator for at least 30 minutes before serving to allow the flavors to meld.
Sweet Potato And Marshmallow Tart

The Sweet Potato and Marshmallow Tart is a delightful treat that captures the spirit of the holidays. Its vibrant orange filling is made from creamy sweet potatoes, giving it a rich flavor that pairs perfectly with the toasted marshmallows on top. The tart sits beautifully on a festive table, surrounded by holiday decorations and a warm fire in the background, creating a cozy atmosphere.
This dessert is not just visually appealing; it’s also simple to make. The combination of sweet potatoes and marshmallows brings a nostalgic taste that everyone loves. It’s a great way to impress your guests while keeping things plant-based and delicious.
Ingredients
- 2 cups sweet potatoes, cooked and mashed
- 1 cup coconut milk
- 1/2 cup maple syrup
- 1 teaspoon vanilla extract
- 1 teaspoon cinnamon
- 1/2 teaspoon nutmeg
- 1/4 teaspoon salt
- 1 pre-made vegan pie crust
- 1 cup mini marshmallows
Instructions
- Preheat your oven to 350°F (175°C).
- In a large bowl, mix the mashed sweet potatoes, coconut milk, maple syrup, vanilla extract, cinnamon, nutmeg, and salt until smooth.
- Pour the sweet potato mixture into the pre-made vegan pie crust, spreading it evenly.
- Bake in the preheated oven for about 30 minutes, or until the filling is set.
- Remove the tart from the oven and top with mini marshmallows.
- Return to the oven and broil for 1-2 minutes until the marshmallows are golden brown. Keep a close eye to avoid burning.
- Let it cool slightly before serving. Enjoy your festive dessert!
Mint Chocolate Chip Ice Cream

Mint chocolate chip ice cream is a festive treat that brings a refreshing twist to your holiday dessert table. This delightful dessert is not only easy to make but also a crowd-pleaser. The vibrant green color and the rich chocolate chips make it a perfect addition to your Christmas celebrations.
In the image, you can see a bowl filled with creamy mint chocolate chip ice cream, topped with mini chocolate chips. The bowl is decorated with cheerful holiday designs, and candy canes are playfully placed beside it. The warm, cozy background with Christmas decorations adds to the festive spirit, making this dessert even more inviting.
This ice cream is a great way to enjoy a classic flavor while sticking to a plant-based diet. It’s creamy, minty, and oh-so-delicious! Let’s get started on making this delightful dessert.
Ingredients
- 2 ripe bananas, sliced and frozen
- 1 cup coconut milk (canned or carton)
- 1/2 teaspoon peppermint extract
- 1/4 cup fresh mint leaves, packed
- 1/4 cup dark chocolate chips or chopped dark chocolate
- Optional: Sweetener to taste (like honey or maple syrup)
Instructions
- Blend the Base: In a blender or food processor, combine the frozen bananas, coconut milk, peppermint extract, and fresh mint leaves. Blend until smooth and creamy.
- Taste and Adjust: Taste the mixture and add sweetener if desired, blending again to combine.
- Add Chocolate: Stir in the dark chocolate chips or chopped chocolate by hand.
- Freeze: Transfer the mixture to an airtight container and freeze for at least 2-3 hours until firm.
- Serve: Scoop the ice cream into bowls and enjoy! Let it sit for a few minutes at room temperature if it's too hard to scoop.
Lemon Coconut Snowballs
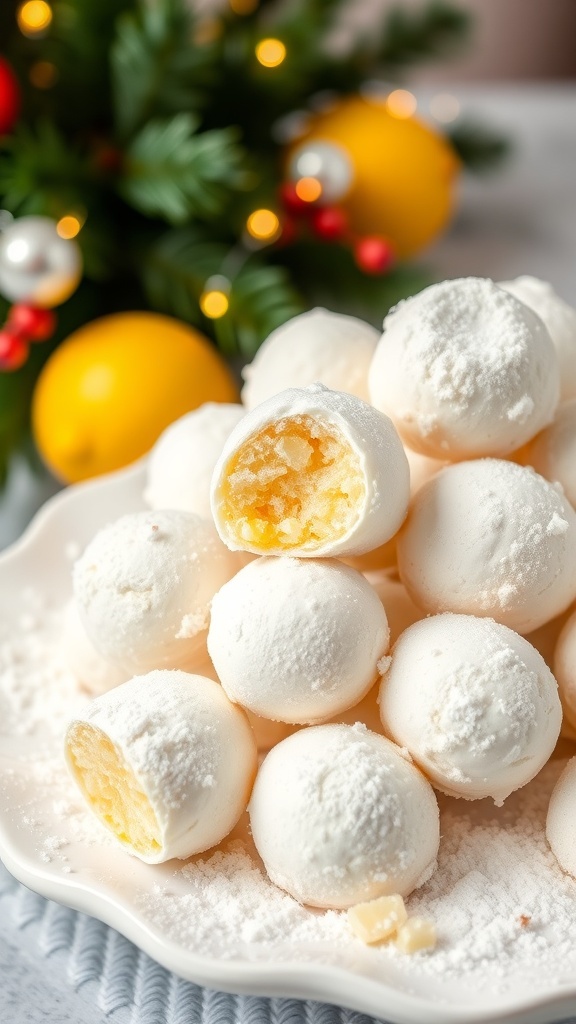
Lemon Coconut Snowballs are a delightful treat that perfectly capture the spirit of the holidays. These little bites are coated in a fluffy layer of coconut, making them look like snowy ornaments on your dessert table. The bright yellow center adds a cheerful pop of color, reminiscent of sunny lemon groves. They’re not just pretty; they’re also packed with flavor!
These snowballs are super easy to make, making them a great addition to your holiday dessert lineup. With just a few simple ingredients, you can whip up a batch that will impress your family and friends. Plus, they’re plant-based, so everyone can enjoy them!
Ingredients
- 1 cup shredded coconut
- 1/2 cup almond flour
- 1/4 cup maple syrup
- 1/4 cup lemon juice
- 1 teaspoon vanilla extract
- 1/4 teaspoon salt
- Powdered sugar for dusting
Instructions
- Mix Ingredients: In a bowl, combine shredded coconut, almond flour, maple syrup, lemon juice, vanilla extract, and salt. Stir until everything is well mixed.
- Form Balls: Take small portions of the mixture and roll them into balls, about the size of a tablespoon.
- Chill: Place the balls on a baking sheet lined with parchment paper and refrigerate for at least 30 minutes to firm up.
- Coat with Powdered Sugar: Once chilled, roll the snowballs in powdered sugar until they are fully coated.
- Serve: Arrange the snowballs on a festive plate and enjoy your delicious holiday treat!
Apple Cinnamon Oatmeal Cookies
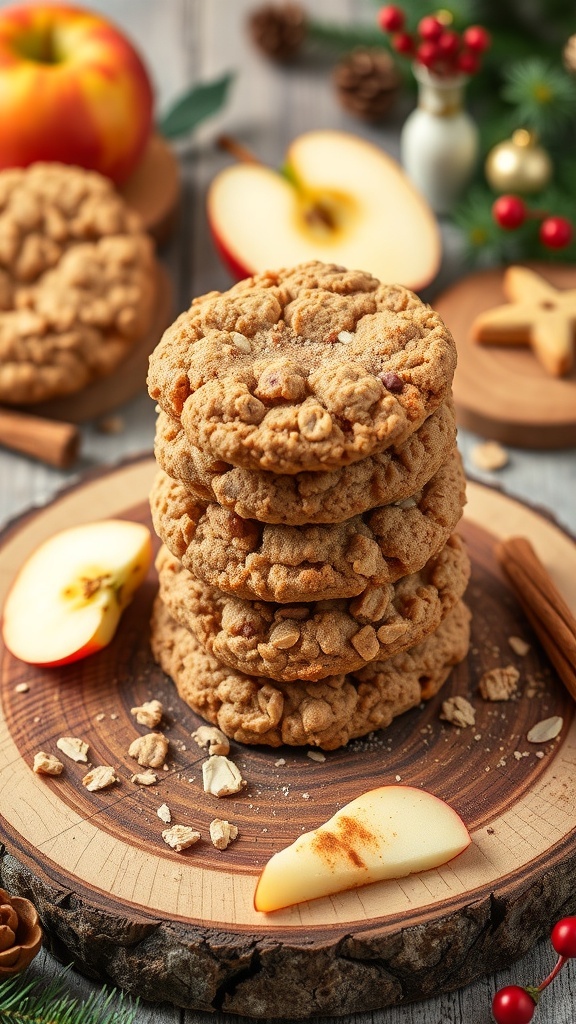
These Apple Cinnamon Oatmeal Cookies are a delightful treat for the holiday season. The image shows a stack of golden-brown cookies, perfectly baked and ready to be enjoyed. Surrounding the cookies are fresh apples and cinnamon sticks, adding to the festive feel. The warm colors and rustic presentation make these cookies look inviting and delicious.
Making these cookies is simple and fun. You get to enjoy the sweet aroma of apples and cinnamon filling your kitchen. They’re perfect for sharing with friends and family or enjoying with a warm cup of tea.
Ingredients
- 1 cup rolled oats
- 1 cup all-purpose flour
- 1/2 cup brown sugar, packed
- 1/2 cup coconut oil, melted
- 1/4 cup maple syrup
- 1 teaspoon vanilla extract
- 1 teaspoon baking soda
- 1 teaspoon ground cinnamon
- 1/2 teaspoon salt
- 1 cup diced apples (peeled and cored)
- 1/2 cup chopped walnuts (optional)
Instructions
- Preheat your oven to 350°F (175°C) and line a baking sheet with parchment paper.
- In a large bowl, combine the rolled oats, flour, brown sugar, baking soda, cinnamon, and salt.
- In another bowl, mix the melted coconut oil, maple syrup, and vanilla extract until well combined.
- Pour the wet ingredients into the dry ingredients and stir until just combined. Gently fold in the diced apples and walnuts if using.
- Drop spoonfuls of the dough onto the prepared baking sheet, spacing them about 2 inches apart.
- Bake for 12-15 minutes or until the edges are golden brown. Let them cool on the baking sheet for a few minutes before transferring to a wire rack.
Chocolate Hazelnut Spread Cookies
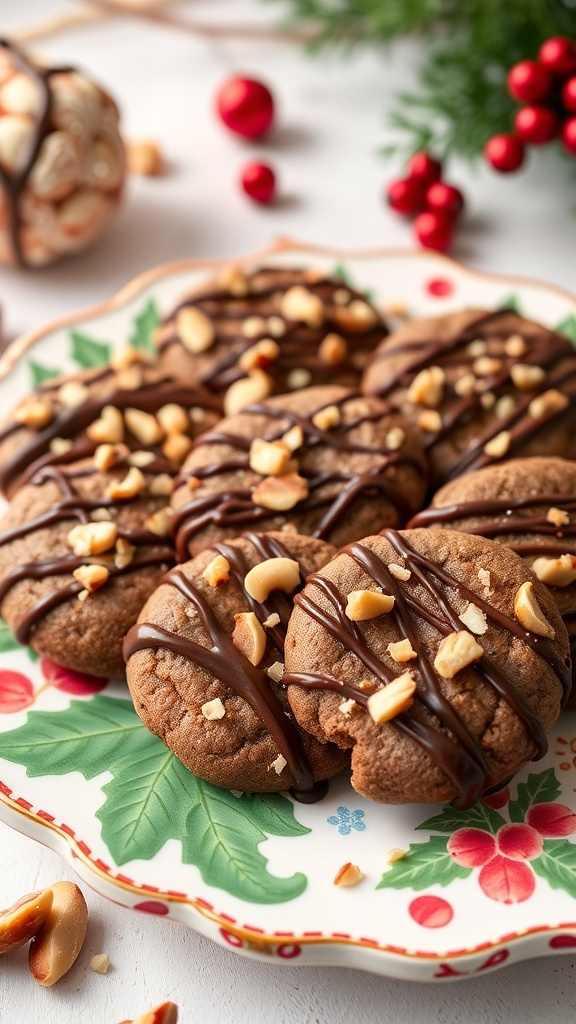
These Chocolate Hazelnut Spread Cookies are a delightful treat for the holiday season. The image shows a plate filled with beautifully baked cookies, drizzled with rich chocolate and topped with crunchy hazelnuts. They look inviting and perfect for sharing with family and friends.
Making these cookies is simple and fun. You can enjoy the process of mixing the ingredients and watching them transform into delicious bites. The combination of chocolate and hazelnut spread gives these cookies a unique flavor that everyone will love.
Let’s get started with the recipe!
Ingredients
- 1 cup all-purpose flour
- 1/2 cup cocoa powder
- 1/2 teaspoon baking soda
- 1/4 teaspoon salt
- 1/2 cup coconut oil, melted
- 1/2 cup brown sugar
- 1/4 cup granulated sugar
- 1/2 cup chocolate hazelnut spread
- 1 teaspoon vanilla extract
- 1/4 cup chopped hazelnuts (for topping)
- 1/4 cup melted chocolate (for drizzling)
Instructions
- Preheat your oven to 350°F (175°C) and line a baking sheet with parchment paper.
- In a bowl, mix together the flour, cocoa powder, baking soda, and salt.
- In another bowl, combine melted coconut oil, brown sugar, and granulated sugar. Stir until well combined.
- Add the chocolate hazelnut spread and vanilla extract to the sugar mixture. Mix until smooth.
- Gradually add the dry ingredients to the wet mixture. Stir until a dough forms.
- Using a spoon, scoop out dough and form small balls. Place them on the prepared baking sheet, leaving space between each cookie.
- Bake for 10-12 minutes. Let them cool for a few minutes on the baking sheet before transferring to a wire rack.
- Once cooled, drizzle melted chocolate over the cookies and sprinkle with chopped hazelnuts.
Enjoy these delicious cookies with a cup of tea or coffee. They make a great addition to any holiday dessert table!
Peanut Butter Blossoms With A Vegan Twist

Peanut Butter Blossoms are a classic holiday treat, and they get a delightful vegan makeover in this recipe. These cookies are soft, chewy, and topped with a rich chocolate kiss, making them a favorite among many. The image shows these adorable cookies, perfectly shaped and ready to be enjoyed.
Using simple ingredients, you can whip up these cookies in no time. The combination of peanut butter and chocolate is always a winner. Plus, they’re perfect for sharing at holiday gatherings or enjoying with a cup of hot cocoa.
Let’s get into the ingredients and steps to create these delicious Peanut Butter Blossoms with a vegan twist!
Ingredients
- 1 cup natural peanut butter
- 1 cup brown sugar
- 1/4 cup almond milk (or any plant-based milk)
- 1 teaspoon vanilla extract
- 1 cup all-purpose flour
- 1 teaspoon baking soda
- 1/4 teaspoon salt
- 1 cup dairy-free chocolate kisses
Instructions
- Preheat your oven to 350°F (175°C) and line a baking sheet with parchment paper.
- In a large bowl, mix together the peanut butter, brown sugar, almond milk, and vanilla extract until smooth.
- In another bowl, whisk together the flour, baking soda, and salt. Gradually add this dry mixture to the wet ingredients, stirring until combined.
- Roll the dough into small balls and place them on the prepared baking sheet, spacing them about 2 inches apart.
- Bake for 8-10 minutes, or until the edges are lightly golden. Remove from the oven and immediately press a chocolate kiss into the center of each cookie.
- Let the cookies cool on the baking sheet for a few minutes before transferring them to a wire rack to cool completely.
Cranberry Orange Bread Pudding
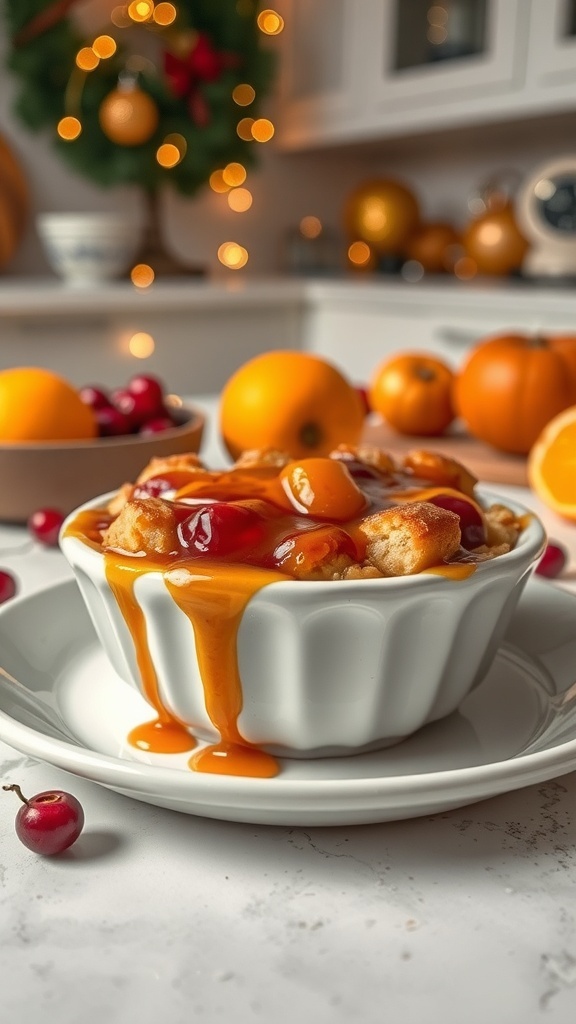
Cranberry Orange Bread Pudding is a delightful treat that captures the essence of the holiday season. The image showcases a warm, inviting bowl of bread pudding topped with a luscious orange sauce, surrounded by fresh cranberries and vibrant oranges. The festive decorations in the background add to the cozy atmosphere, making it perfect for Christmas gatherings.
This dessert combines the tartness of cranberries with the bright flavor of oranges, creating a wonderful balance. It’s easy to make and can be served warm or at room temperature, making it a versatile option for any holiday table.
To make this delicious dessert, you’ll need some basic ingredients that you might already have at home. Let’s get started!
Ingredients
- 4 cups cubed bread (day-old works best)
- 2 cups almond milk (or any plant-based milk)
- 1/2 cup granulated sugar
- 1/4 cup orange juice
- 1 tablespoon orange zest
- 1 teaspoon vanilla extract
- 1 teaspoon ground cinnamon
- 1 cup fresh cranberries
- 1/4 cup maple syrup (for drizzling)
Instructions
- Preheat your oven to 350°F (175°C). Grease a baking dish.
- In a large bowl, combine the cubed bread, almond milk, sugar, orange juice, orange zest, vanilla extract, and cinnamon. Mix well until the bread is soaked.
- Fold in the fresh cranberries gently.
- Pour the mixture into the greased baking dish and spread it evenly.
- Bake for 30-35 minutes, or until the top is golden and the pudding is set.
- Let it cool slightly before serving. Drizzle with maple syrup for an extra touch of sweetness.


Comments
Post a Comment