14 Budget-Friendly Thanksgiving Desserts That Look Expensive
14 Budget-Friendly Thanksgiving Desserts That Look Expensive
Thanksgiving desserts don’t have to break the bank to impress your guests. With a little creativity and some simple ingredients, you can whip up stunning treats that look fancy but are easy on your wallet. Get ready for some budget-friendly recipes that will make your holiday table shine without draining your pockets!
Whimsical Treats: Mini Apple Crumble Jars
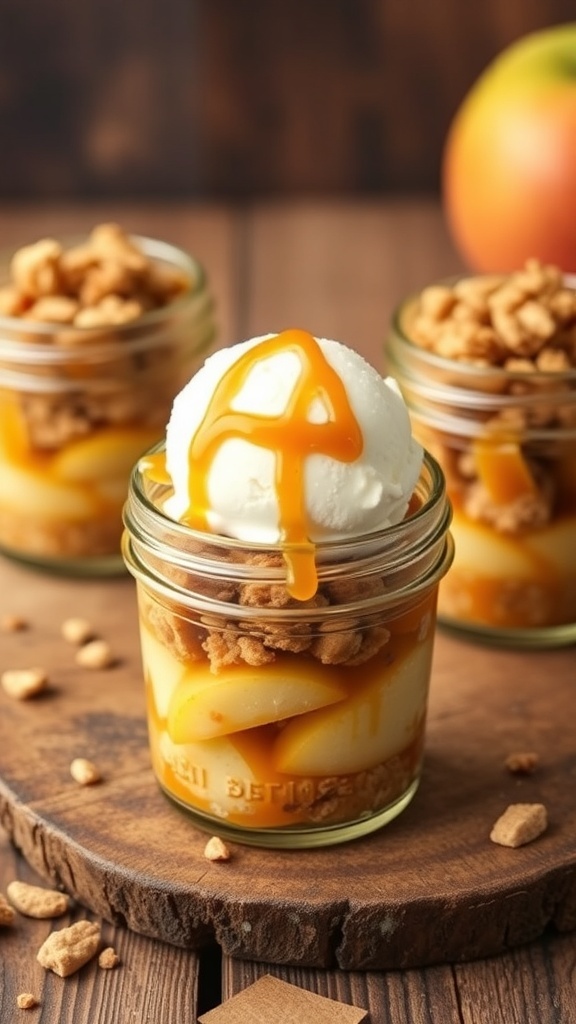
Mini apple crumble jars are a delightful way to serve dessert this Thanksgiving. They look fancy but are easy to make and budget-friendly. Each jar is filled with layers of tender apples, a crumbly topping, and a scoop of ice cream. The presentation in jars adds a fun twist, making them perfect for any gathering.
Start with fresh apples, sliced and tossed with a bit of sugar and cinnamon. Layer these in the bottom of small jars. Next, prepare a simple crumble topping using oats, flour, brown sugar, and butter. Sprinkle this over the apples for that classic crumble texture. Top it all off with a scoop of vanilla ice cream and a drizzle of caramel sauce for a sweet finish.
These mini treats not only taste amazing but also bring a touch of charm to your Thanksgiving table. They’re easy to grab and enjoy, making them a hit with guests of all ages!
Ingredients
- 4 medium apples, peeled and sliced
- 1/4 cup granulated sugar
- 1 teaspoon ground cinnamon
- 1 cup rolled oats
- 1/2 cup all-purpose flour
- 1/2 cup brown sugar, packed
- 1/4 cup unsalted butter, melted
- Vanilla ice cream
- Caramel sauce for drizzling
Instructions
- Preheat your oven to 350°F (175°C).
- In a bowl, mix the sliced apples with granulated sugar and cinnamon. Divide the mixture among small jars.
- In another bowl, combine oats, flour, brown sugar, and melted butter. Mix until crumbly.
- Sprinkle the crumble topping over the apples in each jar.
- Bake in the preheated oven for about 20-25 minutes, or until the apples are tender and the topping is golden brown.
- Let cool slightly, then top with a scoop of vanilla ice cream and drizzle with caramel sauce before serving.
A Twist On Tradition: Maple Pecan Tart

The Maple Pecan Tart is a delightful twist on the classic pecan pie. This dessert combines the rich flavors of maple syrup and toasted pecans, creating a sweet and nutty experience that feels luxurious without breaking the bank. The tart's golden crust cradles a gooey filling that’s both comforting and festive, making it a perfect addition to your Thanksgiving table.
Visually, this tart is stunning. The glossy top, adorned with perfectly arranged pecans, catches the eye and invites you to take a slice. The warm autumn colors of the tart contrast beautifully with the vibrant fall leaves in the background, setting a cozy, seasonal mood.
Making this dessert is easier than it looks! You’ll impress your guests with its elegant appearance and delicious taste. Plus, it’s budget-friendly, so you can enjoy a fancy dessert without the hefty price tag.
Ingredients
- 1 pre-made tart shell
- 1 cup maple syrup
- 1/2 cup brown sugar
- 1/4 cup unsalted butter, melted
- 3 large eggs
- 1 teaspoon vanilla extract
- 1/4 teaspoon salt
- 1 1/2 cups pecans, toasted
Instructions
- Preheat your oven to 350°F (175°C).
- In a large bowl, whisk together the maple syrup, brown sugar, melted butter, eggs, vanilla extract, and salt until smooth.
- Stir in the toasted pecans, ensuring they are evenly coated with the mixture.
- Pour the filling into the pre-made tart shell, spreading the pecans evenly.
- Bake for 35-40 minutes, or until the filling is set and the top is golden brown.
- Let the tart cool before slicing. Serve with whipped cream or vanilla ice cream for an extra treat!
No-Bake Bliss: Chocolate Raspberry Torte
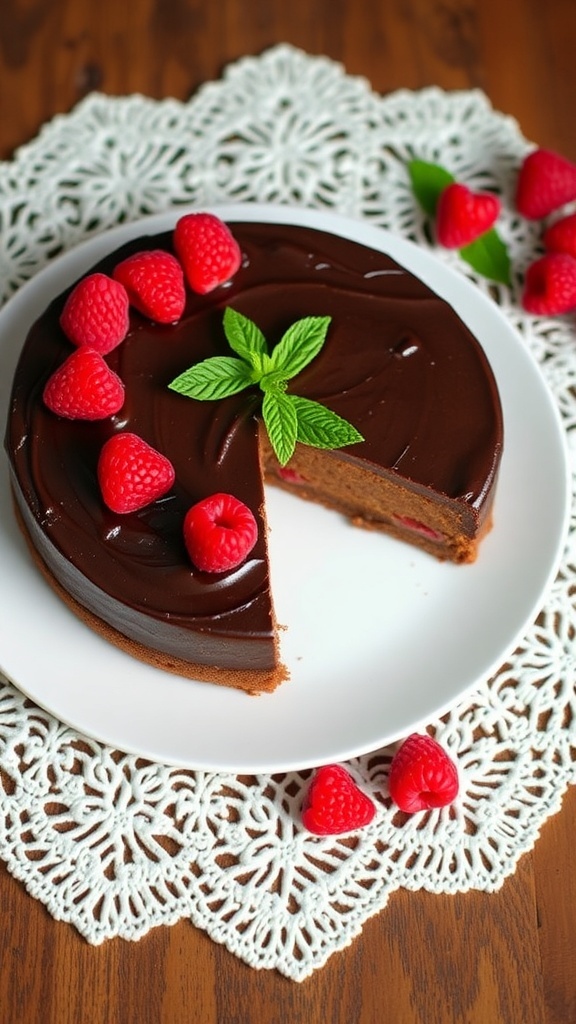
Picture this: a rich chocolate torte topped with fresh raspberries and a glossy chocolate ganache. This no-bake dessert is not only easy to make but also looks stunning on any Thanksgiving table. The combination of chocolate and raspberry is a classic that never fails to impress.
The beauty of this torte lies in its simplicity. You can whip it up without turning on the oven, making it a perfect choice for busy holiday preparations. The layers of chocolate and the tartness of the raspberries create a delightful balance that everyone will love.
To make this dessert even more appealing, serve it on a decorative plate or a lace doily. The contrast of the dark chocolate against the bright red raspberries makes for a beautiful presentation.
Ingredients
- 1 1/2 cups chocolate cookie crumbs
- 1/2 cup unsalted butter, melted
- 2 cups heavy cream
- 8 ounces cream cheese, softened
- 1 cup powdered sugar
- 1 teaspoon vanilla extract
- 8 ounces dark chocolate, chopped
- 1 cup fresh raspberries
- Fresh mint leaves for garnish
Instructions
- Prepare the Crust: In a bowl, mix the chocolate cookie crumbs and melted butter until combined. Press the mixture into the bottom of a springform pan to form a crust.
- Make the Filling: In a saucepan, heat 1 cup of heavy cream until it starts to simmer. Remove from heat and add the chopped dark chocolate. Stir until smooth. Let it cool slightly.
- In a separate bowl, beat the cream cheese, powdered sugar, and vanilla until smooth. Gradually add the cooled chocolate mixture and mix until well combined.
- Whip the remaining heavy cream until stiff peaks form. Gently fold the whipped cream into the chocolate mixture until fully incorporated.
- Layer the Torte: Pour the chocolate filling over the crust in the springform pan. Smooth the top and refrigerate for at least 4 hours or until set.
- Serve: Once set, remove the torte from the pan. Top with fresh raspberries and garnish with mint leaves. Slice and enjoy!
Creamy Comfort: Sweet Potato Cheesecake

Sweet potato cheesecake is a delightful twist on traditional desserts, offering a creamy texture and a rich flavor that feels luxurious without breaking the bank. The vibrant orange hue of the cheesecake, topped with whipped cream and pecans, makes it visually appealing and perfect for Thanksgiving gatherings.
This dessert combines the comforting taste of sweet potatoes with the smoothness of cream cheese, creating a dessert that’s both familiar and unique. The crust, often made from graham crackers, adds a nice crunch that complements the creamy filling.
To make this cheesecake, you’ll need simple ingredients that you might already have in your pantry. It’s an easy recipe that can impress your guests and leave them asking for seconds!
Ingredients
- 1 ½ cups graham cracker crumbs
- ½ cup unsalted butter, melted
- 2 cups cooked sweet potatoes, mashed
- 16 oz cream cheese, softened
- 1 cup granulated sugar
- ½ cup brown sugar
- 3 large eggs
- 1 teaspoon vanilla extract
- 1 teaspoon ground cinnamon
- ½ teaspoon ground nutmeg
- ¼ teaspoon salt
Instructions
- Prepare the Crust: Preheat your oven to 350°F (175°C). In a bowl, mix graham cracker crumbs with melted butter. Press this mixture into the bottom of a 9-inch springform pan.
- Bake the Crust: Bake the crust for about 10 minutes, then remove from the oven and let it cool.
- Make the Filling: In a large bowl, beat the cream cheese until smooth. Add the granulated sugar and brown sugar, mixing until well combined. Then, add the mashed sweet potatoes, eggs, vanilla, cinnamon, nutmeg, and salt. Mix until everything is smooth and creamy.
- Pour the Filling: Pour the sweet potato mixture over the cooled crust, spreading it evenly.
- Bake the Cheesecake: Bake for 50-60 minutes, or until the center is set but still slightly jiggly. Turn off the oven and let the cheesecake cool inside for about an hour.
- Chill: Once cooled, refrigerate the cheesecake for at least 4 hours, preferably overnight.
- Serve: Top with whipped cream and pecans before serving for an extra touch of elegance.
Rich And Creamy: Pumpkin Cheesecake Bars
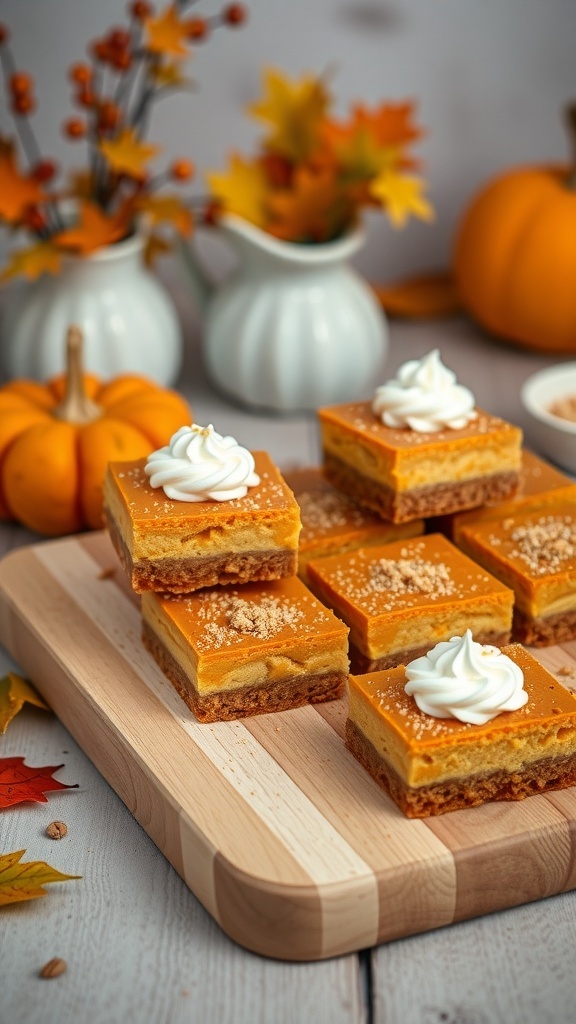
These pumpkin cheesecake bars are the perfect blend of rich and creamy flavors, making them a standout dessert for Thanksgiving. The layers of smooth pumpkin filling and creamy cheesecake sit atop a deliciously spiced graham cracker crust. They not only taste amazing but also look impressive on any dessert table.
The vibrant orange hue of the pumpkin filling is complemented by a dollop of whipped cream on top, adding a touch of elegance. With a sprinkle of graham cracker crumbs, these bars are sure to catch the eye of your guests. Plus, they are budget-friendly, allowing you to serve a luxurious dessert without breaking the bank.
Making these bars is simple and fun. You’ll need basic ingredients that you likely already have in your pantry. Gather your friends or family to help out, and enjoy the process of creating something delicious together!
Ingredients
- 1 ½ cups graham cracker crumbs
- ½ cup unsalted butter, melted
- ¼ cup granulated sugar
- 2 (8 oz) packages cream cheese, softened
- 1 cup canned pumpkin puree
- ¾ cup granulated sugar
- 3 large eggs
- 1 teaspoon vanilla extract
- 1 teaspoon ground cinnamon
- ½ teaspoon ground nutmeg
- ½ teaspoon salt
- Whipped cream for topping
Instructions
- Preheat your oven to 350°F (175°C). Grease a 9x13 inch baking dish.
- In a medium bowl, mix graham cracker crumbs, melted butter, and ¼ cup sugar until well combined. Press this mixture into the bottom of the prepared baking dish to form the crust.
- In a large bowl, beat the cream cheese until smooth. Add pumpkin puree, ¾ cup sugar, eggs, vanilla, cinnamon, nutmeg, and salt. Mix until everything is well combined and creamy.
- Pour the pumpkin cheesecake mixture over the crust in the baking dish. Smooth the top with a spatula.
- Bake for 30-35 minutes, or until the center is set. Let it cool completely before cutting into bars.
- Top each bar with a dollop of whipped cream and a sprinkle of graham cracker crumbs before serving.
Classic Comfort: Caramel Apple Galette
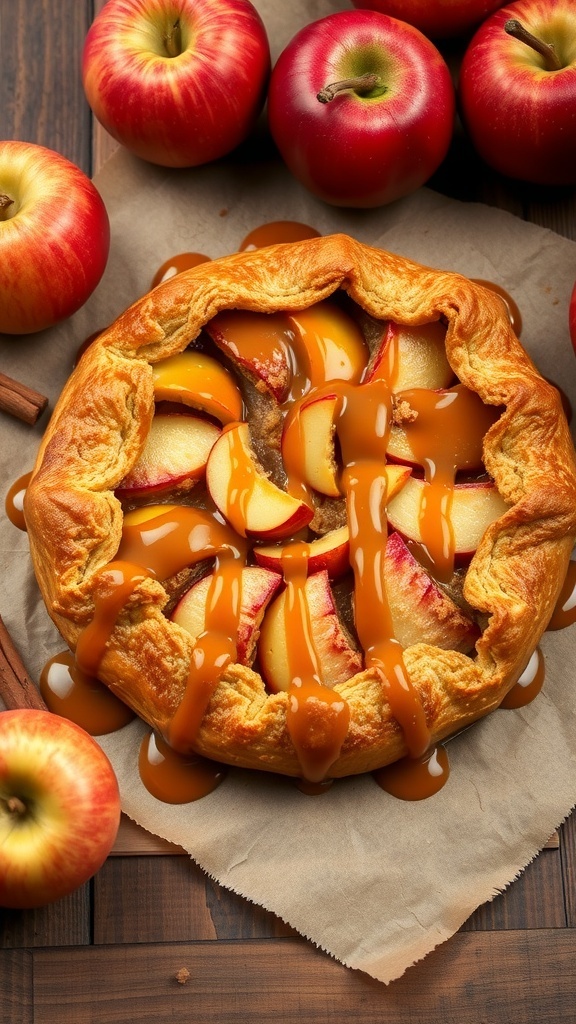
When it comes to Thanksgiving desserts, the Caramel Apple Galette is a true classic. This rustic tart combines the sweetness of apples with the rich flavor of caramel, all wrapped in a flaky pastry crust. It looks impressive but is surprisingly easy to make, making it perfect for any holiday gathering.
The galette is filled with sliced apples, often mixed with a hint of cinnamon and sugar, which enhances their natural sweetness. The caramel drizzle on top adds a touch of luxury, making it look like a dessert from a fancy bakery. Plus, the casual, free-form shape of a galette means you don’t have to worry about perfecting a pie crust.
Serving this dessert warm, perhaps with a scoop of vanilla ice cream, will surely impress your guests. It’s a delightful way to celebrate the flavors of fall while keeping your budget in check.
Ingredients
- 1 pre-made pie crust
- 4 medium apples, peeled and sliced
- 1/4 cup granulated sugar
- 1 teaspoon ground cinnamon
- 2 tablespoons all-purpose flour
- 1 tablespoon lemon juice
- 1/4 cup caramel sauce
- 1 egg, beaten (for egg wash)
- 1 tablespoon butter, cut into small pieces
Instructions
- Preheat your oven to 375°F (190°C).
- In a large bowl, combine the sliced apples, sugar, cinnamon, flour, and lemon juice. Toss until the apples are well coated.
- Roll out the pie crust on a baking sheet lined with parchment paper. Leave a 2-inch border around the edges.
- Place the apple mixture in the center of the crust, leaving the border clear. Fold the edges of the crust over the apples, pleating as you go.
- Brush the crust with the beaten egg and sprinkle the butter pieces on top of the apples.
- Bake for 30-35 minutes, or until the crust is golden brown and the apples are tender.
- Once out of the oven, drizzle with caramel sauce before serving. Enjoy warm!
Festive Flavors: Gingerbread Trifle
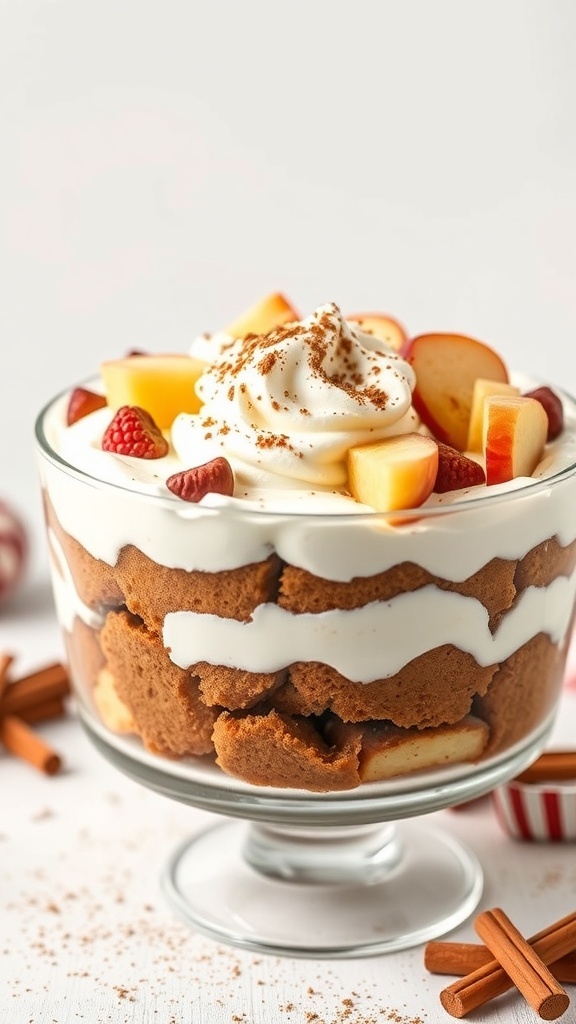
The Gingerbread Trifle is a delightful dessert that captures the spirit of Thanksgiving. Layers of soft gingerbread cake, creamy whipped topping, and fresh fruits create a beautiful presentation. This dessert not only looks fancy but is also budget-friendly, making it perfect for your holiday gathering.
Imagine serving this stunning trifle at your Thanksgiving table. The warm spices of gingerbread combined with the lightness of whipped cream and the freshness of fruits will impress your guests. Plus, it’s easy to make ahead of time, allowing you to enjoy the festivities without stress.
Ingredients
- 1 box gingerbread cake mix
- 1 cup heavy cream
- 1/2 cup powdered sugar
- 1 teaspoon vanilla extract
- 2 cups mixed fruits (like apples, raspberries, and pears)
- Cinnamon for garnish
Instructions
- Prepare the Gingerbread: Bake the gingerbread cake according to the package instructions. Let it cool completely.
- Make the Whipped Cream: In a mixing bowl, beat the heavy cream, powdered sugar, and vanilla extract until soft peaks form.
- Assemble the Trifle: Cut the cooled gingerbread into cubes. In a trifle dish, layer the gingerbread cubes, whipped cream, and mixed fruits. Repeat the layers until all ingredients are used, finishing with whipped cream on top.
- Garnish: Sprinkle cinnamon over the top for a festive touch.
- Chill: Refrigerate for at least 2 hours before serving to let the flavors meld.
A Delightful Treat: Pear And Almond Tart

The Pear and Almond Tart is a stunning dessert that brings a touch of elegance to your Thanksgiving table without breaking the bank. This tart features a buttery crust filled with a creamy almond frangipane and topped with fresh, juicy pear slices. The combination of flavors is delightful, making it a perfect end to your holiday meal.
What makes this tart so appealing is not just its taste, but also its beautiful presentation. The pear slices are arranged in a lovely pattern, and the almonds add a nice crunch. Dusting it with powdered sugar gives it that extra flair, making it look like a dessert from a fancy bakery.
Making this tart is simpler than it appears. With just a few ingredients and some straightforward steps, you can create a dessert that looks and tastes gourmet. It’s a great way to impress your guests while keeping your budget in check.
Ingredients
- 1 pre-made tart shell
- 3 ripe pears, thinly sliced
- 1 cup almond flour
- 1/2 cup granulated sugar
- 1/4 cup unsalted butter, softened
- 2 large eggs
- 1 teaspoon vanilla extract
- 1/4 teaspoon almond extract
- 1/4 cup sliced almonds
- Powdered sugar for dusting
Instructions
- Preheat the oven to 350°F (175°C).
- In a bowl, cream together the softened butter and granulated sugar until light and fluffy.
- Add the eggs, vanilla extract, and almond extract, mixing well.
- Stir in the almond flour until combined.
- Spread the almond mixture evenly in the tart shell.
- Arrange the pear slices on top of the almond filling in a circular pattern.
- Sprinkle sliced almonds over the pears.
- Bake for 30-35 minutes, or until the tart is golden and set.
- Let it cool slightly, then dust with powdered sugar before serving.
Charming Bites: Pumpkin Pie Bites

These pumpkin pie bites are the perfect blend of charm and flavor. They look fancy but are super easy to make, making them a great addition to your Thanksgiving spread. Each bite-sized treat is filled with creamy pumpkin filling and topped with a dollop of whipped cream. They’re sure to impress your guests without breaking the bank!
To create these delightful bites, you’ll need a few simple ingredients. The mini pie crusts are easy to find at the store, or you can whip up your own if you’re feeling adventurous. The pumpkin filling is made with canned pumpkin, sugar, and spices, giving it that classic fall flavor.
These bites not only taste great but also add a festive touch to your table. Serve them on a beautiful platter, and watch as they disappear in no time!
Ingredients
- 1 package of mini pie crusts (or homemade)
- 1 can (15 oz) pumpkin puree
- 3/4 cup granulated sugar
- 1 teaspoon ground cinnamon
- 1/2 teaspoon ground ginger
- 1/4 teaspoon ground nutmeg
- 1/4 teaspoon salt
- 2 large eggs
- 1 cup whipped cream (for topping)
Instructions
- Preheat your oven to 350°F (175°C).
- In a mixing bowl, combine the pumpkin puree, sugar, cinnamon, ginger, nutmeg, salt, and eggs. Mix until smooth.
- Place the mini pie crusts in a muffin tin. Fill each crust with the pumpkin mixture, about 3/4 full.
- Bake for 20-25 minutes, or until the filling is set. Let them cool completely.
- Before serving, top each bite with a dollop of whipped cream.
Classic Elegance: Chocolate Chip Cookie Pie

Chocolate chip cookie pie is a delightful twist on a classic favorite. This dessert combines the warm, gooey goodness of chocolate chip cookies with the elegance of a pie. It's perfect for Thanksgiving, offering a comforting yet sophisticated option for your dessert table.
The image showcases a beautifully baked chocolate chip cookie pie, topped with a generous scoop of vanilla ice cream. The pie crust is golden brown, with chocolate chips peeking through, making it look as good as it tastes. Surrounding the pie are autumn leaves and a small pumpkin, adding a festive touch that captures the essence of the season.
This dessert is not only visually appealing but also budget-friendly. With simple ingredients, you can create a dish that impresses your guests without breaking the bank. Let’s dive into how you can make this delicious chocolate chip cookie pie!
Ingredients
- 1 pre-made pie crust
- 1 cup brown sugar
- 1/2 cup granulated sugar
- 1 cup unsalted butter, softened
- 2 large eggs
- 2 teaspoons vanilla extract
- 2 cups all-purpose flour
- 1 teaspoon baking soda
- 1/2 teaspoon salt
- 2 cups chocolate chips
Instructions
- Preheat your oven to 350°F (175°C).
- In a large bowl, cream together the softened butter, brown sugar, and granulated sugar until smooth.
- Add the eggs and vanilla extract, mixing well.
- In another bowl, whisk together the flour, baking soda, and salt. Gradually add this mixture to the wet ingredients, stirring until combined.
- Fold in the chocolate chips.
- Pour the cookie dough into the pre-made pie crust, spreading it evenly.
- Bake for 30-35 minutes, or until the edges are golden brown and the center is set.
- Allow to cool slightly before serving. Top with a scoop of vanilla ice cream for an extra treat!
Simple Yet Sophisticated: Lemon Meringue Tart
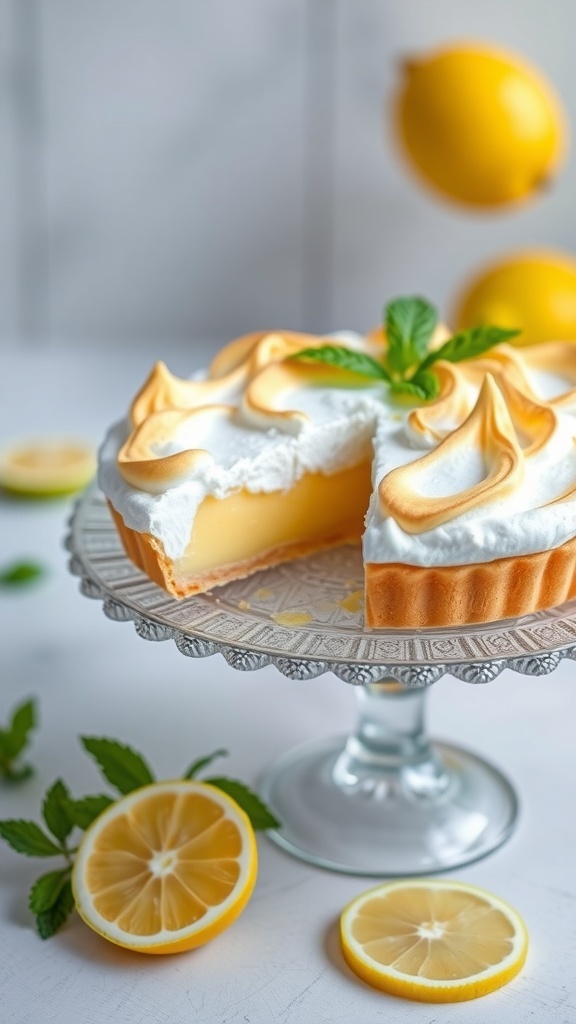
The Lemon Meringue Tart is a stunning dessert that brings a touch of sophistication to any Thanksgiving table. With its bright yellow filling and fluffy meringue topping, it looks impressive but is surprisingly easy to make. The tart crust provides a perfect balance to the zesty lemon filling, while the meringue adds a light and airy finish.
This dessert is not just about looks; it’s packed with flavor. The tartness of the lemon contrasts beautifully with the sweetness of the meringue, making each bite a delightful experience. Plus, it’s budget-friendly, using simple ingredients that won’t break the bank.
To make this Lemon Meringue Tart, you’ll need a few key ingredients. The crust is made from basic pantry staples, while the filling requires fresh lemons for that vibrant flavor. The meringue is whipped to perfection, creating those lovely peaks that you see in the image.
Ingredients
- 1 pre-made tart shell
- 1 cup granulated sugar
- 1/4 cup cornstarch
- 1/4 teaspoon salt
- 1 1/2 cups water
- 3 large egg yolks
- 1/4 cup fresh lemon juice
- 1 tablespoon lemon zest
- 2 tablespoons unsalted butter
- 3 large egg whites
- 1/4 teaspoon cream of tartar
- 1/2 cup granulated sugar (for meringue)
Instructions
- Prepare the Filling: In a saucepan, whisk together sugar, cornstarch, and salt. Gradually stir in water and cook over medium heat, stirring constantly until thickened. Remove from heat.
- Add Egg Yolks: In a separate bowl, whisk egg yolks. Slowly add a small amount of the hot mixture to the yolks to temper them, then return everything to the saucepan. Stir in lemon juice, lemon zest, and butter. Cook for another minute until combined.
- Fill the Tart Shell: Pour the lemon filling into the pre-made tart shell, smoothing the top with a spatula.
- Make the Meringue: In a clean bowl, beat egg whites and cream of tartar until soft peaks form. Gradually add sugar and continue beating until stiff peaks form.
- Top the Tart: Spread the meringue over the lemon filling, making sure to seal the edges. Create peaks with a spatula for a decorative touch.
- Bake: Bake in a preheated oven at 350°F (175°C) for about 10-15 minutes until the meringue is golden brown. Let cool before serving.
A Crunchy Delight: Chocolate Hazelnut Tart
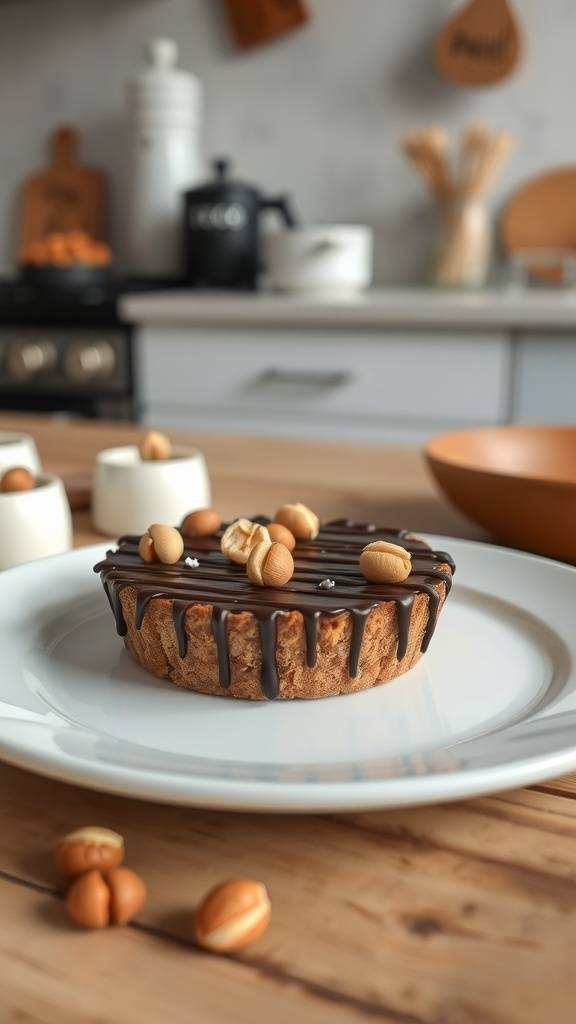
This Chocolate Hazelnut Tart is a showstopper that won't break the bank. With its rich chocolate flavor and crunchy hazelnut topping, it looks fancy but is surprisingly easy to make. The tart has a beautiful, glossy chocolate glaze that catches the eye, making it perfect for your Thanksgiving table.
The combination of chocolate and hazelnuts creates a delightful taste that everyone will love. It’s a great way to impress your guests without spending too much time or money. Plus, the ingredients are simple and can be found at your local grocery store.
To make this tart, you’ll need a few basic ingredients. The crust is made from crushed cookies and butter, while the filling is a mix of chocolate, cream, and hazelnuts. The final touch is a drizzle of chocolate on top, making it look even more appealing.
Ingredients
- 1 1/2 cups crushed chocolate cookies
- 1/2 cup unsalted butter, melted
- 1 cup heavy cream
- 8 ounces semi-sweet chocolate, chopped
- 1/2 cup hazelnuts, chopped
- 1/4 cup powdered sugar
- 1/2 teaspoon vanilla extract
- Extra chocolate for drizzling
Instructions
- Prepare the Crust: In a bowl, mix the crushed cookies with melted butter. Press the mixture into the bottom of a tart pan. Chill in the fridge for about 30 minutes.
- Make the Filling: In a saucepan, heat the heavy cream until it just starts to simmer. Remove from heat and add the chopped chocolate. Stir until smooth. Add the powdered sugar and vanilla extract, mixing well.
- Add Hazelnuts: Stir in the chopped hazelnuts into the chocolate mixture.
- Fill the Tart: Pour the chocolate filling into the chilled crust. Smooth the top and refrigerate for at least 2 hours until set.
- Finish with Chocolate Drizzle: Melt some extra chocolate and drizzle it over the tart before serving. Garnish with whole hazelnuts if desired.
Light And Fluffy: Coconut Cream Pie
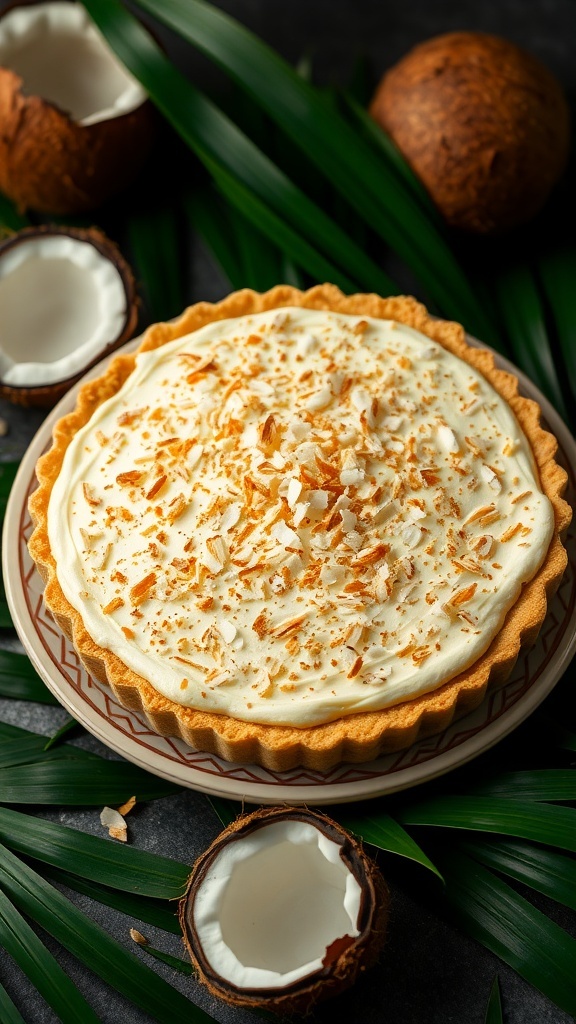
Coconut cream pie is a classic dessert that brings a taste of tropical paradise to your Thanksgiving table. Its light and fluffy texture makes it a delightful end to any meal. The creamy coconut filling sits atop a crisp, buttery crust, creating a perfect balance of flavors and textures.
In the image, you can see a beautifully crafted coconut cream pie, topped with a generous layer of whipped cream and sprinkled with toasted coconut flakes. The pie’s golden crust and creamy filling make it look like a fancy dessert, but it’s surprisingly easy to make at home.
This dessert is not only budget-friendly but also a showstopper that will impress your guests. With just a few simple ingredients, you can whip up this delightful treat that tastes as good as it looks.
Ingredients
- 1 pre-made pie crust
- 1 cup coconut milk
- 1 cup whole milk
- 3/4 cup granulated sugar
- 1/4 cup cornstarch
- 1/4 teaspoon salt
- 3 large egg yolks
- 2 tablespoons unsalted butter
- 1 teaspoon vanilla extract
- 1 cup shredded coconut (sweetened or unsweetened)
- 1 cup heavy cream
- 2 tablespoons powdered sugar
- Toasted coconut flakes for topping
Instructions
- Preheat the oven to 350°F (175°C). Bake the pie crust according to package instructions until golden brown. Let it cool.
- In a saucepan, combine coconut milk, whole milk, sugar, cornstarch, and salt. Whisk until smooth and cook over medium heat, stirring constantly until the mixture thickens.
- In a separate bowl, whisk the egg yolks. Gradually add a small amount of the hot milk mixture to the yolks, stirring constantly to temper them. Then, pour the yolk mixture back into the saucepan.
- Continue to cook for another 2-3 minutes, then remove from heat. Stir in butter, vanilla extract, and shredded coconut.
- Pour the coconut filling into the cooled pie crust and refrigerate for at least 4 hours, or until set.
- Before serving, whip the heavy cream with powdered sugar until soft peaks form. Spread or pipe the whipped cream over the pie and sprinkle with toasted coconut flakes.
Sweet And Spicy: Chai-Spiced Pumpkin Cupcakes
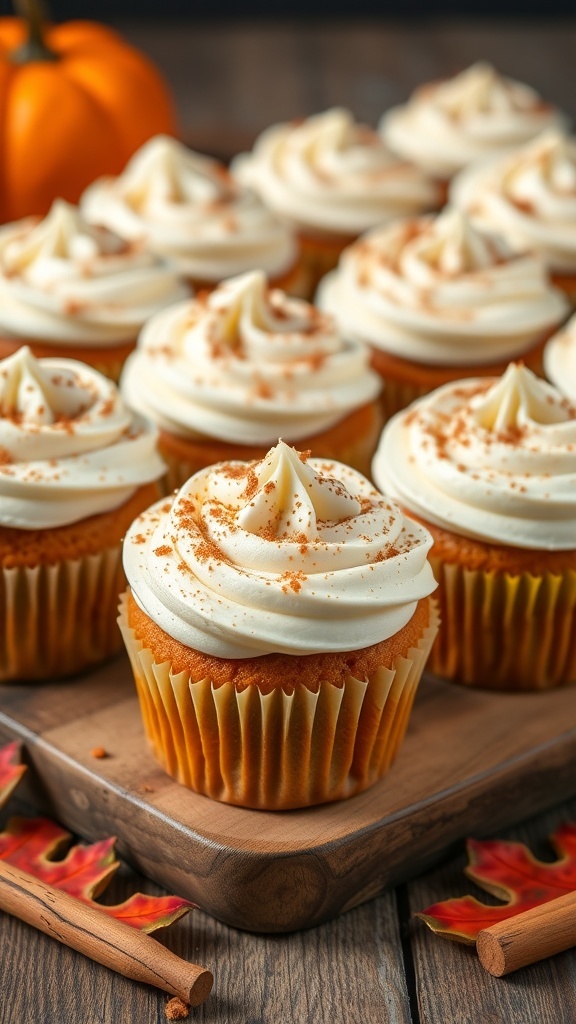
Chai-spiced pumpkin cupcakes are a delightful treat that perfectly capture the essence of fall. These cupcakes combine the warm flavors of chai spices with the rich taste of pumpkin, making them a cozy addition to your Thanksgiving dessert table. Topped with a smooth cream cheese frosting, they look as good as they taste!
The image showcases beautifully frosted cupcakes, each adorned with a sprinkle of cinnamon, inviting you to take a bite. The warm orange hue of the pumpkin cake contrasts nicely with the creamy white frosting, creating an appealing presentation. These cupcakes not only taste amazing but also add a festive touch to your holiday spread.
Making these cupcakes is simple and budget-friendly, allowing you to impress your guests without breaking the bank. With just a few ingredients, you can whip up a batch that looks and tastes like a gourmet dessert.
Ingredients
- 1 cup all-purpose flour
- 1/2 teaspoon baking powder
- 1/2 teaspoon baking soda
- 1/2 teaspoon salt
- 1 teaspoon ground cinnamon
- 1/2 teaspoon ground ginger
- 1/4 teaspoon ground nutmeg
- 1/4 teaspoon ground cloves
- 1/2 cup granulated sugar
- 1/2 cup brown sugar, packed
- 1/2 cup vegetable oil
- 2 large eggs
- 1 cup canned pumpkin puree
- 1 teaspoon vanilla extract
- 1 cup cream cheese, softened
- 2 cups powdered sugar
- 1 teaspoon vanilla extract (for frosting)
Instructions
- Preheat the oven to 350°F (175°C) and line a muffin tin with cupcake liners.
- In a bowl, whisk together flour, baking powder, baking soda, salt, cinnamon, ginger, nutmeg, and cloves.
- In another bowl, mix granulated sugar, brown sugar, and oil until combined. Add eggs, pumpkin puree, and vanilla extract, mixing well.
- Gradually add the dry ingredients to the wet ingredients, stirring until just combined.
- Fill each cupcake liner about two-thirds full with the batter. Bake for 18-20 minutes or until a toothpick comes out clean.
- Let the cupcakes cool completely before frosting.
- For the frosting, beat cream cheese, powdered sugar, and vanilla extract together until smooth. Frost the cooled cupcakes and sprinkle with cinnamon.


Comments
Post a Comment